Making dough using the Thermomix is one of the simplest and most enjoyable things to do. This is mainly because the effort is minimal in comparison to the delicious results.
You can let your imagination run wild to create any flavour, shape and texture that you like. In the past I have made chocolate banana bread, sourdough loaf, burger rolls and yeast free crackers.
My inspiration for this recipe comes from the lovely Miss Meagan. One of my gorgeous Thermomix team mates. She is not only an amazing Mum to two adorable boys, she is a (born again) fitness guru and fabulous buddy. She is also affectionately referred to (at least by me) in Thermomix circles as the “bread queen of Vic Park”. I’m so lucky to be surrounded by talented people that I can call my friends 🙂
This is something similar to a dish that she demonstrated at our last cooking class. I loved the idea so much that I played with it a little and made it my own.
Lunches are one of those things that are usually leftovers or something really quick to grab in the morning. So you can imagine G’s excitement when he discovered a pizza pocket in his lunch bag one day. Even better that it had a filling that he loved and there were more for the rest of the week. I think I was number one in the house that day 🙂
You could fill these with whatever you like. What have you used in the past and what is the next thing you’ll try. I’d love to hear your ideas, so please leave me a comment.
Pizza pockets (recipe adapted by Fiona at Food 4 Thought. Original recipe by Meagan Quantock)
makes 6 – 12 packets, depending on what size you want them to be.
dough
Ingredients
290g warm water
1 sachet or 2 teaspoons dried yeast
510g Bakers flour
2 teaspoons fine rock/sea salt
15 – 20g olive oil
additions
25g parmesan, chopped into 1.5cm cubes
50g tasty cheese, chopped into 1.5cm cubes
15g fresh spinach
20g sundried tomatoes
Preparation
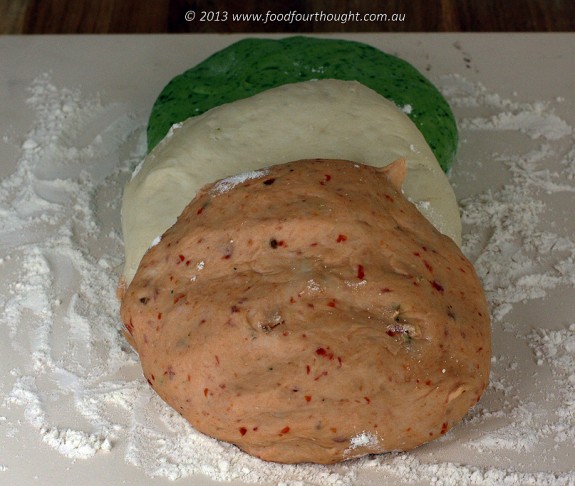
Place the parmesan and tasty cheese into the TM bowl and grate for 10 seconds on speed 8. Remove from bowl and set aside. Add all the ingredients for the dough into the TM bowl in the order they are listed. Turn the dial slowly from speed 1 to 6, then mix for a further 10 seconds on speed 6, until the dough is well combined. Set the dial to closed lid position, then knead the dough for 1 minute on interval. Remove dough from the bowl by tipping it upside down and gently shaking. Place the dough onto your Thermomat, then divide it into three equal portions (I used my TM scales to weigh each batch – I had 3 x 280g portions).
This is where you can add your variation.
For green, add spinach to TM bowl and chop for 5 seconds on speed 6. Scrape around the sides of the bowl and add one portion of the dough (I also added and good pinch of extra flour to prevent the dough from being sticky) and mix for 10 seconds on speed 6. Then set the dial to closed lid position, then knead the dough for 20 seconds on interval.
For red, add sundried tomatoes to TM bowl and chop for 5 seconds on speed 6. Scrape around the sides of the bowl and add one portion of the dough (I also added and good pinch of extra flour to prevent the dough from being sticky) and mix for 10 seconds on speed 6. Then set the dial to closed lid position, then knead the dough for 20 seconds on interval.
For white, leave the dough plain. Place each portion in separate bowl and cover with cling wrap. Set aside in a warm place for 20 – 30 minutes until they have doubled in size.
Once they have doubled in size it is time to roll them out.
Divide each colour of dough into 2 – 4 even portions (depending on the size you would like to end up with).
Roll each portion into whatever shape you like (my circles are never perfect – hence the “whatever shape”) until they are approximately ½ cm thick. I do mine long, like an oval shape.
Place your choice of filling (see below) into the middle of the dough and stretch it along the length leaving an even border around the whole edge. Be careful not to overfill them.
Gently tease the edges over the top of the filling and gently press them together. Sometimes a little water around the edge first will help. Make sure there are no holes.
Turn the pockets over so that the seam is at the bottom when baking.
I used tomato paste mixed with a little homemade tomato sauce for the base then sprinkled them with the grated cheese. Then the filling.
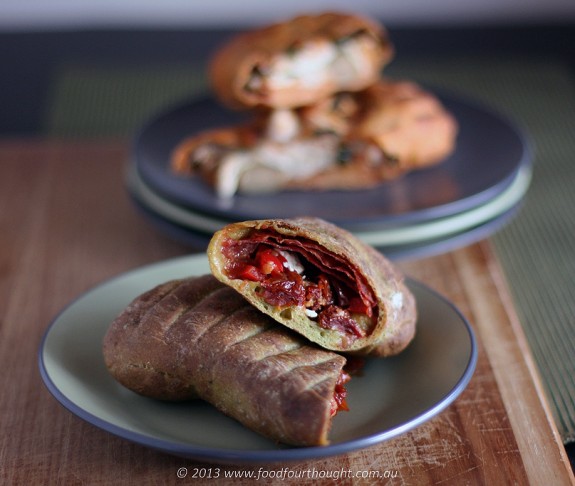
For green, I used sliced chilli salami, chopped red capsicum, chopped sundried tomatoes and a small amount of feta cheese.
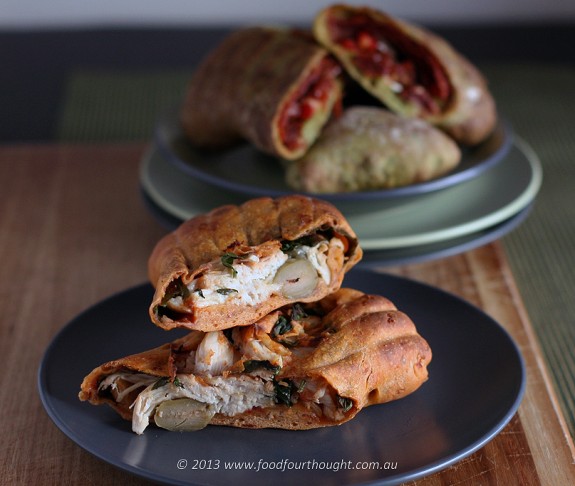
For red, I used some leftover cooked chicken, chilli and garlic green olives and spinach.
For white, I actually decided to make salami, anchovy and olive mini pizza.
You can do whatever you like.
Heat the oven to 200°C (190°C fan-forced). While the oven is coming up to temperature. Set the pizza pockets aside and let them rise again. Once the oven has reached the desired temperature, place the pizza pockets onto a baking tray lined with baking paper or onto a pizza stone and bake for 15 – 20 minutes until golden brown and crunchy. Cool on a wire rack, then serve hot or cold, or wrap and freeze until required.
My tips/alterations: *If you’d like to use these for lunches, you can freeze them, take them out on the day you want them and by lunchtime they are ready to eat. *Use these doughs for pizza, scrolls even as a flat bread base. *When you add ingredients to the dough you will have to adjust the flour, most likely you will need to add more. I usually like to watch through the hole in the lid to see if it looks like it is sticking to the blade. If it is I will add a pinch of flour then more until it comes away from the blade. *The Thermomat is a great product that makes life a lot easier to roll and rise the dough. *When you are rolling these up, try not to overlap the dough too much but make sure they are well tucked in so that they don’t come open while cooking.
ease: 7.5 – 8/10. Not too difficult, just a few steps.
prep time: 5 minutes for the dough plus rising time plus 15 minutes for the rolling and folding.
cooking time: 20 minutes.
total: 40 minutes + rising time.
taste: 7.5 -8/10. The score depends on whether they are fresh from the oven or not. Of course when freshly baked they have a great crunch but this is slightly lost in the lunchbox. However the flavour is still really good.
would I make it again: Yes. Anything that is a make ahead, tasty, freezeable, healthy lunch is a winner in my eyes.


Leave a Reply