A sample text widget
Etiam pulvinar consectetur dolor sed malesuada. Ut convallis
euismod dolor nec pretium. Nunc ut tristique massa.
Nam sodales mi vitae dolor ullamcorper et vulputate enim accumsan.
Morbi orci magna, tincidunt vitae molestie nec, molestie at mi. Nulla nulla lorem,
suscipit in posuere in, interdum non magna.
|
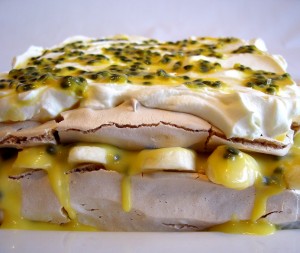 Being invited to a friends place for dinner is a special treat for me as not too many people will invite and willingly cook for a (self confessed) food junkie. However, our friend M is a wonderful cook in his own right and often provides me with recipes for his generous and delicious creations. I offered to make dessert because I had a couple of egg whites sitting in the fridge that I wanted to get rid of but couldn’t bear to throw out (I know, sad isn’t it). The first thing that I thought of making was a pavlova because it is easy and transports well but I had made one of those for the same dinner guests previously so decided against it. I really wanted to create a meringue layered with passionfruit curd because I also had purchased some lovely passionfruit during the week that were begging to be utilised. So being the stubborn Taurean that I am, that is exactly what I created. I must say, I was quite proud of this dish so I hope you enjoy it too. Being invited to a friends place for dinner is a special treat for me as not too many people will invite and willingly cook for a (self confessed) food junkie. However, our friend M is a wonderful cook in his own right and often provides me with recipes for his generous and delicious creations. I offered to make dessert because I had a couple of egg whites sitting in the fridge that I wanted to get rid of but couldn’t bear to throw out (I know, sad isn’t it). The first thing that I thought of making was a pavlova because it is easy and transports well but I had made one of those for the same dinner guests previously so decided against it. I really wanted to create a meringue layered with passionfruit curd because I also had purchased some lovely passionfruit during the week that were begging to be utilised. So being the stubborn Taurean that I am, that is exactly what I created. I must say, I was quite proud of this dish so I hope you enjoy it too.
meringue stack with passionfruit curd and banana (recipe adapted from Gourmet Traveller and Taste online)
serves 6 (my version)
My alterations: *I only used 4 egg whites and divided the remaining ingredients to suit. This mixture made two 14 x 20cm layers. *I used less castor sugar as I follow the rule of 50g of castor sugar for each egg white to make meringue. *I cooked the meringue at a slightly highter temperature than the recipe suggested by starting it on 150°C for 30 minutes then reducing it to 100°C for the final 30 minutes. This makes sure that the outside is nice and crisp and the inside a little soft and sticky. *I used two medium sized bananas to cover on layer. *I didn’t mix the curd into the cream as the recipe suggests. My layers from bottom to top were – meringue, banana, passionfruit curd, meringue, cream, fresh passionfruit. *I used the old fashion method of cooking the curd, in a pot on the stove. I feel I have more control over the result than if I use a microwave, although I am sure it would work well.
My tips: *I always add a pinch of salt to my egg whites when I beat them up, it helps them to hold their shape once they are whipped up. When mixing the sugar into the egg whites make sure that you do so slowly and beat the mixture until the sugar is completely dissolved. This will prevent the layers from “weeping” after they are cooked. *The easiest way to get the pulp from passionfruit is to squeeze it and roll it between your thumb and forefinger like you do with citrus. This also prevent scrapping the membrane out that encapsulates the seeds. *When making the curd you need to be careful that the eggs don’t curdle as it thickens. I found moving the pot on and off the heat while whisking or stirring did the trick. *You could prepare all of the ingredients and assemble this just before serving, that will ensure the meringue stays slightly crunchy.
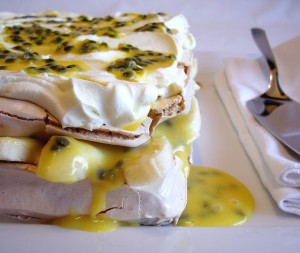 Meringue stack Meringue stack
ease: 10/10. This is simple meringue and the shapes don’t need to be perfect.
prep time: 20 mins + cooling and assembly.
cooking time: 60mins.
total: 1hour 20mins.
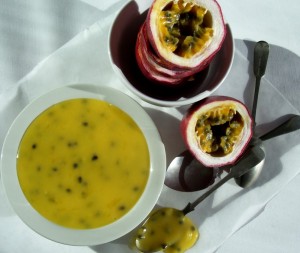 Passionfruit curd Passionfruit curd
ease: 8/10. I cooked this on the stove (see my alterations) and needed to be careful that it didn’t curdle.
prep time: 5 mins.
cooking time: 15mins.
total: 20mins.
taste: 10/10. Meringue stack with banana and passionfruit curd – Firstly, I have to say that I don’t like passionfruit. I made this because G & M both love it and I had some to use. The outcome was that we all loved it. The passionfruit curd was sweet while still tasting of the fruit itself. The meringue yielded slightly as we cut into it but everything held its shape very well. The flavours were well balanced and each seemed to contribute to the other tasting that much better and the textures melded together beautifully.
We had some left over and it was just as good the next day. The meringue had softened slightly but had not collapsed and the flavours were fabulous.
would I make it again: Absolutely – Especially to impress friends.
Meringue recipe – From Gourmet Traveller Online
Passionfruit Curd Recipe – From Taste Online
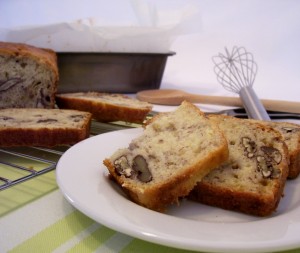 In our house, fresh fruit is something that we tend to eat more in the summer, although we still go through fads. One week we’ll eat quite a bit and others it just seems to sit around. The most common thing we seem to be left with at the end of the week is over ripe bananas. I recently found one great way to use them and now I think I have another. In our house, fresh fruit is something that we tend to eat more in the summer, although we still go through fads. One week we’ll eat quite a bit and others it just seems to sit around. The most common thing we seem to be left with at the end of the week is over ripe bananas. I recently found one great way to use them and now I think I have another.
In my mind, family recipes are often things to be treasured. They are sometimes the simplest creations that have a comforting familiar flavour, evoking memories of times gone by. This recipe was given to me by a dear friend, Gladys, many years ago. It reminds me of the kind of recipe that my Nanna used to make. It is the type of thing that she would whip up when the shearers were coming and needed to have morning tea to keep things flowing in the right direction for the rest of the day.
banana bread (recipe by Gladys – adapted by Fiona at Food 4 Thought)
makes one loaf
Ingredients
¼ cup melted butter, cooled
1 egg
1 ¾ cups self raising flour
¾ cup sugar
1 tsp baking powder
pinch of salt
3 medium size bananas, mashed
½ cup milk
1 handful of walnuts or pecan nuts (not in the original recipe, this is my addition)
Preparation
Preheat oven to 160°C. Line and grease a 21 x 11cm loaf pan (measured at the base).
Use a whisk to beat the cooled butter and egg together until well combined and smooth. Add the flour, sugar, baking powder and salt. Stir to distribute butter mixture throughout the dry ingredients. It will not combine completely. Add the banana, milk and nuts. Stir to combine. Do not over mix the batter as it may become tough.
Pour the mixture into a prepared tin and bake for 50 – 60 minutes, until a skewer inserted into the centre of the cake comes out clean.
Remove from the tin and allow to cool on a wire rack before slicing and serving with any accompaniments that you desire.
My tips: *Make sure the butter is cool before adding the egg, otherwise you will have scrambled eggs. *I know that baking is a science and that all things should be measured perfectly. However, this mixture is a little forgiving and therefore “a handful of nuts” is an acceptable amount. *I like to mash one banana then break the rest into small chunks. It gives the mixture a more interesting texture and seems to keep the cake a little moister.
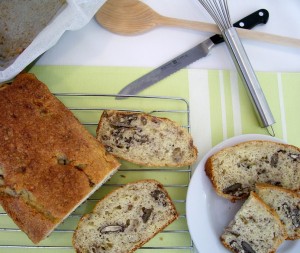 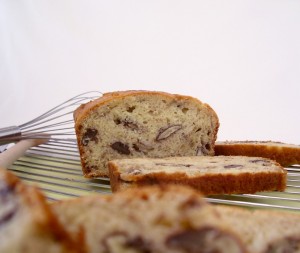
ease: 10/10. This is one of the quickest preparations in baking. Ask the kids to mash the banana, add the milk and even measure out the ingredients if you like.
prep time: 10mins.
cooking time: 50mins.
total: 60mins.
taste: 9/10. The flavours and texture evoke wonderful childhood memories of afternoon tea with my Nanna and Grandpa. Any dish that can do that deserves high praise in my book. Besides, it is really yummy.
would I make it again: Always – In fact, I would buy over ripe bananas so that I could.

Being a self confessed cooking and food addict does not mean that I am completely immune to those days when you just don’t know what to cook for dinner or simply, and possibly more honestly in my case, just can’t be bothered trying to create something delicious. Yes, it was one of those days! So what was I to do. G isn’t the kind of person who expects dinner on the table when he gets home. Don’t get me wrong, I know he loves eating good food but if I told him we were ordering take away he would be quite happy because it would be a bit of a treat for us. Not wanting to delve into the world of take away food, I racked my brain for something simple for me to cook using the ingredients I had in the pantry that tasted good and was something I hadn’t made for G before. Not a big ask at all really!!! Then I remembered something that I saw when I was making the bbq chicken casserole from my original recipe book. It met every requirement on my list. So without further ado, the winner is………
creamy chicken casserole (recipe by Fiona from Food 4 Thought)
serves 4
Ingredients
Olive oil, for shallow frying
750g skinless chicken breast fillets
1 onion, finely diced
3 rashers of bacon
2 cloves garlic, crushed
¼ cup medium/dry sherry
1 x 420g tin of cream of chicken soup
½ cup thick cream
salt and pepper, to taste
bread, for croutons
2 Tbls butter, melted
Preparation
Preheat oven to 180°C and place casserole dish or oven proof pan over a medium heat.
Pour 2 Tbsp of oil into pan, slice chicken fillets into 1cm thick slices. Add chicken pieces and cook until golden brown on both sides. Remove from pan and set aside. Add onion and cook until translucent and slightly golden, about 4 – 5 minutes. Remove the rind from the bacon and cut into 1cm cubes. Add to the pan along with the garlic and cook for further 3 – 4 minutes, stirring to avoid catching on case of the pan.
Deglaze the pan by adding the sherry and allowing it to come to the boil. Add chicken back to the pan along with all other ingredients except the bread. Mix well to combine. If there is not enough sauce add a little hot water.
Cut enough bread into 2cm cubes to cover the top of the dish. Brush bread with melted butter to assist browning. Bake in oven for 20 – 25 minutes or until sauce is bubbling at the sides and the bread is slightly golden and crisp.
My tips: *If you do not want to add the bread, serve this with pastry disks (like I did) or you can even use it as a sauce for some fresh pasta. *If the sauce appears a little dry you can add water or stock if you prefer. *Add any vegetables that you like to this dish. *Don’t try and use low fat cream as it can curdle when heat is applied. *My mum read this blog and told me that she used to also change the soup that she used and that would change the flavour completely. She gave me the example of cream of mushroom soup and adding fresh mushrooms. You can make this whatever you want to.

ease: 10/10. This is a quick and easy mid week meal. To make it even easier, buy a roast chicken on the way home from work and use the meat in place of the chicken fillets. There is no need to cook the chicken, just add it to the sauce before topping the dish with the bread.
prep time: 15mins.
cooking time: 20mins.
total: 35mins.
taste: 9/10. This dish has a complexity that it almost doesn’t deserve given the ease and limited time it takes to create. The sherry is the key in providing such depth. Both G and I devoured this in what seemed to be minutes.
would I make it again: In a heartbeat – I think this will become a regular addition to my winter repertoire, especially considering the diverse ways in which it can be served.
 Both G & I have a “thing” for something sweet after dinner. I know, not the best thing for the waistline but it is just one of those things that we can’t seem to deny ourselves. Usually whatever sweet little morsel we choose is accompanied by a good quality cup of coffee. Earlier this week G was hunting for that illusive treat to go with his cuppa but unfortunately a cookie monster had left our cupboard rather bare. Knowing that I had a little spare time today I decided to create something a little different. For some unknown reason we don’t tend to eat much shortbread. I think it is just that they tend to be so rich and buttery that they can become sickly if you have more than one. Both G & I have a “thing” for something sweet after dinner. I know, not the best thing for the waistline but it is just one of those things that we can’t seem to deny ourselves. Usually whatever sweet little morsel we choose is accompanied by a good quality cup of coffee. Earlier this week G was hunting for that illusive treat to go with his cuppa but unfortunately a cookie monster had left our cupboard rather bare. Knowing that I had a little spare time today I decided to create something a little different. For some unknown reason we don’t tend to eat much shortbread. I think it is just that they tend to be so rich and buttery that they can become sickly if you have more than one.
I decided to make these because they were a little different to my normal type of biscuit that I like to bake. Also, having one sweet treat after dinner (rather than several) is possibly not a bad thing.
alfajores – spanish shortbread
makes approximately 40
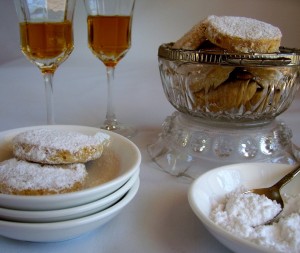 
My tips: *I didn’t have any aniseed so I decided to grind up some star anise, not exactly the same flavour but good enough for me as a first try. You could substitute cinnamon if you prefer of just have them with the lemon. *I used a floured board and cutter as I found this mixture a little soft and sticky when rolling it out and cutting shapes. I also rolled mine a little thinner than the 1cm thickness suggested in the recipe. *I needed to cook these for about 25 minutes to ensure they were cooked in the centre. I found this a little odd as my oven normally cooks slightly hot.
ease: 7/10. This mixture is very soft and can be difficult to roll out and cut, especially if the weather is a little warm.
prep time: 30mins + chilling, cooling and decorating.
cooking time: 25mins.
total: 2hours including chilling.
taste: 7/10. The texture was shorter than normal shortbread. The lemon and sherry worked well. I think they were better with a little more, rather than less icing sugar. G commented that initially he found them too short but they seemed better the day after they were made. At first he ate them on their own, the next day he had them with coffee and said they were much better. In fact these seemed to improve both in flavour and texture a few days after they were made.
would I make it again: Maybe – I like that these were a bit different but life is too short for biscuits that are a little difficult to make and not quite as delicious as others. If I wanted something different for friends I’d try them again.
Alfajores Recipe – Feature recipe from Gourmet Traveller online
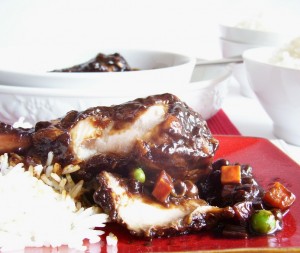 The weather has been a little cooler this week, staying in the high 20’s rather than being close to 40°C. This made me want to cook something warm & hearty rather than something that would go with salad which we tend to eat when the weather is warm. I found an entry written in my original recipe book that I created when I first moved out of home. I remembered it being a delicious, slightly spicy dish that was very easy to make. Given that I had purchased some lovely free range chicken thighs earlier in the day this seemed like the perfect thing for dinner. The weather has been a little cooler this week, staying in the high 20’s rather than being close to 40°C. This made me want to cook something warm & hearty rather than something that would go with salad which we tend to eat when the weather is warm. I found an entry written in my original recipe book that I created when I first moved out of home. I remembered it being a delicious, slightly spicy dish that was very easy to make. Given that I had purchased some lovely free range chicken thighs earlier in the day this seemed like the perfect thing for dinner.
bbq chicken casserole (recipe by Fiona from Food 4 Thought)
serves 4
Ingredients
Olive oil, for frying
1 kilo chicken pieces (I used skinless, free range)
1 onion, finely diced
1 1/2 cups tomato sauce
2 Tbsp bbq sauce
1/2 cup soy sauce
1 tsp mustard powder
1/4 tsp cayenne pepper, or to taste
2 cloves garlic, crushed
2 Tbsp brown sugar
Preparation
Preheat oven to 180°C and place casserole dish over a medium heat.
Pour 2 Tbsp of oil into dish, add chicken pieces and cook until golden brown on all sides. Do not cook completely. Remove from pan and set aside. Add onion and cook until translucent and slightly golden, about 4 – 5 minutes.
Add chicken back to the pan along with all other ingredients. Mix well to combine. Seal dish with a lid and place in the oven for 40 – 50 minutes, or until the chicken is beginning to fall off the bone.
Remove from the oven and allow to rest for 15 minutes or so. Serve with steamed rice or mashed potato.
My tips: *I try to use a low sodium tomato sauce, however, if you prefer you could use the same quantity of tomato passata with a couple of tablespoons of tomato paste added to it. *Use light soy sauce if you prefer a milder flavour. *Using skinless chicken pieces reduces the fat content of this dish.
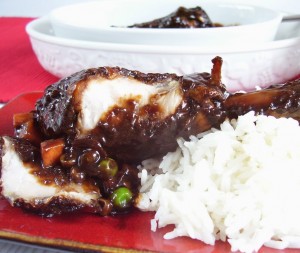 ease: 10/10. This is one of those things that you can throw in the oven when you get home and if you cut down on the cayenne even the kids might eat it. ease: 10/10. This is one of those things that you can throw in the oven when you get home and if you cut down on the cayenne even the kids might eat it.
prep time: 25mins.
cooking time: 50mins.
total: 1hour 15mins.
taste: 8/10. The evening I cooked this we had a friend for dinner unexpectedly. We all loved this meal for a mid week kind of thing. It was a different kind of comfort food. The only reason we didn’t score this higher was because it didn’t have a complexity to it that other dishes can have. As far as mid week comfort food is concerned I would rate it a 10!
would I make it again: Yes – For a quick, easy, mid week meal and for unexpected guests 🙂
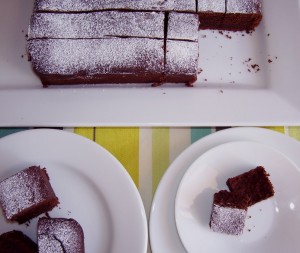
Coming home from being out of town is always a wonderful feeling. Not that I don’t love going away, I just adore the comforts of home and especially being with G. I usually try to leave a few pre-prepared dinners for him when I am away so that he doesn’t have to worry about cooking too much. He is a great cook but sometimes time can be a little limited. So when I return I like to assess what has been used, what needs to be used and what may need to go to food heaven. One of the things that I discovered in the fridge this time was a tub of yoghurt that I had made before I left. It was still ok but needed to be used. I decided to make some tandoori chicken for dinner last night (which was delicious) so that used about half of what I had. Today I wanted to make something sweet. I trawled the internet to find something suitable and discovered many yoghurt cake recipes, most of which had the inclusion of lemon. I wished I had a spare lemon but alas, the cupboard was bare. After much surfing I found this little gem, and given that it would use up all of the yoghurt that I had left, it was the winner.
fudgey valentine yogurt cake
makes 22cm square cake 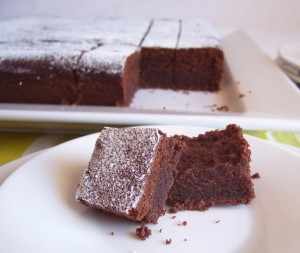 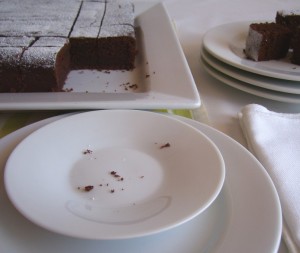
My tips: *If you don’t overcook this cake it will come out with a soft, almost brownie like consistency. *I lined the tin with greaseproof paper to make removal from the pan easier. *Use the best cocoa that you can afford, it makes an immense difference. *I didn’t decorate these because they were delicious on their own. *I would cut them into larger squares and add a dollop of cream or some good quality vanilla ice-cream if I was serving it as a dessert.
ease: 9/10. If you can bake a cake you can do this.
prep time: 20 mins + cooling and decorating.
cooking time: 35mins.
total: 1hour 10mins including cooling and decorating.
taste: 9/10. I cut these into bite size pieces which was a dangerous thing to do. When you eat one piece you think it is a tiny bite so you can afford to have another, then another. I consumed, or should I say inhaled, six (or was it eight) within the first 30 minutes of them being out of the oven. I would say they were a cross between a brownie and chocolate cake. You will notice the density when mixing the ingredients then once you add the yoghurt an unexpected lightness is created. This is definitely what gave this cake its brownie like texture.
The remainder were sent to G’s office (as they needed to be removed from the house – for my own sake) and critiqued by many discerning tasters. The general consensus was that the texture was better than that of a normal brownie and the flavour was a great balance of chocolate and sweetness without being too rich. The storage container came home completely empty which is always a good sign.
would I make it again: Absolutely – I love the fact that I didn’t have to use melted chocolate to achieve a smooth, slightly dense, crumbly texture and rich chocolate flavour. I also can’t think of a better way to use up yoghurt!
Fudgey Valentine Yogurt Cake Recipe
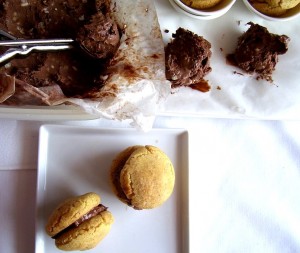 It was Valentine’s Day yesterday and while neither G or I buy into the commercialism of the day we do like to spend some time together and relax. The one thing I do like about a day that celebrates love is that it reminds us all how important our loved ones are in our lives. I fell in love with my amazing man the week after our first date and am very grateful for the wonderful relationship that we have. I often find that cooking involves “marriages made in heaven”, things that just work when they are put together. Truffles and eggs, tomatoes and basil, even ham and mustard. Baci is one of G’s favourite consumable items in the world and while I don’t really like many liquers I would walk over hot coals for some Frangelico on ice with a wedge of lime. Put those two together and you have something that I consider fail safe. However, I wanted to confirm my plan with G and also have a back up in case my thoughts weren’t on target, so I choose a seasonal fruit, plums. It was Valentine’s Day yesterday and while neither G or I buy into the commercialism of the day we do like to spend some time together and relax. The one thing I do like about a day that celebrates love is that it reminds us all how important our loved ones are in our lives. I fell in love with my amazing man the week after our first date and am very grateful for the wonderful relationship that we have. I often find that cooking involves “marriages made in heaven”, things that just work when they are put together. Truffles and eggs, tomatoes and basil, even ham and mustard. Baci is one of G’s favourite consumable items in the world and while I don’t really like many liquers I would walk over hot coals for some Frangelico on ice with a wedge of lime. Put those two together and you have something that I consider fail safe. However, I wanted to confirm my plan with G and also have a back up in case my thoughts weren’t on target, so I choose a seasonal fruit, plums.
When I gave G the option of Baci Semifreddo or Plum Ripple Semifreddo the choice was very simple and obvious. We are off to Aunty J’s tomorrow night for dinner and I asked if I could contribute by bringing along something for dessert. That meant I had to choose something that I could make ahead, would travel well and I could do the final assembly after dinner. I had some egg yolks left over from some meringue I made over the weekend so to me that simply meant “make ice cream”. Normally I would make a traditional vanilla or some other fruit that needed to be used but today I wanted something with a point of difference, something that would make people say “Yum”. What better way to do that than with an ice-cream flavoured with chocolate, nuts and alcohol.
I have to tell you that I am not a big fan of Baci chocolates nor of ice-cream. In fact, the only thing I like about ice cream is the slighty gooey edge that is created when it softens in the container. When I made this recipe I was unsure why I needed to line the container and to be honest I don’t think it is necessary unless you want to turn it out and serve it in slices. However, this did give me a excellent excuse to allow the semifreddo to soften slightly, creating that gooey edge. This is such a delicious mix that I turned it out, removed the baking paper and promptly stood in front of the kitchen sink devouring every ounce of chocolatey covering that the paper had. When I had finished I went to the bathroom to find my chin completely covered with evidence of my gluttony. I smiled to myself and fondly remembered those moments of my childhood where sneaking ice-cream from the edge of the container gave me such pleasure.
 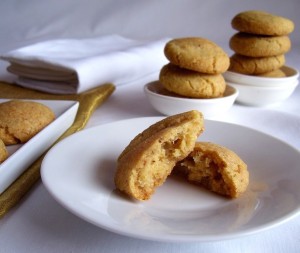
My tips: For the Semifreddo – *The temptation is to add more alcohol for that “extra kick” but do be careful as it can potentially seize the mixture when you add the chocolate. *When adding the ingredients together make sure that you work quickly as the mixture can begins to stiffen. When adding the first quantity of cream you may need to beat it in a little to loosen the mixture, then fold the remaining cream in gently and it will keep its volume. *Remove the semifreddo from the fridge at least 10 minutes before you want to serve it. For the Ladies’ Kisses – *Make sure that you add a good pinch of salt because it brings out the flavours and balances the sweetness. *If you do not have a food processer just place the hazlenuts into a tea towel of strong plastic bag and crush them with a rolling pin or other heavy object. *Make sure that you only use a teaspoon of the mixture when rolling them as this will effect the desired outcome of your biscuits, especially if you want to join them together. The smaller they are the flatter they become when they are cooked, the larger size will just rise up but won’t flatten much.
Baci Semifreddo
ease: 8/10. This wasn’t difficult, you just need to have all of the components ready before you start.
prep time: 30 mins.
cooking time: 5mins.
total: 35mins.
taste: 9/10. I couldn’t resist testing the semifreddo after about 4 hours in the freezer and it was like a chilled, dense, chocolate mousse. I had to force myself to put it back in the freezer overnight. Once the mixture had set completely it was removed from the freezer. Let me just say that if you like Baci chocolate you will love this dessert because it tastes exactly the same; rich, dark chocolate and hazlenuts, mmmm. I took off half a point because it was slightly too rich for me.
would I make it again: Absolutely – I think this is an easy and delicious dessert that would satisfy any chocolate lover and non Baci lovers alike.
Baci di dama (Ladies’ Kisses) Biscuits
ease: 9/10. Very simple.
prep time: 30 mins.
cooking time: 30mins.
total: 60mins.
taste: 9/10. These are delicious. They have everything that I imagine a ladies kiss to have, firm to begin with yielding to a softness that seems familiar. These biscuits have an almost macaroon like texture with that lovely soft centre. The nuts and orange work really well together.
would I make it again: Definitely – Either as a bisuits to have with coffee or to use as an addition to the semifreddo.
We decided to serve these in a glass with the option of Frangelico in the bottom and biscuits to be crushed over the top or eaten along with the semifreddo. The other option is to serve it with orange segments. My favourite option was to make them into ice cream sanwiches, so instead of holding them together with a ganache like filling using the semifreddo.
The Frangelico in the bottom of the glass with crushed biscuits went down a treat and the flavours balanced each other well. So I guess this is one of those things that “just works”. I hope your Valentine’s Day was exactly that.
Baci Semifreddo Recipe – From Gourmet Traveller, January 2010
Ladies’ Kisses Biscuit Recipe – From Gourmet Traveller, Online
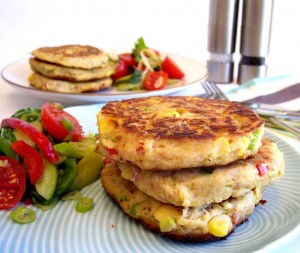 Having left over mashed potato could be considered a blessing in our house because there is always something to do with it. One of my favourites and the easiest thing I know to do is make tuna patties. They succeed on may levels. They are quick and easy to prepare, a good source of protein and a great way to get kids to eat tuna and vegetables. I made this recipe up as I went along and just used what I had in the cupboard and the fridge. I like to serve these as a light lunch accompanied by a crunchy salad but you could easily wrap them in a pita bread with lettuce, cheese and maybe a little sweet chilli sauce. Having left over mashed potato could be considered a blessing in our house because there is always something to do with it. One of my favourites and the easiest thing I know to do is make tuna patties. They succeed on may levels. They are quick and easy to prepare, a good source of protein and a great way to get kids to eat tuna and vegetables. I made this recipe up as I went along and just used what I had in the cupboard and the fridge. I like to serve these as a light lunch accompanied by a crunchy salad but you could easily wrap them in a pita bread with lettuce, cheese and maybe a little sweet chilli sauce.
tuna patties (recipe by Fiona from Food 4 Thought)
makes 6 patties
Ingredients
1 cup cold mashed potato
1 x 95g tin tuna, drained (I used naturally smoked)
50g corn kernels
50g red capsicum
2 x spring onions
1 egg, beaten
3 Tbsp breadcrumbs
Salt and pepper
vegetable oil, for shallow frying
Preparation
Preheat a large non-stick frypan over medium heat.
Place the potato and tuna into a large bowl. Dice the red capsicum so that it is roughly the same size as the corn and finely slice the spring onions. Add these and the remaining ingredients (except the oil) to the bowl and stir well to combine.
Add 1 Tbsp of oil to the pan. Moisten your hands with cold water. Take approxroximately 3 Tbsp of the mixture and shape into a disc. Cook for 3 – 4 minutes per side until golden brown.
Serve with side salad and accompaniments of your choice.
My tips: *If you find the mixture too soft to shape, place it in the refrigerator for half an hour. It will hold together much better. Additionally, make sure you have damp hands as it makes these easier to shape. *Cooking these a little longer, until they are well browned, will give them a better flavour and a little more crunch on the outside. *Use other vegetables if you like such as carrot and celery. *My mash was very creamy to begin with so if your mash is on the drier side you may need to add less breadcrumbs.
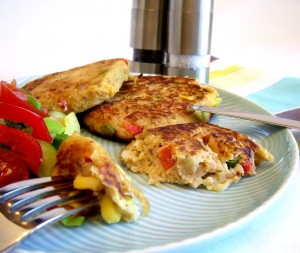
ease: 10/10. This is kid friendly if adults do the things that involve knives and heat.
prep time: 15mins.
cooking time: 10mins.
total: 25mins.
taste: 9/10. Both G and I liked these for our simple Sunday lunch. We felt they had good flavour and texture. G felt that they would also be good with a little spice added to them to create a little depth. I would just serve them with sweet chilli sauce 🙂
would I make it again: Yes – For a quick, easy, healthy way to use up left over mashed potatoes I think this is unbeatable.
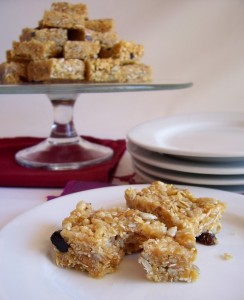 When I was a child I loved the Kelloggs Rice Bubbles (Rice Krispies for those people not in Oz) ad on TV. Snap, Crackle and Pop were the three character who bought the breakfast cereal to life. Unfortunately not even my adoration for them meant that I was committed to the cereal for very long. Being a typical fickle kid and getting bored with breakfast cereal rather often meant that there was regularly half a box left sitting in the cupboard. When I was a child I loved the Kelloggs Rice Bubbles (Rice Krispies for those people not in Oz) ad on TV. Snap, Crackle and Pop were the three character who bought the breakfast cereal to life. Unfortunately not even my adoration for them meant that I was committed to the cereal for very long. Being a typical fickle kid and getting bored with breakfast cereal rather often meant that there was regularly half a box left sitting in the cupboard.
These days my tastes have changed substantially and rice bubbles are no longer a part of my breakfast regime. Although I did purchase a box to make my Mars Bar Slice and of course, there was half a box left over. So being the ‘never waste anything’ person that I am I was racking my brains on what to do with it and remembered this slice we used to make when I was younger. We used to use it as an energy bar when we were at an all day swimming competition as they were a great substitute for lollies because they gave you that bit of a sugar hit in a healthier way.
muesli slice (recipe from my Mum’s cook book – I have no idea where she got it from)
makes approximately 40 – 46 pieces
Ingredients
1 cup toasted muesli
3 cups rice bubbles
1/2 cup coconut
1/4 cup sesame seeds
1/4 cup sunflower seeds
4 Tbsp honey
125g butter
4 Tbsp peanut butter
1/2 cup raw sugar
Preparation
Lin a 30cm x 20cm lamington tin with non-stick baking paper.
Combine the first five ingredients in a large bowl.
Place the last four ingredients in a medium saucepan over medium heat. Melt these together, stirring to combine. Bring to the boil, reduce the heat and simmer for 5 minutes. Stir continuously to ensure the mixture does not stick or burn. The mixture will thicken slightly.
Add the wet mixture to the dry ingredients and mix well to combine. Press into the prepared tin and refrigerate until set, a minimum of 1 hour. Cut into pieces.
My tips: *Make sure that you mix the wet and dry ingredients quickly as the sauce begins to thicken as soon as it cools. *Press it firmly into the tin so that it stays together when you cut it. When you press it into the tin use a silicone spatula or wooden spoon as the mixture will be hot to touch. *When you want to cut it, take it out of the fridge and leave it sit for 5 minutes, it is much easier to cut into pieces.
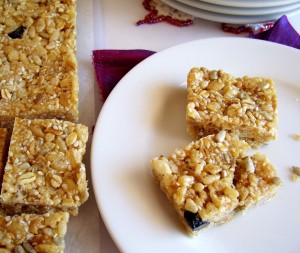 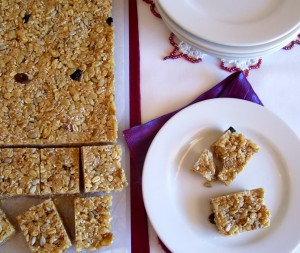
ease: 10/10. This couldn’t be much simpler. Get the kids to help measure out the dry ingredients. They’ll love eating what they help to create.
prep time: 15 mins.
cooking time: 10mins.
total: 25mins.
taste: 9/10. I love the chewiness and sweetness of this slice. The rice bubbles give it a lightness that somehow makes it seem really healthy (and luckily for me), like you can eat several pieces without overindulging. These really are simple to make and simply a pleasure to eat. G’s comment: 9/10. The rice bubbles, muesli and seeds give it that muesli bar feel about it. The peanut butter and honey stand out and work really well.
would I make it again: Definitely – Especially if I had the ingredients sitting around. These are great for kids (and adults) lunch boxes, for picnics, birthday parties or just something sweet to have whenever you have that sugar craving.
 There are many addictions in the world and it would be remise of me not to admit to one of my own. Cooking magazines. Not quite as bad as cook books, although the only reason I buy magazines is because I have so many books that my shelving is beginning to look a little a lot worse for wear. Mind you it is not all magazines, just a select few. My favourites are those that can sometimes put a different slant of recipes and have some great stories about produce/products. I also love great photography. This being (what I consider to be) one of my weaker areas, I love seeing what great work can be done to inspire people to cook. There are many addictions in the world and it would be remise of me not to admit to one of my own. Cooking magazines. Not quite as bad as cook books, although the only reason I buy magazines is because I have so many books that my shelving is beginning to look a little a lot worse for wear. Mind you it is not all magazines, just a select few. My favourites are those that can sometimes put a different slant of recipes and have some great stories about produce/products. I also love great photography. This being (what I consider to be) one of my weaker areas, I love seeing what great work can be done to inspire people to cook.
Recently I purchased the December 2009/January 2010 copy of Dish, a NZ magazine that was introduced to me some time ago by my passionate and very selective foodie friend, Karina. I flicked through it and marked about ten things that I wanted to try and this is one of them. This recipe was under the easy entertaining section.
asian beef and rice bowl (recipe from Dish Magazine, Dec/Jan 2010, P 115)
serves 4
Ingredients
500g sirloin or rump steak
1 Tbsp grated fresh ginger
1 clove garlic, crushed
1 Tbsp sesame oil
good grinding of black pepper
cooking broth
2 cups beef stock
3 Tbsp hiosin or oyster sauce
1 Tbsp fish sauce
2 Tbsp sweet chilli sauce
rice
1 3/4 cups basmati rice, well washed and drained
2 1/2 cups chicken stock or water
to serve
1 bunch bok choy, leaves separated
1 Tbsp sesame seeds, toasted
pickled ginger, optional
Preparation
Rice: Put the rice and stock with a pinch of salt in a medium saucepan. Bring to the boil, stir and cover tightly. Reduce the heat to low and simmer for 20 minutes without the lifting the lid. (A simmer mat is ideal for gentle cooking).
Remove from the heat and leave covered for 10 minutes.
Beef: Slice beef thinly and combine with the ginger, garlic, sesame oil and pepper.
Broth: Put all the ingredients in a saucepan and simmer for 2 minutes to infuse the flavours. Drop the bok choy into a saucepan of boiling, salted water and cook for 1 – 2 minutes. Drain well.
To serve: Add 1/3 of the beef to the hot stock, stirring to separate the pieces. As soon as it changes colour remove with a slotted spook and place in a bowl. Cover to keep warm. Cook the remaining beef.
Fluff up the rice with a fork and spoon into the centre of a warm, shallow servings bowls. Top with the beef, bok,choy, sesame seeds and ginger. Ladle the hot broth around the rice.
My tips: *I used rump steak and cooked it for approximately 30 seconds in the hot broth. This meant that it remained meltingly soft. *I didn’t cook the rice according to the recipe, I used my own fail safe method and suggest you do the same.
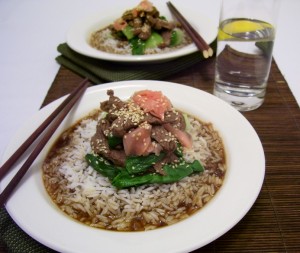 ease: 6/10. This is a simple dish but using so many pots meant that the clean up wasn’t as simple. ease: 6/10. This is a simple dish but using so many pots meant that the clean up wasn’t as simple.
prep time: 25mins.
cooking time: 15mins.
total: 40mins.
taste: 6/10. I was generous, G rated this dish 5/10. We agreed that the most delicious parts of the meal were the tenderness of the beef and the taste of the broth which was well balanced with good depth and layers of flavour to it. The rest of the dish didn’t have much body and fell flat on the palate. The bok choy was fresh but had that irony taste associated with leafy greens that made it seem impossible for it to blend into the dish. While the pickled ginger added an extra dimension, G and I agreed that we would both leave it out next time.
would I make it again: Maybe – With the following changes – Saute thin slices of onion, red capsicum and bok choy stems, until slightly softened, add chopped bock choy leaves. Once beef is cooked add to vegetables and place on top of rice. Top with coriander leaves and roughly chopped toasted cashew nuts.
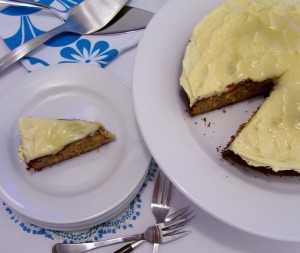
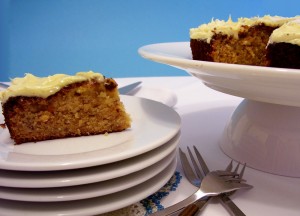 As I mentioned in the first series of this subject, sometimes I find the most simple and delicious creations can be inspired by things that need to be used up. This cake was inspired by some fast becoming blacker than the ace of spades bananas that were in our fruit bowl. I was sick of making my standard banana and walnut loaf that I have memorised the recipe for so decided to hunt something out from the copious number of cookbooks that I have collected. I came up with this and boy, I am so pleased that I did. As I mentioned in the first series of this subject, sometimes I find the most simple and delicious creations can be inspired by things that need to be used up. This cake was inspired by some fast becoming blacker than the ace of spades bananas that were in our fruit bowl. I was sick of making my standard banana and walnut loaf that I have memorised the recipe for so decided to hunt something out from the copious number of cookbooks that I have collected. I came up with this and boy, I am so pleased that I did.
My Brother bought me this book when we were holidaying together once. My orange polenta biscuit recipe also came from this book so I must say “Thanks Jas”.
yoghurt banana cakes with honey icing (recipe from bake it by Bay Books)
makes 2 cakes, each serving 8
Ingredients
180g (6oz) unsalted butter, softened
90g (3 1/4oz) honey
230g (8oz) caster (superfine) sugar
1 ½ teaspoons natural vanilla extract
3 eggs
360g (12 3/4oz) mashed ripe banana – about 4 bananas
185g (6 1/2oz) plain yoghurt
½ teaspoon bicarbonate of soda (baking soda)
375g (13oz) self raising flour
honey icing
125g (4 1/oz) unsalted butter, softened
3 tablespoons honey
125g (4 1/oz) icing (confectioners’) sugar
1 tablespoon milk
Preparation
Preheat oven to 180°C (350°F/Gas 4). Lightly grease two 15cm (6 inch) round cake tins and line the bases with non-stick baking paper.
Cream the butter, honey, sugar and vanilla in a bowl using electric beaters until pale and fluffy. Add the eggs one at time, beating well after each addition, then beat in the banana.
Combine the yoghurt and bicarbonate of soda in a small bowl. Fold the flour alternatively with the yoghurt mixture into the banana mixture. Divide the mixture evenly between the tins, smoothing the tops. Bake for 50 – 60 minutes, or until a skewer inserted into the centre of the cake comes out clean. Cool in the tins for 5 minutes, then turn out onto a wire rack.
To make the honey icing, cream the butter and honey in a small bowl using electric beaters until pale and fluffy. Gradually add the icing sugar alternately with the milk, beating well until the mixture is very pale. When the cakes are cold, divide the honey icing between the tops, spreading the icing to form peaks.
These cakes will keep, stored in an airtight container, for up to 4 days. Un-iced cakes can be frozen for up to 3 months.
My tips: *Make sure the cakes are completely cold before icing them. *You could join these cakes together with the icing for a wonderful alternative as a celebration cake. *I used two 19cm round tins to make these and they came out about 3 1/2cm high. *The icing was enough to cover them but a little more could be nice. *I used a fan forced oven and notice that the tops were browning quickly. So I turned the fan off and it seemed to help a little.
 ease: 8/10. ease: 8/10.
prep time: 30mins.
cooking time: 50mins.
total: 1hour 20mins.
taste: 8.5/10. The flavour of this cake was beyond my expectation (and I expected a lot). I thought the banana could have been overpowered by the honey icing but was joyously surprised to find that they worked together in harmony similar to that of a philharmonic orchestra. The .5 deduction was only because I found the icing a little too rich and sweet. However, those who know me are fully aware that I don’t like too sweet desserts and reduce the sugar content in most of the recipes I create.
This cake was a great hit with G and his Mum.
would I make it again: Without question – This is one of the most delicious ways I found to use up old bananas. If you have any others please let me know.
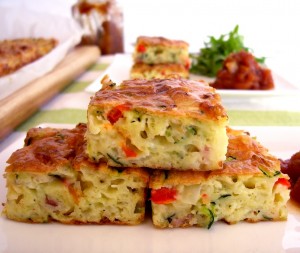
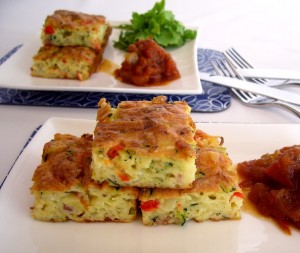
Sometimes I find the most simple and delicious creations can be inspired by things that need to be used up. Like dinner this evening for example. I had some smoked salmon that was on a wing and a pray and if not used today was heading for food heaven. So I decided to make G a corn cake stack with smoked salmon and crème fraiche. My meal was inspired by the humble zucchini and memories of meals that Mum used to cook when I was younger. I called Mum and asked her for the recipe she uses and got started. For the effort and time you invest in this dish I think that you are repaid in abundance by the light, fluffy, flavoursome mixture that evolves into a quiche like feast (or at least that is what I remember from my childhood).
zucchini slice (recipe from women’s day – best ever)
serves 6 – 8
Ingredients
5 eggs
60ml (1/4 cup) vegetable oil
150g (1 cup) self-raising flour, sifted
375g zucchini, grated
1 large onion, finely diced
150g rindless bacon, chopped
80g (1 cup loosley packed) grated cheddar cheese
Salt and pepper
Preparation
Preheat oven to 170°C. Grease and line a 30 x 20cm lamington pan.
Beat the eggs and oil in a large bowl until combined. Add the flour and beat until smooth, then add zucchini, onion, bacon, cheese and stir to combine. Pour into the prepared pan and bake in oven for 30 – 40 minutes or until cooked through. Remove from oven and cool in the pan for 10 minutes before placing on a wire rack. Cut into slices when cool enough to handle.
My tips/alterations: *I squeezed out the excess water from the zucchini which makes sure that there is not too much moisture in the mix. *Every oven is different. I used a fan forced oven and cooked it for 35 minutes. *I added 75g red capsicum, finely diced. You can also add grated carrot if you like. Make whatever variation you like and call it your own.
 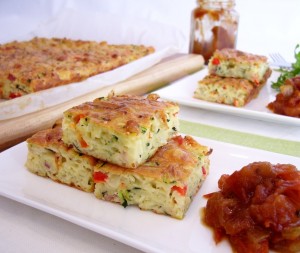
ease: 10/10. (could it be any easier?).
prep time: 15mins.
cooking time: 30mins.
total: 45mins.
taste: 9/10. This is great hot or cold. I love having it with some spicy tomato relish. It is fantastic in lunchboxes for kids and with a crunchy salad for bigger kids. It can even be frozen then reheated. We had some leftover so the next day I took it to G’s Mums place for lunch along with the banana cake
would I make it again: Without a doubt – It doesn’t just have to be when you need to use things up, I will make this for our next picnic also.
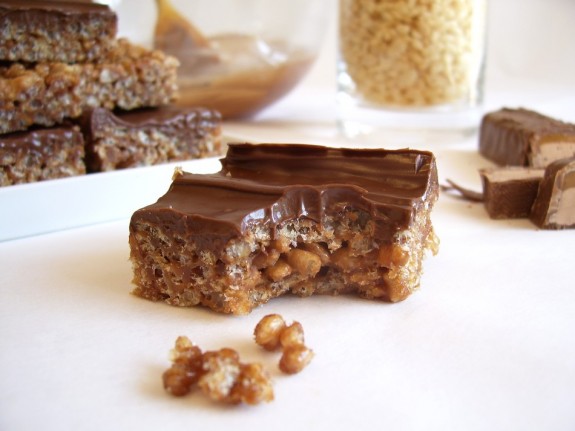
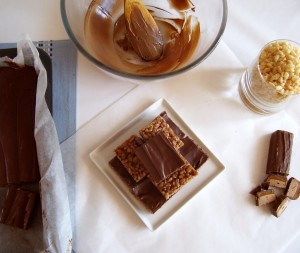
Food can evoke some very powerful memories, especially of one’s childhood. Being a competitive swimmer when I was younger meant that my diet consisted (mostly) of healthy, energy giving food with sweet treats being exactly that, a special treat. One of the first delights I remember making with my Mum was Mars bar slice. I was about five at the time and was allowed to mix the ingredients together to create a memorable delicacy. Imagine, crispy rice bubbles bound by a rich, slightly chewy, chocolate-caramel mixture and spread with a luscious chocolate icing. Once a childhood treat, now a guilty pleasure, this slice is very moreish for kids and adults alike!
Mars bar slice (recipe from my Mum – one of a trillion out there)
makes 20 – 25 pieces
Ingredients
3 cups (100g/3.5 ozs/¼lb) rice bubbles
3 x 53g Mars Bars (*See below for US version)
90g (3 ozs/¾ of a stick) unsalted butter
200g (7 ozs/½lb) milk or semisweet chocolate (cooking or normal eating chocolate)
20g (1½ tablespoons) unsalted butter
Preparation
Grease and line 26cm x 16cm slice tin with non-stick baking paper. Place the rice bubbles into a large bowl.
Chop Mars bars into chunks and place in saucepan along with butter. Melt together, breaking down the Mars Bars with a spatula. This will take a few minutes.
Once the mixture begins to come together I use a whisk to finish it off. You need to bring it to a boil to get it to come together completely. Just before it does it will look like it has split but keep stirring.
Once combined add the caramel to the rice bubbles and stir quickly to combine well.
At this stage I can almost guarantee that you will want to dive in and taste the mixture. Please don’t. The mixture is very hot and you will burn your mouth, trust me, I speak from experience!
Pour the mixture into the tin.
Melt the chocolate and butter together, pour over slice. Refrigerate until chocolate and slice are firm, minimum of 1 hour. Remove slice from the tin and cut into pieces.
My tips: *The quantities listed make a thin slice, if you would like it thicker simply increase by 1 each. That is, 4 cups rice bubbles, 4 Mars bars and 4ozs (125g) butter. *Don’t use cheap rice crispies, they just don’t work as well, I use the Kellogs brand. *From memory and experience when living in the US a few years ago, Mars bars are not the same as those ‘Down Under’. They don’t have the caramel section and therefore the mixture doesn’t turn out the same. Some other caramel bars might work. Since I wrote this post I have found out that Mars Bars have been re-released into the US market. I am not sure of the size of the bar you will need to use but think they are about 58g or approximately 2 ozs, so I would use three of those.
 ease: 10/10. (this is even kid friendly so long as an adult heats the mixture). ease: 10/10. (this is even kid friendly so long as an adult heats the mixture).
prep time: 15mins.
cooking time: None.
total: 15 mins + chilling
taste: 10/10. It is what it is. Sweet, sticky, slightly chewy caramel flavoured crisp morsels covered in chocolate. Does it get any better?
would I make it again: Yes – especially when there are some kids around to make it with me.
One of the things that I love about cooking is the constant learning that is involved. It is filled with trials and tribulations as well as successes and celebrations. Last night G & I decided we would attempt to make sushi for the first time. Our effort definitely involved the former and not much of the later. When I started this blog I decided that no matter what the outcome, I would share it all. The sushi train journey began with me preparing all the ingredients, ensuring that things were chopped in an even manner and everything was organised for assembly. Our rice was cooked well and nicely seasoned, our bowl of water and sushi mat ready to go. We were aiming to create japanese sushi rolls (or nigiri) with fillings such as carrot, cucumber, chicken and egg. We also had some tuna with Japanese mayonnaise stirred through it. Our first effort ended with way too much rice and not much filling, the next was a little better but nowhere near perfect. We seemed to improve slightly until eventually the tortured ended when we ran out of rice.
There is no photographic evidence of our virginal sushi experience and for that I am grateful. However, G and I agreed that the flavour was really good and we will definitely do it again.
I have a new found respect for those who are skilled in this intricate art and hope that one day I can produce something that I am proud enough to put into print.
I was so pleased when I woke up this morning and the temperature had dropped overnight and that today was expected to be 30°C (86°F). We have had so many days of hot weather, even up to 42°C (107°F), that it has made being in a small, hot kitchen rather difficult. Given the blessing delivered to me I decided to create something that took some time and that I had been wanting to do for a few weeks.
Slowly caramelising onions brings out their deep, rich, sweet flavour as the natural sugars breakdown and become a beautiful mahogany colour. This process takes time and patience, but trust me, it is well worth it.
There are probably a million and one recipes out there for caramelised onions and mine is adapted from several of those. I just wanted mine to have a little bit of spice along with that balance of sweet and sour.
You can use these deeply golden strands in many ways. One of the classics is added to a steak sandwich. I love to use mine in little savoury pastry tarts with beetroot and marinated feta.
caramelised onions (recipe created by Fiona from Food 4 Thought)
makes approximately 560g
Ingredients
3 – 4 Tablespoons olive oil
800g (28 ¼ oz) brown onions, thinly sliced
2 cloves of garlic, crushed
Pinch of dried chilli, to taste
250g (8 ¾ oz) brown sugar
185ml (6 ¼ fluid oz) balsamic vinegar
185ml (6 ¼ fluid oz) water
2 star anise
6 sprigs fresh thyme
Salt and pepper, to taste
Preparation
Preheat a large heavy based pan over medium heat.
Add olive oil to the pan, add onions, reduce heat slightly. Stir and sauté for 15 – 20 minutes, until the onions have softened and started to become golden. Add the garlic and chilli, stir to combine and cook for a further 3 – 4 minutes. If the onions begin to stick to the pan, add a little water.
Add 200g of the sugar, vinegar and water into the pan, stir to dissolve the sugar. Add the star anise and thyme. Increase heat and bring to a boil, reduce heat to low and simmer, stirring occasionally, for about 1 ½ hours.
The onions should become dark brown and sticky. Taste the mixture and adjust the seasoning, sweetness and sourness until you have the flavour you like.
Store in sterilise jars. You can keep this in the fridge for up to a month, but like most things they are best consumed soon after making.
My tips: *I start with 200g of sugar and add more if I need to. The alterations will depend on how sweet the onions are. *If you would like a slightly different flavour, substitute 50ml of the water with your favourite port. It provides yet another dimension.
ease: 8/10. (you can slice the onions in a food processor to make this even easier).
prep time: 20mins.
cooking time: 90mins.
total: 1hour 50mins.
taste: 9/10. Star anise is one of my favourite spices. It has an evocative headiness to it, an amazing intensity that makes me want to sleep with it under my pillow. Adding it to the onions creates another level of deliciousness. I especially love the sweet and sour balance that is created in this condiment.
would I make it again: Yes – yet another thing that I can have fun making and no longer have to buy.
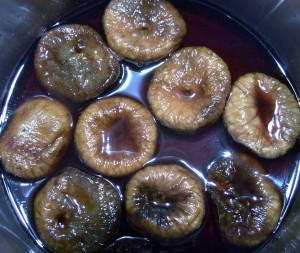
I almost ran out of port soaked figs! To some of you that may not sound like a crisis but my pork fillet stuffed with wild rice, port soaked figs and marinated feta just won’t be the same without them. So off I went to one of the stores that I knew stocked the brand that I like. They are from a local producer and have that sticky sweetness that can only come from soaking a beautiful piece of dried fruit in a sticky, rich, luscious liquer like port. Once inside my destination, I asked one of the staff where I might find them and discovered there was one jar left on the shelf. The jar was a different shape than I had seen previously and it appeared a little smaller but it is the last jar so I snapped it up. Upon my arrival home, I not only discovered that the jar was a different shape but it also contained almost a third less than the jar I had purchased a few months ago for the same price. Now we all know that economic times have been a little tough lately but a third less………….it was too much for me to bear. So being the determined (and I admit, sometimes stubborn) person that I am I decided to try and make some myself by reading the ingredients, doing some research and taste testing the two products side by side. I pulled out one of my favourite local ports (I like the name and the label as much as what is in the bottle), some dried figs and a few other necessary ingredients. After an afternoon of experimenting, I came up with the following recipe that I hope you all enjoy making as much as I did.

port soaked figs (recipe created by Fiona from Food 4 Thought)
makes approximately 400g
Ingredients
150ml port
40g sugar
50ml water
2 star anise
1 cinnamon stick
6 whole black peppercorns
175g dried figs, stems removed
Sterilised jar
Preparation
Place the port, sugar and water into a medium size pot over a medium heat. Stir the mixture until the sugar dissolves. Add the star anise, cinnamon and peppercorns, increase the heat to bring to a boil. Add the figs and simmer for 20 – 25 minutes, or until figs have softened. Turn the figs several times throughout the process. Remove from the heat and allow to steep for an hour minimum. Remove the figs from the mixture and place them in a sterilised jar. Remove the spices from the liquid and add the sweet nectar to the figs. Seal and keep for up to 3 months. I keep mine in the fridge.
ease: 9/10. (This is not difficult, just takes some time).
prep time: 10mins.
cooking time: 25mins + 1 hour steeping + 5 mins jarring.
total: 1hour 40 mins.
taste: 9/10. These are delicious. Don’t get me wrong, the batch that I made is not identical in flavour to the purchased product and nor would I want it to be, because then it wouldn’t be my creation. It is however a sticky, sweet, spiced concoction that I will be proud to use. The sauce that is in my creation is thicker than that of its original counterpart but you can always add a little more water or even a dash of alcohol after it has cooled. I wouldn’t worry too much about burning off the alcohol content because the original seems more alcoholic than its homemade cousin.
would I make it again: You bet – It was not only being able to recreate something that I no longer have to buy, it was the achievement of looking at a label and being able to figure out what to use to get close to replicating the flavour that made it a pleasure to cook these. Besides that there are some very delicious ways to use these sweet little morsels, the simplest being on top of vanilla ice-cream.
I apologise for the quality of the photos, I couldn’t set up my studio in time.
I also promise to blog my stuffed pork loin recipe that I mentioned in my opening paragraph in the near future.
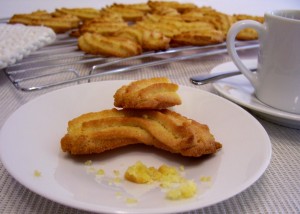
Today was one of those days when I sincerely appreciated how the world works. You know what I mean, when things just seem to work out for the best. This morning I was supposed to go for an early walk with a girlfriend I haven’t seen in some time, but unfortunately a text at 6.30am explained that she had slept terribly due to a problem with her neck and was heading back to bed. As disappointed as I was because I wanted to see her, I was equally as elated because that meant I now had time in my day to bake. Last night after dinner I really felt like a cup of coffee and a biscuit, but the cupboard was bare, not even a standard store bought packet (which I normally buy to make cheesecake bases). G arrived home a little later and also expressed disappointment with the no biscuit situation as that was what he really felt like. So, I am very pleased to say that I whipped up some yummy biscuits with a twist.
orange polenta biscuits (recipe from bake it by Bay Books)
makes 20 – 22
Ingredients
125g (4 ½ oz) unsalted butter, softened
80g (2 ¾ oz) caster (superfine) sugar (I used 70g)
1 tsp orange flower water (I used 1 ½ tsp)
Finely grated zest of 1 orange (2 tsp)
2 eggs, lightly beaten
165g (5 ¾ oz) plain (all purpose) flour
80g (2 ¾ oz) polenta (cornmeal)
Preparation
Preheat the oven to 200°C (400°F/Gas 6). Line two baking trays with baking paper.
Combine the butter, sugar, orange flower water and orange zest in a food processor and process until light and creamy. Add the eggs and process until smooth. Add the flour and polenta and pulse until a sticky dough forms.
Transfer the mixture to a piping bag fitted with a 2cm star nozzle (I used a size 11 star nozzle). Pipe the mixture onto the prepared baking trays to form 7cm (2 ¾ inch) crescents. Bake for 15 minutes, or until the biscuits are golden around the edges. Cool on the trays for 5 minutes, then transfer to a wire rack to cool completely.
Keep stored in an airtight container, for up to 3 days.
My tips: *If you do not want to pipe the mixture you could take a teaspoon of the mixture, moisten your hands a little with either water or orange blossom water and roll into a ball. Press down lightly with a fork.
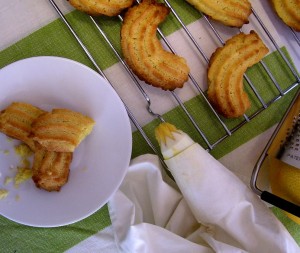
ease: 8/10. (depends how competent you are with a piping bag).
prep time: 15mins.
cooking time: 15mins + 5 mins cooling on tray.
total: 35mins.
taste: 8/10. The hint of orange blossom that come through these slightly crunchy firm textured little morsels reminds me of late spring when the citrus trees begin to flower. That evocative scent that makes you want to inhale deeply is also one of the things that make you want to eat more than one of these biscuits. The other reason I ate 3 (or was it 4) in the first half hour after they had cooled, is the wonderful texture that polenta gives to these biscuits. It is hard to describe without sounding derogatory but the graininess that is in every bite makes you want to have another. Oh, and they are a fantastic accompaniment to a cup of freshly brewed coffee.
The best part about baking these was that they made G and I both sigh with relief, not only did we both love the flavour and texture but they also satisfied our biscuits craving……for now!
would I make it again: Yes – and maybe use just a little more orange blossom water, because I love it.
I entered the world of blogging in January 2010. It was a little daunting at first, after admiring many pages of amazing stories, photos and recipes from talented people for some time, I felt like a very little fish in a big fishpond. Nonetheless I have commenced the journey into webland and am very excited to be able to put my passion into pages, to share recipes, experiences and photos from my humble kitchen, hopefully inspiring others to cook. My work space is tiny, I don’t have a dishwasher, nor a digital SLR (my new dream machine because I bought myself a Kitchen Aid a few years ago). My photographic studio is our measly kitchen table and my official (and very critical – in a good way) taste tester is my adorable partner, G.
I hope you enjoy perusing the site. Leave me a comment so that I know you have stopped by.
|
 Being invited to a friends place for dinner is a special treat for me as not too many people will invite and willingly cook for a (self confessed) food junkie. However, our friend M is a wonderful cook in his own right and often provides me with recipes for his generous and delicious creations. I offered to make dessert because I had a couple of egg whites sitting in the fridge that I wanted to get rid of but couldn’t bear to throw out (I know, sad isn’t it). The first thing that I thought of making was a pavlova because it is easy and transports well but I had made one of those for the same dinner guests previously so decided against it. I really wanted to create a meringue layered with passionfruit curd because I also had purchased some lovely passionfruit during the week that were begging to be utilised. So being the stubborn Taurean that I am, that is exactly what I created. I must say, I was quite proud of this dish so I hope you enjoy it too.


