A sample text widget
Etiam pulvinar consectetur dolor sed malesuada. Ut convallis
euismod dolor nec pretium. Nunc ut tristique massa.
Nam sodales mi vitae dolor ullamcorper et vulputate enim accumsan.
Morbi orci magna, tincidunt vitae molestie nec, molestie at mi. Nulla nulla lorem,
suscipit in posuere in, interdum non magna.
|
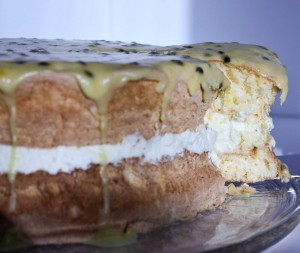
There are certain things in life that just make people happy, a puppy running towards them to say hello or maybe a child’s laughter. We all have something that we love. For many of my family’s friends that would have to be my Mum’s sponge. When I was a little girl it was always my Nanna who made the best sponge. They were so high that you couldn’t get the whole piece in your mouth, as light as a feather, filled with the freshest cream and ripe fruit and topped with delicious icing. We were also lucky enough to have it topped with hundreds and thousands. It was enough to make all the cousins eat every vegetable on their plate just so that they could have a piece. Those times have passed and my Mum has struggled with the huge boots to fill for many years and (by her own admission) failed somewhat for a long time. However, the last few years have proved that practice makes perfect. She now creates these amazing towers of velvety golden sponge, filled with cream and sliced strawberries and topped with passionfruit icing. They are often taken to the local fire house, as one of our friends is a fireman, and devoured in minutes by the hard working gents with many words of praise and thanks.
I was fortunate enough to spend some time with my Mum (who lives interstate) recently and was lucky enough to receive a long awaited sponge cooking lesson during her visit. Although I have always been a little hesitant to make a sponge in the past (because Mum is sooooo good at it) I think this recipe is so good that I am quite looking forward to trying it on my own in the future.
During my Mum’s visit many happy childhood memories were renewed, cooking with my Mum, eating sponge and spending time with friends and family that I love. The best things in life are often the simplest.
sponge (recipe by Mary – Fiona’s Mum)
makes 2 sponges
Ingredients
4 eggs
3/4 cup castor sugar
3/4 cup cornflour
1/2 tsp bicarbonate of soda
1 tsp cream of tartar
1 Tbsp custard powder
Preparation
Preheat oven to 180°C (350°F/Gas 4). Lightly grease two 20cm (8 inch) round cake tins with a small amount of melted butter and line the bases with non-stick baking paper.
Separate the eggs and using an electric mixer, beat the whites until soft peaks begin to form. Slowly add the castor sugar and beat until the sugar is dissolved. Add the egg yolks one at a time and beat well, until completely combined. Sieve the remaining ingredients three times to maximise lightness and pour into egg mixture. Fold the flour mixture in using a circular motion.
Divide equally between the two pans. Bake in a non fan force oven for 20 – 23 minutes, until risen and lightly golden.
Remove from the oven. Run a flat knife around the edge of the tin to loosen the sponge. Turn out onto a wire rack while still hot and gently remove paper.
Once cool, cut sponge in half and fill with cream and seasonal fruit. Top with your favourite icing.
My (Mum’s) tips: *Be careful that you do not over beat the egg whites. As soon as the sugar is dissolved you should stop mixing. You can tell if the sugar is dissolved by dipping your finger in the mixture and rubbing your finger and thumb together. If you don’t feel any grains of sugar then it is ready. *Don’t be scared of mixing the dry ingredients into the egg whites, you need to use a folding acting but be quite firm with it. *Don’t use a fan force oven unless you have to as this can make them sink when your remove them from the oven. If you do use a fan forced oven you may need to reduce your cooking time by up to 5 minutes. *When dividing the mixture between the tins, weigh it out. This will make sure you have two sponges that rise and cook the same.
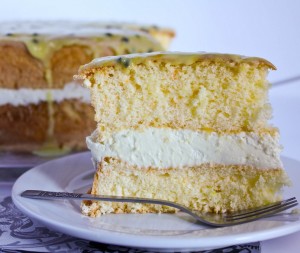 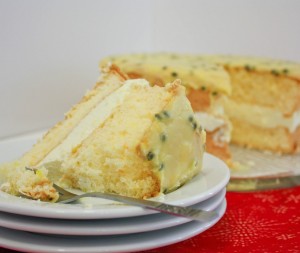
ease: 8/10. After you have made these the first time it becomes really simple.
prep time: 15mins
cooking time: 20mins.
total: 35mins.
taste: 10/10. This is the lightest cake I have ever eaten. It is so high that it needs to be eaten with a fork. Each mouthful seems to almost touch your tongue and disappear due to the lightness of the sponge itself. The cream is sweetened with a small amount of sugar and we decided upon a passionfruit icing this time. All of the flavours worked together to create bliss. We took this to dinner with family and although it was not completely eaten on the night I never saw it again. I think that’s a good thing. 🙂
Mum told me that this is often better the next day because it gives the cream a chance to immalgamate with the sponge properly. Just cover it and place it in the fridge until it is needed.
would I make it again: Yes – Because everyone asks for them and to honour my Mum & my Nanna.

There are times that I absolutely love to make things that I have made a hundred times before. There is something extremely comforting about knowing a recipe like the back of your hand and knowing the steps inside out. Most of these types of recipes come from my Nanna or my Mum.
I was reading through some of my recipes and chatting with my Mum about all things cooking. She is having a new oven installed at home while she is here on holidays and is a little unsure about her choice. She will be working with a 600mm wide new oven whereas her previous oven was 900mm so she is worried about cake tins fitting and how it will all work. I assured her that it will all be fine. My oven is 44cm internally (which is tiny) and I survive, so I am sure she will too. Our discussions lead to when I was a child and the wood stove that we used to have at home, which is the oven that I learnt to cook in. Being fuelled by wood meant that it was difficult to keep the temperature constant but I learnt to use all of my senses to tell when something was ready. My Nanna used to tell how hot her oven was by opening the door and holding her hand in there. This innate knowing is also reflected in her recipes.
When I read the recipe for these biscuits it made me giggle because there was no mention of oven temperature or time to bake them. Typical of my Nanna, you cook them in an oven that is the right temperature, until they are golden brown and cooked. 🙂 Another thing that my Nanna used to do, that I still do sometimes, is measure things in the palm of her hand. She would always tip things such as sugar, salt and the like into her hand and say “that’s about a teaspoon”. The best part was the recipes always worked, so she must have been right. I can only hope that some of the innate knowledge from both my Mum and my Nanna has rubbed off on me.
nanna’s gingernuts – (recipe from My Nanna – adapted by Fiona at Food 4 Thought)
makes approximately 30
Ingredients
125g (4oz) unsalted butter, softened
1 cup sugar
1 tablespoon golden syrup
1 egg
2 cups self raising flour
1 teaspoon bicarbonate of soda
1 teaspoon mixed spice
2 teaspoons ground ginger
castor sugar, to roll biscuits in
Preparation
Preheat oven to 180°C. Line a baking tray.
Place the butter and sugar into a medium bowl and beat until light and creamy. Scrap the sides of the bowl, add golden syrup and mix to combine then add the egg and mix again. Sifted flour, bicarb soda and spices and add to butter mixture. Stir to combine.
Roll “rounded teaspoons” of mixture into balls and roll in castor sugar until completely covered. Place onto baking tray allowing room to spread. Bake for 12 – 15 minutes or until golden and crisp on the outside. Remove from oven and allow to cool for a couple of minutes before placing on a wire rack to cool completely.
My tips/alterations: *To make all of my biscuits the same size I like to use a small ice-cream scoop to measure it out, then roll the mixture into balls. *These biscuits are supposed to rise slightly then begin to crack on top, this is what gives them their wonderful texture.

ease: 9/10.
prep time: 25mins.
cooking time: 15mins.
total: 40mins.
taste: 9/10. These are one of my favourite biscuits. I love the textural difference between the crunchy outside and soft inside along with the warmth provided by the ginger. The castor sugar on the outside adds an extra, slightly unexpected dimension. G isn’t a big fan of these as he does not like things that taste too much like ground ginger.
I like making these for guests because they taste like they are old-fashioned and a little bit special.
would I make it again: Yes, forever and ever.
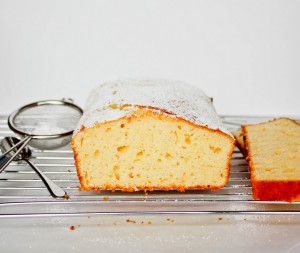
Visiting friends or having friends over always gives me a great excuse to bake and I often like to try something different. My recipes come from a range of sources such as my Mum, my Nanna, other people blogs, the internet in general and sometimes they are given to me by friends who suggest that I might like to try them for my blog. This recipe was given to me recently by a friend who had received it from her Aunt.
G and I were having some family and friends over on Sunday for morning tea and I wanted something to add to my fuyu cake and ginger nut biscuits that I had already made. Given that G’s Mum’s lemon tree is producing fruit in abundance I knew I wanted something that included them. When I read this recipe I thought it sounded quick and easy. It also helped me use up some yoghurt that I knew would just sit in the fridge otherwise.
lemon yoghurt cake – recipe from the Aunt of a close friend (adapted by Fiona at Food 4 Thought)
makes one loaf
Ingredients
80g unsalted butter or margarine
3/4 cup castor sugar
2 large eggs
1 1/2 cups self raising flour
1/2 cup yoghurt
2 teaspoons lemon rind
juice of 2 lemons (60 – 80ml)
Preparation
Preheat oven to 180°C. Grease and line a 21 x 10cm loaf pan.
Place the butter and sugar into a large bowl and mix until smooth and well combined. Scrap down the sides of the bowl and add eggs one at a time, beating well after each addition. Add lemon rind and half the lemon juice and mix to combine. Add flour gradually and fold in. Fold in the yoghurt. Pour mixture into the prepared pan and bake for 30 – 40 minutes or until cooked.
Remove from the oven and using a skewer make several holes in the cake while still in the tin. Pour extra lemon juice slowly over the top of the cake so that it soaks in. Remove from tin and dust the cake with icing sugar to serve.
My tips/alterations: *The original recipe mentioned that you could use margarine in place of butter and low fat yoghurt if you wish. I used unsalted butter and greek yoghurt in my cake. It also required a 25 x 11cm tin which would have meant the cake was flatter. This may mean that the cake would be moisture also as the lemon juice would penetrate more of the cake. *When creaming the butter and sugar I noticed that it did not become light and fluffy like in some recipes. This is due to the (low) ratio of butter to sugar. *The mixture was quite stiff until the yoghurt was added which lightened it up considerably. * I cooked my cake in a fan forced oven and it took 35 minutes. *To test if the cake is cooked, insert a skewer into the centre of the cake and if it comes out clean the cake is done.
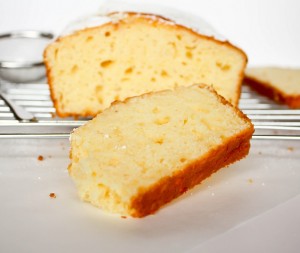
ease: 9/10. Simple cake method.
prep time: 15mins.
cooking time: 35mins.
total: 50mins.
taste: 7/10. This cake looked delicious and we served it to our guests with a dollop of double cream and they all raved about it. It didn’t impress me that much because I felt that it was too dry and the lemon juice that moistened the cake was too sharp. I make another cake similar to this that has lemon syrup (sugar, water, lemon juice) poured over the top and it is delicious. This seemed to fall short of that one. In the recipes defence, I did not have the correct size tin and this could have made a significant difference (see My tips/alterations above).
would I make it again: Probably not. I’d rather the other version that I make.

I love finding new produce or products that I have never used before. I’ve even been known to purchase items without really having any idea what they might taste like or how to use them and bringing them home just to experiment. For me, this is part of the joy of cooking, being able to discover and learn new things.
Last weekend I was at the fruit and vegetable markets in Subiaco and found some fuyu persimmons. I had seen regular persimmons before and had heard of fuyu but never seen them. They look very similar to other persimmons but can be firm firm in texture even when they are ripe. They can be used that way or they can be eaten when a little softer, however, you should not let them become over-ripe as they will turn mushy. Their flavour is sweet and slightly similar to that of a cantaloupe (rockmelon). Having never seen or used them before a little research was necessary.
That was last weekend. Since then my Mum arrived for a visit and things have been rather hectic for a few days. Mum and I decided to have a day of cooking together and given that I still had the fuyu I suggested that we use them. I had searched the internet for ideas and couldn’t find many recipes for fuyu. There were plenty for persimmons but not many using its firmer cousin and, of course, this would make the dish completely different. My research also told me that you should not substitute between them so I needed something specifically for fuyu. Eventually I settled on a recipe for a Fuyu Bundt Cake. However, there were several things standing in my way to making this cake. I don’t own a bundt cake tin and didn’t have enough fruit to make this cake so I adapted the recipe and (literally) made it up as I went along.
This was a fun thing to do with my Mum because neither of us had a clue what to expect or even how to do it so we just tried things and hoped for the best. Together we discovered a delicious, rich, fruity cake that we feel is best eaten warm with a dollop of double cream.
fuyu cake – (recipe from The California Fuyu Growers Association – adapted by Fiona at Food 4 Thought)
makes one loaf
Ingredients
3 fuyu persimmons (to yield 1 1/2 cups of chopped fruit)
1 tsp bicarbonate of soda
60g unsalted butter
3/4 cup sugar
1 egg
1/2 teaspoon vanilla extract
1 teaspoon lemon juice
1 cup plain flour
1/2 teaspoon baking powder
1/2 teaspoon ground cloves
1/2 teaspoon ground cinnamon
1/4 tsp ground nutmeg
50g walnuts, roughly chopped
75g raisins
Preparation
Preheat oven to 180°C. Grease and line a 21 x 10cm loaf pan.
Peel fuyu, remove leaves and chop flesh into 1cm dice (avoiding the large seeds). Place the flesh into a bowl and sprinkle with bicarb soda. Stir to combine and set aside.
Beat butter and sugar together until slightly well combined. Scrap down the bowl and add egg, vanilla and lemon juice. Beat until light and fluffy. Sieve the flour, baking powder and spices. Add these to the butter mixture and stir until just combined then add the walnuts and raisins and mix to distribute these throughout the mixture.
Place the mixture into the lined loaf pan. Bake for 50 – 55 minutes, until golden and a skewer comes out clean.
My tips/alterations: *The original recipe did not mention peeling the fuyu but I decided to for my recipe. *Peeling the fuyu is like peeling an apple. *The butter and sugar do not cream and go fluffy like a normal cake recipe until the lemon juice is added, then it begins to come together. *The mixture is quite thick before it is cooked, just spread it evenly in the pan as it will not level itself out during cooking. *I used a fan forced oven and noticed the top of the cake was browning quickly so I loosely covered the top halfway through to prevent it burning.
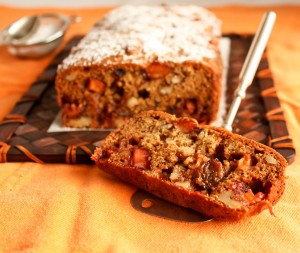 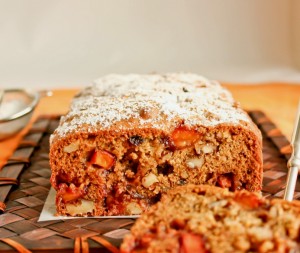
ease: 9/10. Just like any other cake mixture with the addition of chopped fruit, nuts and spices.
prep time: 20mins.
cooking time: 55mins.
total: 1hour 15mins.
taste: 9/10. This smelt delicious when it came out of the oven. We tasted it while it was still warm and topped it with a dollop of double cream. The combination of sweet fruit, spices and nuts is a classic one in the world of cakes because it works so well and it did not disappoint in this instance either. Serve this as a dessert cake or alternatively for morning tea when you have guests. It can be eaten warm or cold.
would I make it again: Yes.
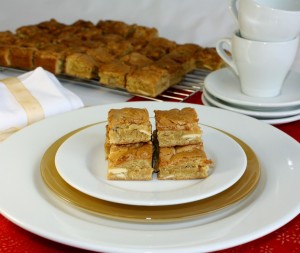
Baking is one of my pleasures in life that I don’t need an excuse to do. Although, I always seem to have a good reason for the things that I make, whether it be taking a dessert to someone’s place for dinner or simply because our cookie jar is empty. Secretly, I love it when I have an excuse to bake :).
The first reason for making these was that I had promised to bring something for everyone to nibble on at G’s track day over the weekend (a day where he and his mates who are members of the car club are able to use the local race track to take their cars out for the day and test their own abilities – translation – great fun!). The second reason is that G’s niece, Alexandra, who lives quite a distance from us, absolutely LOVES white chocolate and I have been trying to think of a recipe that she would be able to make (with a little help from her Mum).
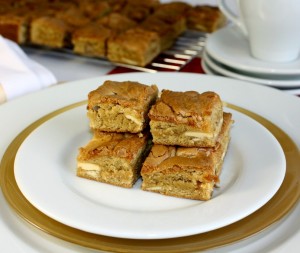
I had hardly anytime on the morning of race day to bake because I wanted to take some photos for my blog, finish preparing lunch and clean up before I left for the day. I made the Blondies at 7am so needless to say they are quick & easy because thinking too much at that time on a Saturday morning can be a little challenging at times. Within an hour they had baked, cooled and were packaged up ready to go. These could be the speedy gonzales of the baking world.
blondies – (recipe by Fiona at Food 4 Thought)
makes about 48 bite size pieces
Ingredients
160g unsalted butter
300g soft light brown sugar
1/2 tsp vanilla extract
2 large eggs, lightly beaten
2 cups plain flour
2 tsp baking powder
pinch of salt
60g roughly chopped pecans
90g white chocolate buttons
Preparation
Preheat oven to 190°C.
Line a lamington tin (30cm x 21cm x 3cm) with non-stick bake paper. Melt the butter in a medium size saucepan. As soon as the butter is melted remove from the heat then add the sugar and vanilla. Stir to combine. Add the eggs to the pan and beat with a wooden spoon, until the mixture becomes smooth.
Sift the flour and baking powder into the egg mixture. Stir well with a wooden spoon then add the pecans and chocolate, stir well to combine.
Pour the mixture into prepared tin and bake for 15 minutes, until golden. Once cooked, remove from the oven and leave in the tin to cool for 5 minutes.
Cut into squares and store in an airtight container.
My tips/alterations: *If you would prefer to leave the nuts out, just increase the amount of chocolate that you put in. *I don’t use as much sugar as many other recipes but if you find these not sweet enough you can add extra as the recipe will take it and still work. *When spreading this mixture in the tin it may seem like there isn’t enough but just spread it to the edges as it will fill out as it cooks. *I like to cook these for 15 minutes because it gives them a fudgy, brownie like texture. If you would prefer them a little firmer, cake like texture then cook them for 20 minutes. *I find that these are best eaten on the day they are made, although they will keep for a few days in an air tight container.
ease: 10/10. The easiest thing I have made so far.
prep time: 15mins.
cooking time: 15mins.
total: 30mins.
taste: 8.5/10. Crunchy outside, fudgy inside, white chocolate and nuts, there is not too much more that you could want. The crew at the track loved these and almost emptied the container. We ate the rest within a few days.
would I make it again: Yes. It is so quick and easy that it would be great to make whenever you are short on time.
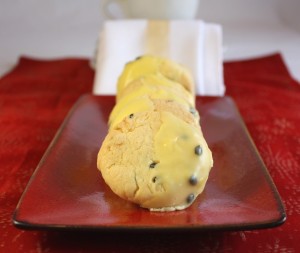
Upon our return from holidays I restocked the fridge with fresh fruit and vegetables ready for the week ahead. As I was doing so I discovered three passionfruit that looked a little worse for wear. I thought about throwing them out but then I remembered that when looking for good passionfruit to buy you should search out the ugly ones that are heavy for their size. This means they are full of seeds and pulp and are ready to use. These were both of those things so I decided to use them.
I wanted something simple and didn’t have enough to make the passionfruit curd that I’ve made previously, all of this along with an empty cookie jar made me look for a biscuit recipe. I went to one of my “old faithful” cookbooks, The Australian Women’s Weekly – The Big book of Beautiful Biscuits, because that was where I had found the chocolate chip cookie recipe and they were delicious. Sure enough I found something that suited my requirements perfectly.
I read through the recipe and got started. I had made the mixture and was attempting to put it into a piping bag as the recipe required but found that my mixture was way too thick to pipe. Upon reviewing the recipe I discovered that there was only 1 1/4 cups of self-raising flour needed and not the 1 3/4 cups that I had put in. What to do? The dough felt a little like a shortbread mixture so I pulled out my small ice cream scoop and started to shape scoopfuls of the mixture into small discs. This worked a treat and they came out of the oven smelling and looking delicious.
I guess what may seem like a disaster in the kitchen can sometimes be overted with some creative thinking and a little faith. 🙂
passionfruit biscuits – (recipe from The Australian Women’s Weekly “Big Book of Beautiful Biscuits” – adapted by Fiona at Food 4 Thought)
makes about 50 (or 35 with my recipe)
Ingredients
185g unsalted butter
1 teaspoon finely grated lemon zest
3/4 cup icing sugar
3 passionfruit
3/4 cup cornflour
1 1/4 cups self-raising flour (or 1 3/4 cups if you want to make shortbread style discs)
Icing
1/2 cup icing sugar
1 teaspoon butter
1 passionfruit
Preparation
Preheat oven to 190°C.
Cream together butter, lemon rind and sifted sugar until light and fluffy. Add passionfruit pulp and mix well. Fold in sifted cornflour and self-raising flour.
Put mixture into a piping bag fitted with a fluted tube and pipe decorative shapes onto a lined baking tray*. Bake for 12 – 15 minutes or until golden brown. Remove from oven and cool on wire racks. When cold, dip half the biscuit in the icing.
For icing, combine sifted icing sugar, softened butter and passionfruit pulp, mix until smooth. Stir over hot water until smooth and glossy.
My tips/alterations: *As mentioned, the original recipe used less flour than I did then the mixture is put through a piping bag. I kind of like the mistake that I made by adding extra flour because it meant that there was no piping involved and that I ended up with a shortbread type biscuits. I used a small ice-cream scoop to make sure each biscuit had the same amount of mixture then shaped them into flatter discs. You could just use a spoon if you prefer.

ease: 8.5/10. This is the score for the way that I made them, without the piping.
prep time: 30mins. Rolling the mixture into balls takes most of this.
cooking time: 15mins.
total: 45mins.
taste: 8.5/10. These have a lovely shortbread texture with the occasional pop from the seeds of the passionfruit that were distributed throughout each biscuit. The absolute hit of these is the combination of the biscuit and icing. The textures and flavours work so well together that you can not imagine they should ever be separated. They even impressed some guests, which is always a nice thing.
would I make it again: I think there will be a demand to do so.

Seeing the final few leaves fall from the frangipani tree signified that winter is just around the corner. This makes me feel a little sad because I love the summer and autumn months in Perth. The heat can be exhausting when it is at its most intense but the autumn months are slightly cooler and much more pleasant to have friends over to dine alfresco. We are fortunate enough not to get snow during the winter and after living in central USA (Indianapolis to be exact) for a few winters I truly know how lucky I am living in this gorgeous city down under. However, we do have cold enough weather to inspire me to want to cook wholesome, comfort food that makes you forget how cold it is outside.
Tonight I decided to try a recipe that I had seen in one of my magazines recently. It was from Rick Stein, who happens to be one of the celebrity chefs I admire. It also had an Indian theme to it and this is one of the cuisines that I love to cook. I am often asked what my favourite cuisines are to cook and my reply usually includes the fact that I love to cook with spices so therefore Thai, Indian, Spanish and the like are my favourite cuisines to try and create. I simply love the layering and depth of flavours that you can create when using different spices and combining them in a harmonious way.
Don’t be put off by the list of ingredients, if you try this recipe and you will be rewarded.
aromatic chicken pilau with cinnamon, tomato and nutmeg – (recipe from Rick Stein, delicious Magazine June 2010)
serves 6-8
Ingredients
750g mixed chicken breast and thigh fillets, cut into 3cm pieces
75g ghee or 2 Tbsp oil
2 x 5cm cinnamon quills or 10 pieces cassia bark
10 cloves
10 green cardamom pods
2 bay leaves
6 garlic cloves, finely chopped
10cm piece ginger, finely grated
2 large onions, halved, thinly sliced
1 Tbsp coriander seeds, roasted, ground
2 tsp cumin seeds, roasted, ground
1 tsp freshly grated nutmeg
1/2 tsp kashmiri or regular chilli powder
400g fresh or canned tomatoes chopped
1 tsp ground turmeric
2 cups (400g) basmati rice
12 curry leaves
chopped coriander leaves, to garnish
Preparation
Preheat oven to 180°C.
Season chicken lightly with salt and pepper. Melt ghee in a large, flameproof casserole over medium-high heat. Add the cinnamon, cloves, cardamom and bay leaves and sizzle for a few seconds until aromatic. Reduce heat to medium-low, add garlic and ginger and cook gently for 2-3 minutes. Add onion and cook, stirring occasionally, for 15 minutes or until very soft and lightly golden. Add coriander and cumin, nutmeg and chilli and fry for a further 2 minutes.
Stir in chicken and cook for 5 minutes or until lightly coloured all over. Add tomato, turmeric, 2 cups (500ml) water, 2 tsp salt and 1 tsp pepper and bring to a gently simmer. Stir in rice and curry leaves. Bring back to a vigorous boil, stir once, then cover with a tight-fitting lid. Transfer to the oven and bake for 20 minutes or until rice is tender and chicken is cooked through. (You could do this on the stove if you can maintain a constant low heat).
Remove pilau from the oven and stand for 5 minutes, then fluff it up with a fork. Serve sprinkled with coriander.
My tips/alterations: *Makes sure you don’t overcook this dish as it will go claggy. Most of the ingredients are available at supermarkets and/or asian food stores.
ease: 7/10. This isn’t difficult there is just a little bit of work involved in the preparation.
prep time: 15mins. Rolling the mixture into balls takes most of this.
cooking time: 50mins.+ 5 minutes standing.
total: 1 hour 10 mins.
taste: 8/10. The mixture of spices in this dish was delicious and you could actually taste each one. We were surprised by the depth of flavour that was achieved through such a short cooking time. The process left the chicken tender and tasty. I loved the fact that this was a one pot dish and that the rice was in with the rest of the dish, it made it so much easier to prepare.
would I make it again: Yes. Winter weather will not seem so bad with a bowl of this in front of me.

For purely selfish reasons I really don’t want to tell you about this wonderful property because I know next time I want to visit there is the possibility that it will be unavailable. Alas, I committed to share all parts of my food journey and technically this is part of it. Doh! 🙂
The best way I can describe this property is like a home away from home, although I wish my home was this gorgeous. Jeanette & Brian Evill are the wonderful owners and hosts of this fabulous oasis nestled in the rolling hills and beautiful forest just outside of Pemberton. There are currently two chalets on the property and they are secluded from each other and the main residence by the stunning surroundings. A small manmade lake and some picturesque walking paths throughout the property add to the feeling of being able to temporarily leave behind the norm of everyday life.
This retreat hosted its first guests in November 2007 and was designed to meet the growing demand for couples seeking a luxury romantic getaway in a forest setting, offering style, spacious living and personal service. The market it has been targeted to service ranges from young couples who are looking for that special place to relax, to honeymooners, corporate stays and overseas guest.
G & I have stayed in a variety of accommodation throughout the country and around the world so we have a vast range of comparison. To us it is the small details that make one place stand out over others. Small wildflowers on pillows and towels, a throw rug on the couch and the lights turned on for our arrival all made us feel extremely special, which is exactly how our hosts wanted us to feel.
The chalets were designed by the owners and built by a local builder with the owners son Blair doing most of the timber work including furniture using materials from the property. Both chalets are open plan with a well equipped kitchen, dining room and lounge room all of which are heated by a gas log fire and reverse cycle air conditioning. The colour palate is aligned throughout the chalet and made it feel warm and inviting. A king size bed (complete with electric blankets) takes pride of place in the centre of the open room that has views through the forest and across the lake. Through an open doorway is a large bathroom with a spa big enough to have a party in or at least to allow two people to stretch out comfortably. Nearby there is a large shower area and plenty of bench space surrounding an above bench basin. One of the best things about the bathroom was the fluffy white robes which are not something I normally use but these were so soft and warm I couldn’t resist.


On our first night the power went down for a short time and just as we were preparing to go to reception Jeanette arrived at our door to explain the situation and deliver a basket of extra candles. A generator sustained us until local power was reinstated and we had also discovered a torch in the cupboard when we were unpacking. We found this all to be very hospitable and well thought out.
We spent quite a bit of time in our chalet because we would head out in the morning to explore the region, stop somewhere for a nice lunch and spend the late afternoon and evening watching a movie and chatting in the chalet.
I think Jeanette & Brian were lucky to get rid of us when they did as this is certainly somewhere that we could stay for a long time.
service: 9/10. Wonderful and helpful hosts who go out of their way to ensure your stay is perfect.
ambiance: 9/10. If it is a romantic secluded getaway that you are looking for, this is the place.
would I do it again: Absolutely, just don’t tell your friends, the less people who know the better………for me 🙂
Going away on holidays can be a combination of stress and relief. The stress comes when trying to organise everything and also working out what to do while away. G and I are both meticulous when it comes to researching all the details to the nth degree, sometimes ending up with too many choices. However, when we recently took a trip down south (South West WA) I decided to limit the amount of research and to allow the rest of the trip to flow along once we were in the region.
We decided to keep away from the busy times as neither of us like crowds of people so visiting during the week was perfect for us. Pemberton was our first stop and after a smooth drive that took a lot less time than expected we arrived at Lost Lake Winery (recommended by our accommodation owner). We had a booking for lunch so decided to do a little wine tasting beforehand. The weather for our arrival was that of a typical early winter south west day, slightly wet with a chilly wind that was enough to wipe the smile off your face. Luckily the winery had an open fire that was well underway and had begun to warm the expansive room and vaulted ceiling of the restaurant. Lost Lake is a relatively new vineyard being established in 1990 and owned by the Masters family since 2006. The winery and restaurant are perched on top of a hill overlooking the rolling country side and a picturesque lake.
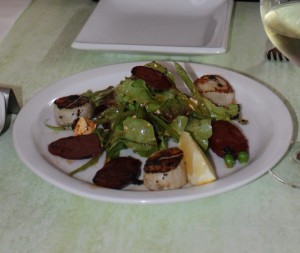
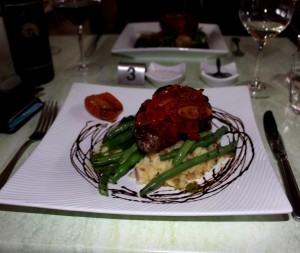
The staff were friendly and informative, even slightly generous with their wine tastings. We really enjoyed their 2008 Classic White, 2007 Barrel Select Cabernet Sauvignon and 2008 Pemberton Red (49% Shiraz; 44% Cabernet Sauvignon; 7% Merlot). Having finished our tasting we were seated early for lunch with our attentive waitress delivering water and our choice of wine just as we were ready to order our meals. We chose the Seared marinated scallops and venison chorizo on a pea, marinated feta and mint salad with a mint vinaigrette as a shared entree. A tipple of 2009 Pemberton Classic White was recommended as an accompanying wine and who were we not to take on such advice, so we indulged. The dish was presented well although the scallops were a little darker than I would normally like, luckily their texture was perfect. The venison chorizo had a string flavour that blended well with the scallops and was lifted by the pea and mint salad. This was a lovely way to start our meal. For my main meal I chose Caramalised roast pork belly infused with a sauce of cinnamon, cardamom and orange marmalade with seasonal vegetables and garlic roast potatoes and G decided upon the Grilled local 250g beef eye fillet served on Pemberton potato, bacon and scallion colcannon, topped with capsicum and tomato relish served market vegetables. A red was recommended with both of our choices and we settled on the 2007 Barrel Select Cabernet Sauvignon.
When our meals arrived we were equally impressed with the presentation of both dishes and this was only surpassed by the first mouthful. The intensity of the sauce on the pork dish was immense and without combining it with the rest of the meal it was almost overpowering. However, once combined with the soft pork, perfectly cooked beans and fluffy potatoes it melded into a sublime and tantalising mouthful. G requested his eye fillet be cooked medium rare and the chef nailed it. This perfectly cooked beef combined with the hearty colcannon and slightly spicy relish took the flavours of comfort food to a new level of excellence. All of this combined with perfect service (something sadly lacking in some of the best establishments in Perth) was enough to make us want to come back again. Unfortunately they weren’t open for meals during the rest of our stay in the region. So we decided to stretch our long lunch a little further and ordered dessert and coffee. The dark chocolate tart was the desired sweet treat and a long macchiato each. Like the rest of the meal neither of these elements were a disappointment. The coffee was served traditional style with a small jug of hot milk in case we wanted them topped up, a nice touch. The tart was stunning and as rich as you would expect such a devilish dessert to be. The double cream and raspberry compote were both divine additions.
We left this fine establishment feeling like we had discovered one of the hidden gems of this relatively untouched region.
 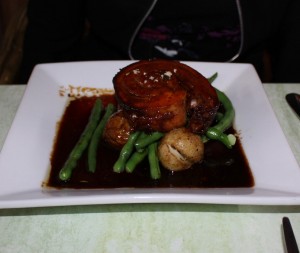
food: 9/10. I’m not sure how this could be improved but I need to have a little room to move when scoring in the future.
service: 10/10. Generous and informative wine tastings along with perfect wait service during lunch made our experience so much better. We were also able to take the wine that we didn’t drink during lunch home with us.
ambiance: 8/10. The exterior of the building and the view are impressive but the inside of the building just didn’t seem to match the level of the food. The open fire and friendly staff contributed to the positive end of the score.
would I eat here again: Yes. I just wish that we lived a little closer.

Cookies (or biscuits if you live down under) are one of those things that can make anyone weak at the knees when they are fresh from the oven, especially if they are chocolate chip cookies. I think that people who love baking are always on the hunt for the best recipes for classics such as these, I know I was, until I made these.
I decided to make these because we were going away on a holiday and I thought it would be nice if we could sit in our chalet with a warm cup of coffee and delicious cookies while we watched the rain outside. It was perfect, just as I imagined. I looked at a lot of recipes for these little gems before going back to my old faithful from the Women’s Weekly “Big Book of Beautiful Biscuits”. I used to make these often but have wanted to try different things of recent times so these have been omitted from my repertoire. I was so happy to rediscover them.
We had to ration these during our time away and they still didn’t last the week. I am sure they will be a significant part of our holiday memories. Unfortunately holidays only happen every so often; luckily the same does not need to be said about making these cookies!
chocolate chip cookies – (recipe from The Australian Women’s Weekly Big Book of Beautiful Biscuits – adapted by Fiona at Food 4 Thought)
makes about 35
Ingredients
125g unsalted butter
1/2 cup sugar
1/2 cup brown sugar (lightly packed)
1/2 teaspoon vanilla extract
1 egg
1 3/4 cups self-raising flour
1/4 teaspoon salt
150g dark chocolate chips
Preparation
Preheat oven to 180°C.
Cream together butter, both sugars and vanilla until light and fluffy. Add lightly beaten egg gradually, beating well after each addition. Mix in sifted flour and salt. Add chocolate chips and mix well to distribute throughout dough.
Shape teaspoonfuls of mixture into small balls, place on a lined oven tray allowing room to spread slightly. Bake in oven for 10 – 12 minutes, until just golden brown. Remove from oven and cool on wire rack.
My tips/alterations: *The original recipe used 125g chocolate chips and 60g walnut pieces. I used Lindt dark chocolate blocks that I smashed up. This meant that there were some large and small pieces throughout the mixture. *I made my cookies about half the size of a golf ball or a little bigger. That way they were bit size and you didn’t feel guilty for having more than one……or two.

ease: 9/10.
prep time: 30mins. Rolling the mixture into balls takes most of this.
cooking time: 12mins.
total: 42mins.
taste: 9/10. Fresh from the oven I think I ate tested four, or maybe five. After they had cooled I had to try another just to make sure they were the right texture. Crunchy on the outside, soft in the middle, perfect. The dough is a little sweet because of the two different sugars and the dark chocolate has a slight bitterness to it, they balanced each other in complete harmony. I could rave about these all day long but I think you should do yourself a favour and make them.
would I make it again: Absolutely. These won’t slip off my repertoire again.

Birthday cakes can come in all shapes and sizes and can range from something simple to quite elaborate. For my Birthday this year I wanted to make something that we could eat as a dessert. Pears are in season at the moment and I absolutely love bosc pears. They have a slight crunch that gives way to their sweet juicy inner flesh as you bite into them. They also hold their shape extremely well as they cook so they are great to use if you are trying to create a pattern like you do when making an upside down cake.
The first upside down cake I remember making was a pineapple one that I made when I was about twelve years old. I loved the way it looked so pretty once it was turned out of the tin. It was completely different from making other cakes because you really aren’t sure how the top will look until the baking is finished.
When I found this recipe that combined one of my favourite fruits with the excitement and anticipation of seeing how it would look when it came out of the tin, I couldn’t resist. I hope you enjoy making this as a dessert or a cake or maybe even for a Birthday.
upside down caramel cake – (recipe from The Sydney Morning Herald – adapted by Fiona at Food 4 Thought)
serves 10 – 12
My tips/alterations: *When making caramel be sure not to stir it once the sugar has dissolved. This will cause the sugar to crystallise. The best method is to swirl the pan. Don’t over caramelise the sugar when making it for this recipe as it will set too hard when the cake is cooked. *I didn’t have an orange so I just used the zest of a Meyer lemon. It has a sweeter flavour than other lemons so worked very well. *I used a fan forced oven and this cake cooked in 30 minutes.
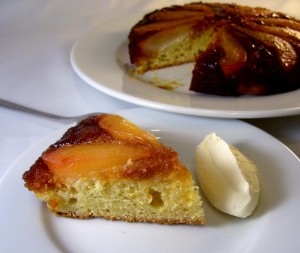
ease: 7/10. Caramel can be a little tricky, the rest is simple.
prep time: 15mins. If you cut the pears and make the batter while the caramel is cooking.
cooking time: 30mins.
total: 45mins.
taste: 8/10. We ate this warm, served with a dollop of cream. G rated this 4/5 and said it wasn’t really a stand out. I loved it. The pears were suitable soft, the caramel sticky and partially absorbed into the top of the cake and the cake itself was spongy and light. I am not really sure what else you could ask for. Luckily this was my birthday cake so I was the one who was supposed to enjoy it the most. 🙂
would I make it again: Yes. As a dessert for friends, or as a birthday cake.
Upside down caramel pear cake – Recipe from Cuisine.com.au
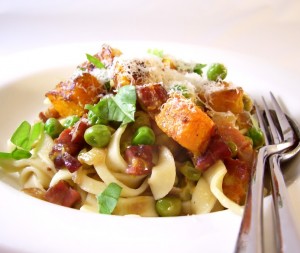
I’ve been making pasta for a little while now. For my Birthday last year I was given some gift vouchers to kitchenware stores from many friends (sincere thanks to you all). Late last year I finally decided that I really wanted the pasta attachments to add to my Kitchen Aid mixer. Up until that point I had been using a hand turned machine that I had borrowed from a friend. It was never attached to my bench because the clamp wasn’t wide enough and the table used to move too much when I clamped it on there so I only made it occasionally, now I like to make it a little more often.
So for my Birthday this year (which was yesterday 🙂 ) I decided I would make us one of our favourite pasta dishes. I know what you are thinking, cooking on your Birthday, are you crazy?! G asked me the same question and suggested that we go out somewhere nice or order in take away at least but we are going away soon so I suggested that we save our money and have a nice meal while we are away. Besides, being a self confessed cooking addict there are not many times that I don’t feel like cooking. I started with the sauce because it is the kind of thing that you can get all the preparation done then just pull it all together at the end and then I moved onto the pasta.
I digress slightly to put the next part of my story into perspective. When I started my blog I committed to being completely honest about my cooking journey and to share the good along with the bad and the ugly therefore giving you the whole experience.
Back to the pasta. I like to make my pasta with enough time to allow it to rest for a minimum of 30 minutes, I find this make silky dough that cooks well and tastes delicious. So I started making my normal mix of 200g of Tipo 00 flour with 2 large eggs. I allow the kitchen add dough hook to do most of the work for me then bring it together at the end with my hands so that I can feel the texture. My first attempt (yes, there was a second), which has never failed before, was quite stiff and crumbly but I thought resting it would allow it to relax and that it would come together when I rolled it through the machine. So after 30 minutes I removed it from the refrigerator and began rolling. It felt completely wrong. It was much firmer than normal and tore every time I ran it through the pasta rollers. It started to come together slightly and I thought all would be fine but my gut feeling was telling me to make it again. By this stage it was 7pm, so I was more than a little reluctant to do so. I played with the dough again and knew that my feeling was indeed correct. I couldn’t believe that of all the days for something not to work it had to be on my Birthday! So more flour, eggs and time later a second batch was produced. I am pleased to say it was silky smooth and rolled out perfectly, albeit an hour later than expected but an extra glass of wine helped to fill the void.
I guess the things that I would like you to take from my story are that when cooking, no matter how many times you have done something before things can still go wrong even if you follow the process exactly, and, always follow your gut feeling, in cooking and in life. In my case I think that the eggs were just a little smaller than normal and therefore not enough liquid was added to the flour. Adding more later would have made the mixture too sticky I think and in my case starting again proved to be the best decision.
The pasta turned out wonderfully, the sauce worked a treat and we sat down with a lovely Sav Blanc and devoured it all.
I hope you take this recipe and make it your own. You don’t have to make your own pasta but I encourage you to use fresh rather than dried. Some supermarkets stock it now and often delis and continental stores make their own. For those people in Perth, the Re Store has some good fresh pasta. Let me a comment if you know of other places to buy it. I will give you some ideas in the tips section regarding ingredient options, so read on. Enjoy!
fettuccini with roast pumpkin, pancetta and peas – (recipe by Fiona at Food 4 Thought)
serves 2
Ingredients
650g butternut pumpkin, peeled
1/2 tsp coriander seeds – optional *
1/2 tsp fennel seeds – optional *
1 tsp sea salt
pinch of dried chilli flakes – optional *
1/4 tsp cinnamon – optional *
2 Tbls olive oil
200g onion
150g smoked flat pancetta
2 gloves of garlic, crushed
1 cup dry white wine
250g frozen peas, defrosted
1/4 cup thick cream
torn basil leaves and parmesan cheese, to serve
Preparation
Preheat oven to 190°C. Cut the pumpkin into 2cm dice, toss in 1 tablespoon olive oil and spread out on a lined baking tray. Place coriander seeds, fennel chilli and salt into a mortar and pestle and pound until it becomes a fine powder. Add the cinnamon and mix to combine. Sprinkle over the pumpkin and roast for 25 – 30 minutes, until golden brown and softened. *If you do not want to use the spices just add the salt and bake.
Bring a large pot of water to the boil and once boiling add a small handful of salt, then bring back to the boil.
Meanwhile, add remaining olive oil to heavy based deep frying pan, dice the onion into 1/2cm pieces and add to the pan. Sweat onion over medium heat with the lid on the pan, stirring occasionally, for 10 minutes or until softened and golden. Remove from pan and set aside, repeat the same method with the pancetta. It should become crisp but you may need to remove the lid to achieve this. Remove from the pan and add to onion. Pour off most of the oil, add crushed garlic and cook for a minute, then pour in white wine and allow to boil for a couple of minutes.
Add pasta to pot of boiling salted water and cook for the desired time.
To finish the sauce, add onion pancetta, roasted pumpkin and peas to the pan. Stir gently and cook for 4 – 5 minutes until peas are cooked. Add cream and stir gently to combine all ingredients. Check for seasoning and adjust as you wish.
Remove pasta from pot and add to the sauce. Fold pasta and sauce together. Add a couple of spoons of pasta water to loosen the sauce if necessary.
Sprinkle with torn basil and grated parmesan cheese and serve.
My tips/alterations: *If you don’t want to use the spices you can simply season the pumpkin with salt and pepper before roasting. *Substitute the smoked pancetta with plain pancetta, streaky bacon or normal bacon. *If you’d like to make this ahead of time you can roast the pumpkin and cook both the onion and pancetta and set them aside. That way you can just assemble the sauce towards the end of the pasta cooking time. *Adding a small amount of the pasta water helps the sauce to coat the pasta thoroughly.
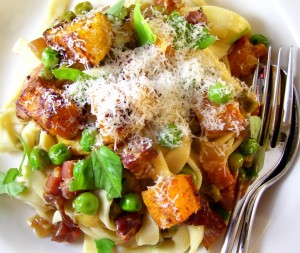
ease: 7.5/10. The sauce is fairly simple, making your own pasta is also not difficult if you have a machine.
prep time: 15mins. plus time to roll your pasta if you make your own.
cooking time: 30mins.
total: 45mins.
taste: 8.5/10. This dish has a good balance of flavours with the saltiness of the pancetta, sweetness of the pumpkin and peas and freshness from the basil. The spices on the pumpkin and the smoke from the pancetta just add another dimension. It is a rich, delicious comfort food that is great in the cooler months.
would I make it again: Many times.
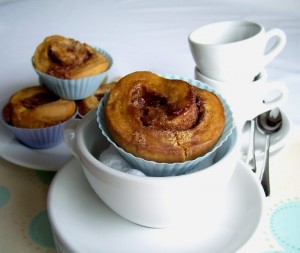
Sunday is normally the day when I have a small window of time to bake a little and it is a time that I treasure. Baking is something that makes me feel satisfied, brings a warm feeling to my heart and makes me feel like I am nurturing those I love. One of G’s favourite ingredients is cinnamon, he loves the scent that it delivers along with the flavour. Studies show that men associate cinnamon with love so when I bake anything with cinnamon in it I know that he feels that little bit of extra love from me. 🙂
I have been on the lookout for an easy cinnamon scroll recipe for some time. Normally they involve yeast, possibly rising overnight, in all, a little too much hassle. They are also quite calorie laden as they are gorgeously sticky which, of course is part of the attraction but given that we are both watching our waistline at the moment I also wanted a slightly lighter version.
Discovering this recipe a few weeks ago meant that it went onto my “must bake” list and today was the day. G was doing some work at his Mum’s so I decided to make afternoon tea for anyone in attendance. Hopefully my creation would make everyone feel loved!
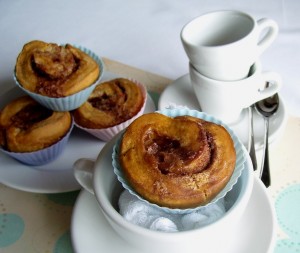
cinnamon roll muffins – (recipe from Ruby Glen – adapted by Fiona at Food 4 Thought)
makes 12
Ingredients
1 cup milk
1 tablespoon lemon juice
1/2 cup brown sugar (firmly packed)
1/2 teaspoon salt
2 teaspoons bicarbonate soda
1 egg
1/2 teaspoon vanilla
3 1/2 cups flour
60g soft butter
60g sugar
2 teaspoons cinnamon
Preparation
Preheat oven to 180°C.
Combine milk and lemon juice, set aside. In a bowl stir together brown sugar, salt and bicarb soda. Mix in egg, vanilla and then milk mixture. Stir in flour to form a firm dough. Transfer to a floured surface and knead for a minute until silky. Do not overwork as it will become tough.
Roll or press dough out into a 20cm x 30cm rectangle. Spread with butter leaving about a 1cm border on every side. Combine the sugar and cinnamon, sprinkle over the butter. Roll up starting from the longer side to make a 30cm log. Cut into 12 pieces approximately 1 – 1½cm thick. Place pieces into a greased or lined 12-hole muffin tray. Bake for 20 minutes, until golden brown.
Remove from oven and serve warm or at room temperature.
My tips/alterations: *You can substitute the lemon juice with vinegar if necessary. *It may seem odd to use bicarb soda rather than baking powder but there is a reason for this. This link provides a good explanation of the process. *I think this dough could benefit from a short resting time once it is kneaded. Next time I make these I would rest the mixture for 15 mins before rolling it out. I think it will give the muffins a softer texture. I would also press the edges firmly into the muffin trays to encourage the centre to pop up a little more. *We added cinnamon cream to this. I made it by simply whisking ½ cup of cream until it holds shape, adding 1 Tbsp icing sugar and 1 tsp cinnamon. Whisk until soft peaks form. This may seem sweet but the dough is not so they work well together.

ease: 8/10.
prep time: 30mins.
cooking time: 20mins.
total: 50mins.
taste: 7.5/10. We ate these warm, served with a dollop of cinnamon cream (see My tips above). On their own I thought they had good flavour but were a little dry. Several comments came from the rest of the group. They loved the flavour, especially because they were warm and served with the cinnamon cream. The crunchy outside gave these a great texture and they weren’t as heavy or overly sweet as normal cinnamon rolls.
It was requested that the leftovers be divided up so that everyone could take some home. That is always a good sign.
would I make it again: Yes I would. I would make the adjustments that I mentioned and serve them warm with the cinnamon cream again.
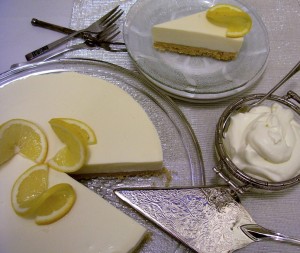
Last Sunday was Mother’s Day and also G’s Birthday. I wanted to be able to look after everyone on their special days so decided to call my Mum interstate, cook breakfast for G’s Mum and create something special for G in the evening. Speaking to my Mum was lovely and I am really looking forward to her visit in a few months. Breakfast consisted of a smoked salmon and asparagus quiche that I made up by adapting the zucchini slice recipe I have written about previously. We also had homemade sourdough toast with eggs and bacon to order. G made us all some delicious coffee. Everyone enjoyed breakfast and we all felt like we needed a midday siesta.
After such a busy morning, G didn’t want me to go to too much fuss for dinner so I decided to create something that I know he loves. Open steak sandwiches (which he continually tells me I need to blog about because he thinks they are sooooo good) and lemon cheesecake. It was about 3.30pm when I decided to make the cheesecake and normally I would have been in a panic that it wouldn’t give me enough time for the cheesecake to set before dinner but I remembered that my Mum used to make a cheesecake that she set with gelatine. I went searching for such a recipe.
A few months ago my Mum very kindly passed my Nanna’s hand written cookbook on to me. It is full of some amazing recipes, household tips and cut outs from magazines. I had flipped through it a couple of times in the past and decided to look in there for the cheesecake recipe. After reading (and giggling at) some of the things that didn’t have oven temperatures, others that had no cooking time and some that didn’t even have measurements I found a cut out for exactly what I wanted.
I made this for my man, the new family in my life. I hope it also honours my Mum and my Nanna who both gave me the recipe and ignited, and continue to feed, my passion for cooking in their own way.
 Gorgeous roses - A gift from G's Mum's garden
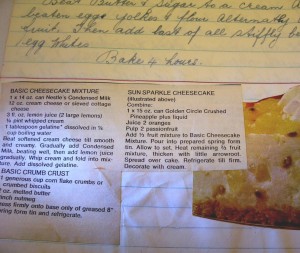 - An excerpt from my Nanna’s recipe book
lemon cheesecake (adapted from my Nanna’s cookbook)
makes 1 x 20-22cm cake
Ingredients
250g marie biscuits
125g butter, melted
340g cream cheese, softened
1 x 395g tin condensed milk
90ml lemon juice
140ml thick cream, whipped
4 x gelatine leaves
to serve, extra cream
Preparation
Crush biscuits into fine pieces. Place crushed biscuits into a large bowl, add melted butter and mix to combine well. Pour biscuit mixture into the base of a 22cm spring form tin, press down firmly to create an even base. Place this in the refrigerator while you make the filling.
Place the cream cheese into a large bowl and beat until smooth and creamy. Gradually add the condensed milk, beating well, then add the lemon juice a little at a time. Fold in the whipped cream.
Place gelatine leaves into enough cold water to cover and allow to soften. After a minute or two they will feel like jelly. Squeeze out the excess water leaving a small amount in the leaves, place into a small bowl. Place into the microwave and cook on high for 15 – 20 secs, just enough to turn it into a liquid. If it is not loose enough add a small amount of hot water to make the mixture liquid enough to pour into the cream cheese mixture. Fold this through the mixture and pour over the base.
Before placing the cake into the refrigerator to set, shake it gently to allow any large air bubbles to come to the surface and break down. Chill for 1 1/2 hours minimum. It is set when the centre is firm if the tin is moved.
Run a flat blade knife around the inside of the cake tin to loosen the sides, remove from cake tin and cut into slices.
My tips/alterations: *The original recipe was in ounces and pints so I have converted everything accordingly. *I used my food processor to crush the biscuits but you can use a rolling pin. I used a flat bottom glass to pack the biscuit base into the tin, it makes it easier to keep the edges smooth. *I used the ratio of 1tsp powdered gelatine equals 1 gelatine leaf. If you use stronger gelatine leaves ie more than gold you will need to reduce the amount. The gelatine and the reaction between the cream and lemon juice meant that this cake set in about 1 ½ hours. I was a little worried that it might be too firm but the consistency was gorgeously silky and allowed us to cut thin slivers without the whole thing collapsing. I think I would possibly try half a gelatine sheet less just to give it a little more softness but that is just me being very picky.
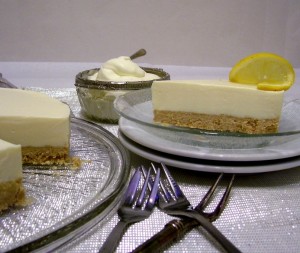 ease: 8/10. I think the hardest part is to try and get the base even. Gelatine sheet are easy to use, just follow the directions. ease: 8/10. I think the hardest part is to try and get the base even. Gelatine sheet are easy to use, just follow the directions.
prep time: 30mins.
cooking time: No cook required. Chill for a minimum of 1 1/2 hours.
total: 2 hours.
taste: 10/10. Firstly, I am not a huge fan of cheesecake except for the crunchy biscuit base. I know I seem to write that a lot in my blogs (that I am not really a fan of some things) but when I cook it is (hopefully) to satisfy others. It also means that I can be a little more impartial and judgemental on what I create and in turn give you an honest opinion of what I have made. So, back to the cheesecake that I am not usually a fan of. I ate approximately a quarter of this over a few nights and it was sublime. G had two pieces on the eve of his Birthday and has continued to ensure that it still tastes ok by checking it each night since. We passed some onto his Mum who (like the rest of us) also found it quite difficult not to eat more than one piece at a time. So what made it so good? The base was thick and crunchy, not sweet but had that rich buttery flavour that is a must have for any good cheesecake. It blended well with the creaminess of the cheese mixture combined a lovely lemon tang that cut the richness perfectly.
would I make it again: I think my man will make sure I do 🙂
I love the times throughout the year when the seasons start to change. One of the things that I enjoy the most is discovering a whole new range of ingredients that suddenly appear at the markets. Citrus fruits one of the things that I love to see and something that I find extremely versatile, they can be equally as good in both sweet and savoury dishes, can be preserved, candied and even dried. Each cuisine has its own unique use for these juicy little morsels.
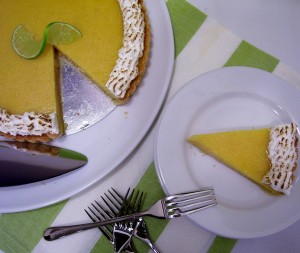
I am fortunate enough to have an almost endless supply of both lemons and limes because G’s Mum has some wonderful trees that produce an amazing amount of fruit. Limes are in season at the moment so I am doing my bit to help out in using them up by making anything I can think of that includes them. I really wanted to make a silky smooth lime tart. Of course there are so many recipes, varying from simple to extremely difficult so I went hunting for the perfect one.
I finally decided upon a Lime Meringue Tart from David Lebovitz. David is a well respected, talented chef, author and blogger who is a native born American now living in Paris (which makes me so envious). I would highly recommend you try this recipe, it is possibly the best lime tart I have ever made.
lime meringue tart (recipe by David Lebovitz )
makes 22cm tart
My tips/alterations: *I followed this recipe to the letter and it turned out wonderfully. *The only thing I would do differently next time would be to make a standard meringue rather than to heat the mixture. The effort just didn’t seem worth it and the meringue was a little difficult to pipe, for an amateur at least. *I didn’t make the pastry by putting a bowl in the oven, I used a saucepan on the stove instead which made it similar to making a roux.
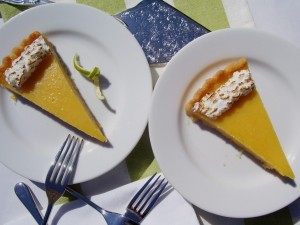
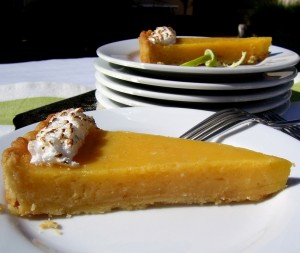
ease: 6/10 There are several elements to this dessert including making lime curd.
prep time: 15mins for pastry, + 15 mins for lime curd, 15mins for meringue.
cooking time: 15mins for pastry, 10 mins for tart, 5mins for meringue.
total time: 1hour 15mins.
taste: 9/10. When you work hard to create something delicious and it is amazing when you eat it, all the effort suddenly disappears from your mind. The pastry was the easiest and best pastry I have ever made and I will certainly be doing so again. It was light and crunchy yet still had that buttery flavour that is an essential part of a citrus tart. This balance very well with the slightly tart flavour of the lime curd which I also loved. All of this topped off with a small amount of sweet meringue and all I could say was…..bliss. This was also a hit with G and friends that we shared it with. You always know when people are willing to take a doggy bag home that you have created something wonderful.
would I make it again: As many times as I can!
Lime meringue tart – Recipe from davidlebovitz.com
French tart dough – Recipe from davidlebovitz.com
Having spent many years working in the health and fitness industry there was a necessity for me to learn quite a lot about nutrition. One of the things that I remember from my days in that field is a quote that explains how our daily food intake should be consumed. “Breakfast like a King, Lunch like a Prince and Dinner like a Porper”. In other words, our biggest meal should be in the morning and our smallest in the evening. Breakfast is something that I have never had a problem with consuming and actually enjoyed, however eating less food throughout the day is something that I have never seemed to master :).
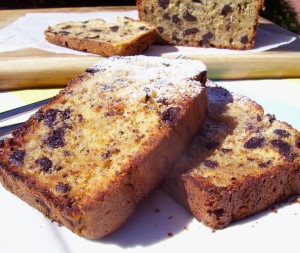
One of the things that G & I love to do is to go out for breakfast. We are both early morning people and neither of us really like crowded places so we usually combine it with a nice drive to our location of choice and devour our meal before most people are even out of bed. G is a coffee mistro so we only go to places that have good coffee. One of our regular haunts is Sayers in Leederville. They know what they are doing with coffee, have fabulous cakes and even better breakfasts. Usually we will have a coffee (or two) then take off because we enjoy having a cooked breakfast at home. On occasion (like we did last weekend) we will have something to share. Banana and chocolate bread was the nourishment of choice that morning :). When it arrived there were two thick slabs of in-house made goodness, toasted enough to soften the chocolate and warm the banana whilst still providing that little crunch that you always want from something that has been burnished under a grill. Sprinkled with icing sugar and butter supplied, we were in breakfast heaven. The flavour was that of a not too sweet banana bread with a tiny amount of bitterness that comes from dark chocolate. Needless to say we were almost fighting over the last bite.
This experience, along with the fact that I still seem to have bananas left over at the end of the week no matter how few I buy and more Lindt chocolate in the house than I care to admit, inspired me to try and recreate this sensational morning feast.
choc chip banana bread (recipe from Best Recipes.com.au – adapted by Fiona at Food 4 Thought)
makes one loaf
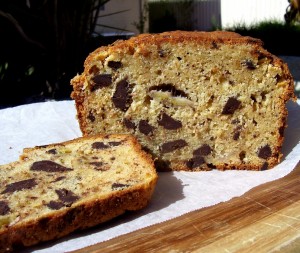
My tips/alterations: *I used 20g less sugar than the recipe suggested because I felt that would create a similar flavour to that of Sayers delight. *I broke up 120g of Lindt 70% chocolate rather than using choc chips. This provided a slight amount of bitterness which balanced really well with the ripeness of the bananas.
ease: 9/10. A normal cream butter and sugar cake method with the addition chocolate.
prep time: 20mins
cooking time: 60mins.
total: 1hour 20mins.
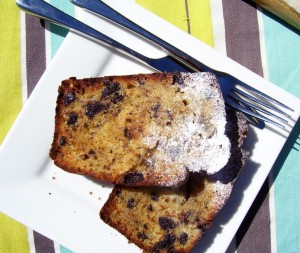
taste: 8.5/10. In my mind anything that has Lindt chocolate in it has to be good. Luckily G is a little more discerning. We replicated the same thick slabs, toasted to perfection, sprinkled lightly with icing sugar and sparingly buttered. The flavours that hit our palates were that of not too sweet banana bread followed by intermittent bursts of rich dark chocolate. We cleansed our tastebuds with great coffee (made by G :)) and our mouths were for ready for the next delicious bite.
We didn’t get to take our usual drive, nor did someone else do the dishes for us but we did manage to recreate our little piece of breakfast heaven.
would I make it again: Yes, yes, yes, yes, yes. – It is devilishly delicious.
Choc chip banana bread – Recipe from Best Recipes.com.au
 Continuing my journey into the unknown depths of my freezer has allowed me to discover certain items that I had completely forgotten about. I’m not sure that is a good thing or something that I should be admitting to but it is a fact. One of those items was a large fillet of crimson snapper. It was a gift from some grateful students given to me some time ago (too long ago to tell you about as it is highly embarrassing :)). Luckily they were keen fishermen who knew exactly how to keep fish in good condition for the longest possible time. It was in a cryovac pack then wrapped in several sheets of newspaper (which told me exactly how long it had been there). I decided to defrost it and see what the quality was like. To my upmost surprise it was in very good condition, which proved that good storage technique is an essential part of cooking. It was a thick fillet so I knew that I wanted to cut it into large pieces and put them into a curry. So I delved into the www to find something of interest. Continuing my journey into the unknown depths of my freezer has allowed me to discover certain items that I had completely forgotten about. I’m not sure that is a good thing or something that I should be admitting to but it is a fact. One of those items was a large fillet of crimson snapper. It was a gift from some grateful students given to me some time ago (too long ago to tell you about as it is highly embarrassing :)). Luckily they were keen fishermen who knew exactly how to keep fish in good condition for the longest possible time. It was in a cryovac pack then wrapped in several sheets of newspaper (which told me exactly how long it had been there). I decided to defrost it and see what the quality was like. To my upmost surprise it was in very good condition, which proved that good storage technique is an essential part of cooking. It was a thick fillet so I knew that I wanted to cut it into large pieces and put them into a curry. So I delved into the www to find something of interest.
I also had some butternut pumpkin that I wanted to use so the recipe that I finally decided upon was perfect. I used this as a base recipe and made my own alterations.
thai pumpkin and fish curry (recipe adapted from Jill Dupleix’s original)
serves 4
My tips/alterations: *I doubled the amount of pumpkin and once it was all softened I removed half of it so that I could blend the mixture with a hand blender. I then added the additional pumpkin and the fish. *I left out the green capsicum because I didn’t have one.
 
ease: 8/10. Using a pre-made paste makes this dish very simple to put together and doesn’t compromise the flavour too much. prep time: 10mins.
cooking time: 25mins.
total: 35mins.
taste: 7/10. I liked this curry because I enjoy fish. G on the other hand thought it was OK because he is not really a fish lover. I usually make my own curry paste so found it a little challenging to use the pre-made paste especially trying to find the right sweet, sour, salty, hot balance that I love about Thai curries. Overall, this was a simple, quick and relatively healthy version of a red Thai curry and who wouldn’t enjoy that.
would I make it again: Yes – If I had fish and pumpkin that I need to use up.
Thai fish and pumpkin curry recipe – From cuisine.com.au
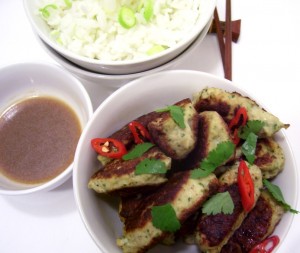 I know this photo doesn’t look like tortellini but I encourage you read on to discover the whole story. I know this photo doesn’t look like tortellini but I encourage you read on to discover the whole story.
Sometimes disasters in the kitchen can be devastating. That is one of the reasons I test my recipes for my classes several times before teaching them. However, other times they can be the perfect opportunity to create something that you have never done before.
Continuing on my journey of cooking different dinners for us I decided to make a dish that I had used some time ago and hadn’t done so for ages. The original recipe makes delicious little morsels that are crunchy yet soft in texture and delicate yet flavoursome on the palate. I made the filling as normal then began to set out my wonton wrappers (the easy way to make tortellini) only to find that because they had been frozen for (I am ashamed to say) way too long that they were dry in parts and not sticking properly when I rolled them. Then after I had boiled and fried them they dried out more than usual. Being a little short on time I thought I’d do the best I could but after my second round I decided on a change of tack.
I wanted to keep using the filling and had the thought of shaping them into quenelles and gently frying them in the same manner that the original recipe referred for the tortellini and that is exactly what I did.
So what I hope I have provided you with in this post is the link to Jamie’s original recipe (which is great) and the courage that if something goes wrong in the kitchen that you can usually turn it around.
chicken tortellini my way (recipe adapted from Jamie Oliver’s original)
serves 4 – 6
My tips: *I used a combination of chicken thigh and breast meat as I like the flavour and texture of both together. If you don’t have a food processor you can purchase minced chicken. *Making queenelles is not difficult once you know how. There are lots of instructions on the net if you search for them. Wetting the spoons that you use to create the shapes will help stop the mixture sticking. *You can always just shape these into small balls if you like.
 The better adaptation  My not so good effort at the original recipe
ease: 7/10. If you haven’t shaped tortellini or quenelles before you may find the technique a little challenging but stick with it as it gets easier the more you do it.
prep time: 30mins.
cooking time: 15mins.
total: 45mins.
taste: 9/10. The tortellini turned out not too bad at all but I have to say the star for us was the filling made into quenelles. They packed a flavoursome punch while still being delicate and had a nice crunch coming from the shards of water chestnut that were distributed throughout the mixture. We ate these with steamed jasmine rice dressed with a mixture of soy, ginger, sesame oil and peanut oil which was a great contrast to the freshness of the chicken. All in all, we loved this.
would I make it again: For sure – Either as the original recipe or my adaptation.
Chicken tortellini recipe – From Jamie Oliver
 I generally have a few staple dinners that I cook during the week. You know what I mean, those dishes that you know take minimum time to prepare and taste great for what they are. Lately though, I have been trying to make sure that I cook a few different things. That, combined with wanting to use up items in the freezer, has meant that I need to be a little more creative. I generally have a few staple dinners that I cook during the week. You know what I mean, those dishes that you know take minimum time to prepare and taste great for what they are. Lately though, I have been trying to make sure that I cook a few different things. That, combined with wanting to use up items in the freezer, has meant that I need to be a little more creative.
Minced lamb is probably my favourite minced meat because it has a sweetness that beef just can’t compete with. So discovering a few packets in my freezer was like finding a wonderful present hidden under the Christmas tree, I was quite excited. (I know it is very sad that I am excited by finding a particular item in my freezer but that is part of the life of a self confessed food/cooking junkie :-)). I even knew exactly what I wanted to do with it. So after searching the www for what I needed, I came up with this recipe. I hope you enjoy it as much as we did.
lamb koftas (recipe from Taste.com.au)
serves 8
My tips: *Use the best quality lamb mince that you can afford as it will make a difference to the finished dish. *I didn’t have a red onion so I just used a brown one and it was fine. *I found that combining the mixture by hand gave me the best result as I could feel that everything was incorporated properly. *You can prepare the mixture ahead of time and refrigerate it for a few hours until you are ready to cook the koftas.
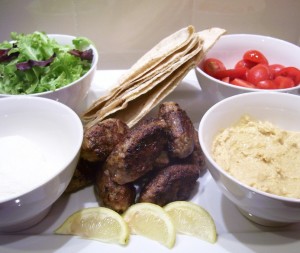 ease: 9/10. ease: 9/10.
prep time: 15mins.
cooking time: 20mins.
total: 35mins.
taste: 10/10. These were delicious. We decided to serve them with salad, hummus, natural yoghurt with lemon juice and pita bread so that we could make them into a kind of sandwich. They were also great just on their own, the spices and freshness of the herbs were balanced well and gave them a delicious flavour. The condiments, especially the yoghurt and lemon juice, just topped them off. G was very lucky to have any leftover for lunch the next day.
would I make it again: Absolutely – I’d just make more of them.
Lamb kofta recipe – From Good Taste, October 2004
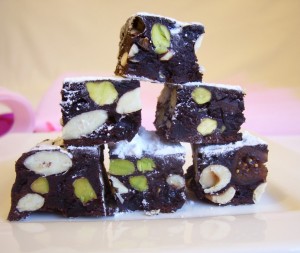 Yesterday was a day of spring cleaning, even though it is autumn at the moment. A couple of times a year I like to clean all of those places that never get cleaned. I also like to go through the fridge and either throw out or use up all the jars of things that say “refrigerate after opening”. They seem to accumulate and multiply on their own while I am not watching. One of the things that I found was a jar of fruit mince that I had partially used around Christmas time. Yesterday was a day of spring cleaning, even though it is autumn at the moment. A couple of times a year I like to clean all of those places that never get cleaned. I also like to go through the fridge and either throw out or use up all the jars of things that say “refrigerate after opening”. They seem to accumulate and multiply on their own while I am not watching. One of the things that I found was a jar of fruit mince that I had partially used around Christmas time.
I had seen this recipe some time ago and thought it was a great idea to use up this particular ingredient. I have made panforte for special occasions although the recipe that I used is much more complex and time consuming. So although I have never been a big one for cheating in any shape or form, this is one instance that I was willing to give it a go.
quick chocolate panforte (recipe from Taste [Delicious Magazine] online)
makes 40 squares
My tips: *Use the best quality cocoa that you can afford, it will give this a richer flavour. *I didn’t have some of the ingredients listed so I substituted the macadamia nuts with almonds and the dried figs with port soaked figs. The other thing that I didn’t have was an orange. My substitute for the zest was a couple of teaspoons of orange blossom water which a wonderfully subtle orange aroma and flavour. All of these ingredients incorporated very well into the dish. *For a really smooth finish on the top moisten a spatula and press it down firmly before smoothing over the top.
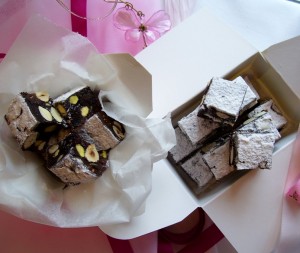 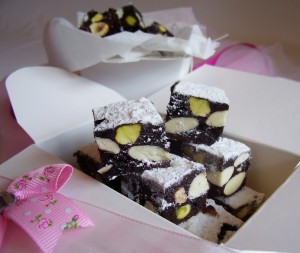
ease: 9/10. This is a basic mix wet ingredients into dry with a little bit of heating involved.
prep time: 10 mins.
cooking time: 18mins.
total: 28mins.
taste: 6/10. There was nothing wrong with this slice perse, it just wasn’t one of those things that wowed us. I wasn’t a big fan because I really don’t like fruit mince but if you like minced pies at Christmas time then I think you would enjoy this, maybe.
I say maybe because G is a huge mince pie and chocolate fan but this slice has been in the house for three days and hardly any has disappeared. Although to clarify, it is competing with the Lindt milk chocolate bunny that I bought for him in the after Easter sale and that is a very tall task.
would I make it again: Possibly – If I needed to use up leftover fruit mince.
UPDATE: Since I posted this dish it has been tasted by a friend who loved it and wanted the recipe immediately. So I guess G and I have just been spoilt with the other panforte that I make and that I would make this again, especially for friends. 🙂
Quick chocolate panforte recipe – From Delicious Magazine -December 2009/January 2010
|


 I know this photo doesn’t look like tortellini but I encourage you read on to discover the whole story.


