A sample text widget
Etiam pulvinar consectetur dolor sed malesuada. Ut convallis
euismod dolor nec pretium. Nunc ut tristique massa.
Nam sodales mi vitae dolor ullamcorper et vulputate enim accumsan.
Morbi orci magna, tincidunt vitae molestie nec, molestie at mi. Nulla nulla lorem,
suscipit in posuere in, interdum non magna.
|

Cooking with seasonal ingredients is something I always try to do. It gives our dishes the best possible flavour because the produce is at its peak when it is in season. It also means that we can (generally) source items from our local area.
This was one of the things I considered when choosing a business name. There are 4 seasons that we use as a planting guide for produce and for setting menus and my cooking classes always have 4 courses.
Hence “Food 4 Thought”. But I digress, back to our seasonal produce.
Recently I delivered a machine to a lovely couple, very excited to receive their new “kitchen hand”. As I was leaving I noticed a large bag of passionfruit by the front door. I mentioned how lucky I thought they were and that I hoped they were going to put them to good use. To which the reply was “Would you like them?” Trying to cover my absolute joy, I asked “Are you sure?”. After hearing how their vine had been prolific and many had been passed on and too many consumed, I didn’t ask again and left looking like a kid who had just raided a candy store. (Thanks so much Sonia and Adam).
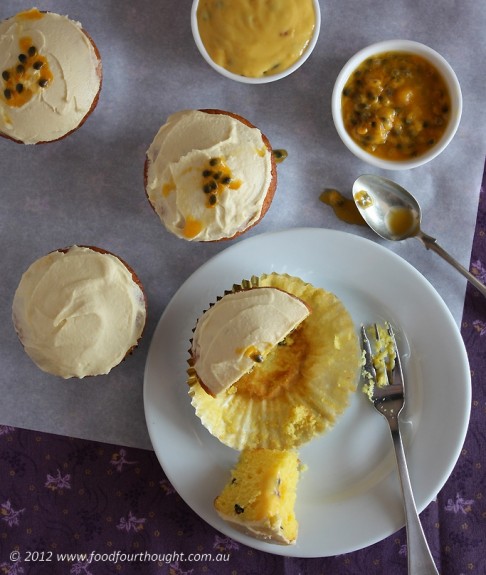
So what is one to do with a bag full of passionfruit? Why Passionfruit Curd of course! It was easy and delicious.
Then one of my gorgeous friends offered me more fresh passionfruit. Not being one able to ever turn away free organic home-grown produce of course I said yes. (Thanks Cherie!). So what next? Passionfruit Cupcakes.
Adapting recipes to the Thermomix is easy. What recipe have you adapted? Leave me a comment below or on my FB page.
passionfruit cupcakes – (recipe adapted by Fiona at Food 4 Thought from here).
makes 12 cupcakes
Ingredients
150g sugar
170g butter, softened
200g self-raising flour
½ teaspoon baking powder
1 teaspoon vanilla extract
3 eggs
100g passionfruit pulp (6 – 12 passionfruit – depending on size)
Preparation
Preheat the oven to 160°C with the fan on (or 180°C for non fan-forced oven). Line and/or spray a 12-hole, 1/3 cup-capacity muffin pan with paper cases.
Add sugar to TM bowl and mill for 3 seconds on speed 9.
Scrape down sides of bowl, add remaining ingredients and mix on reverse for 20 – 30 seconds on speed 5.
Divide mixture between cases. Bake for 20 minutes or until golden and a skewer inserted in centre of one cake comes out clean. Stand in pan for 5 minutes. Transfer to a wire rack to cool completely. Decorate as you wish.
buttercream icing – (recipe adapted from original by Alyce Alexander from “Quick Fix in the Thermomix”).
makes approximately 4 cups
Ingredients
400g raw sugar
340g butter
2 teaspoons vanilla extract
Preparation
Add sugar to TM bowl and mill for 2 minutes on speed 9.
Scrape down sides of bowl, add butter and chop for 5 seconds. Cream butter for 15 seconds on speed 5. *I used room temperature butter so skipped the chopping and creaming stage.
Turn dial to speed 2 and begin adding sugar, 1 tablespoon at a time. Scrape down sides of bowl as necessary. As the mixture begins to thicken with more sugar being added, increase the speed to 3 and then to 4. Once all the sugar is added, mix at speed 4 for 30 seconds or until the mixture is creamy.
If texture is too soft to spread or pipe, refrigerate for 15 minutes.
My tips/alterations: CUPCAKES – *Don’t overcook these cupcakes as they will dry out too much. *This recipe is so easy and could have other fruit or flavour added instead of the passionfruit. *I used reverse to mix the cupcakes so that the passionfruit seeds weren’t broken up. *I used a mini ice-cream scoop to ensure the mixture was divided evenly between the cases. You can use anything you like so long as it is equal in each case. BUTTERCREAM – *It might seem excessive to pulverise the raw sugar for that length of time, however, to reach the desired consistency for the icing it needs to be super fine and aerated. *I used a small amount of what the recipe makes because I decided not to pipe it onto the cupcakes (due to it being 30°C outside and the kitchen being warm) so I stored the remainder in an airtight container in the refrigerator. When I want to use it again I will mix it on speed 4 until it is smooth again. *You can add fruit, chocolate or coffee to the icing to make it whatever you want it to be.
You could use the cupcakes with the buttercream and have a wonderful result. However, being one to always like a surprise when it comes to food, I decided to add a little something extra to the centre of these beauties. I used an apple corer to make a little well in the centre of each cupcake, then piped in some of the delicious passionfruit curd that I had made recently. (See below for picture reference). If you don’t have a piping bag, are scared of piping of simply can’t be bothered, here are some options. No piping bag – use a zip lock bag that you would normally store food in and cut off the corner. Scared of piping – take two teaspoons. Use one to spoon the mixture into the cupcake and the other to push in gently into the well.

What to do with the little pieces that come out of the cupcakes? They are like donut holes, delicious to eat on their own. 🙂
ease: 8.5/10. If you have never filled a cupcake that might be a little tricky. If you decide to leave it out I would rate this 9.5/10.
prep time: 15mins.
cooking time: 20mins in the oven + cooling time.
total: 35 minutes + cooling time.
taste: 9/10. I love the surprise of the curd and the buttercream icing just finishes these off beautifully.
would I make it again: Yes. Whenever I am fortunate enough to have excess passionfruit.
I never thought I’d own a Thermomix, let alone actually be doing in-home demonstrations and loving being an Independent Consultant for the product.
Why? You might ask. Sometimes I tell my story about how I started in this business during my demos. Briefly, I owned every kitchen appliance known to man. I was as addicted to buying kitchen “gadgets” as much as many of my friends were to buying clothes and shoes.
Then one fine Sunday summers afternoon, my gorgeous girlfriend Alex invited me to a Thermomix demo. Being one of the “foodies” in the group meant that I needed to know what this thing was and its capabilities. So I did 2 weeks of solid research before attending the demo. Upon arrival I told all twelve other guests that they needed to buy one because they were amazing (I watched many YouTube videos and – despite my intense searching – couldn’t find anything bad about it on the internet). When asked if I was going to buy one I told them all that I had everything and didn’t need “another kitchen appliance”.
By the end of the demo I was blown away and waited until everyone else left to chat to the Consultant. I didn’t purchase then and there despite my excitement. I (like many of my clients) couldn’t justify the cost and needed to digest what I had seen as it was slightly unbelievable. My Consultant was wonderful and kept following up with me to see if she could assist (and thank goodness she did). Three weeks later (after more research) I signed up with Thermomix and my life changed forever. I no longer stand in the kitchen for hours after work, cooking is exciting again and not a chore. The best thing (or two), we are eating natural healthy food with no chemicals and saving money!
Now I adapt my old recipes to the Thermomix and share them with you all.
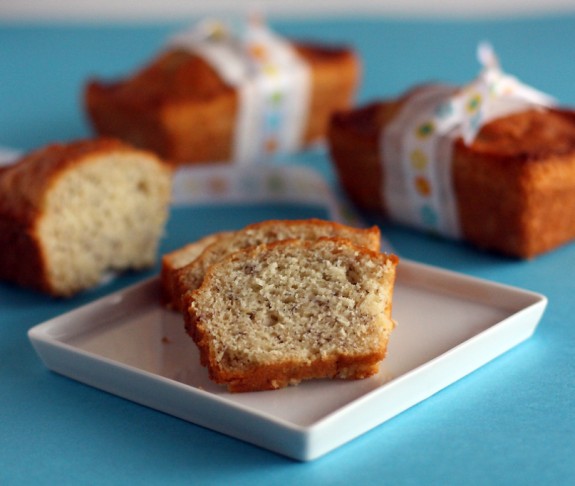
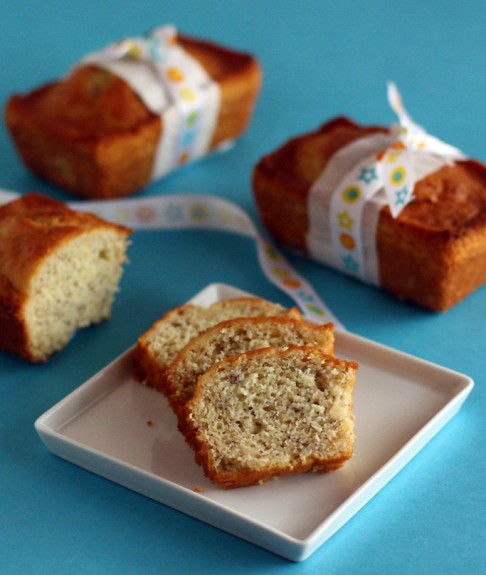
This is my Nanna’s recipe that I have been making for many years. I like it because it is (to me) a true Banana Bread rather than a cake that is called bread. So you will find it not that sweet, firmer than some other recipes and hopefully more delicious :).
I’d love to hear what recipe you’ve changed over to the Thermomix. Leave me a comment below or on my FB page.
banana bread – (recipe by Fiona at Food 4 Thought).
makes 1 loaf or 4 x 250g mini loaves
Ingredients
120g sugar
60g butter
280g self-raising flour
1 teaspoon baking powder
½ teaspoon salt
2 eggs
150g milk
1 teaspoon vanilla extract
300g banana flesh, in chunks (from 2-3 ripe large bananas)
Preparation
Preheat the oven to 170°C with the fan on. Line and/or spray a loaf tin or 4 moulds approx. 250g in each.
Add sugar to TM bowl and mill for 3 seconds on speed 10.
Scrape down sides of bowl, add butter and heat for 50°C, for 2 minutes on speed 1.
Add remaining ingredients and mix for 10 seconds on speed 5.
Pour into prepared moulds. Bake for 45-55 minutes for large loaf tin or 25-30 minutes for smaller cakes or until golden and a skewer inserted in centre comes out clean.
Slice when cool and serve with a smear of soft butter.
My tips/alterations: *If you prefer to have chunks of banana in your bread use the reverse button for the final mix. *I have used two different size loaf tins for this recipe – 26cm x 10cm and 21cm x 11cm – and both work equally well. *Previously I have done a recipe for Chocolate chip banana bread. I have since made this recipe and added 100g Lindt 70% dark chocolate (broken into smallish pieces) when I added the banana chunks. YUM!
ease: 9.5/10. It doesn’t get much easier when it comes to baking.
prep time: 5mins.
cooking time: 55mins in the oven.
total: 60 minutes.
taste: 9/10. I love that this is not too sweet and you can taste the bananas. It is great toasted for breakfast, as a lunchbox snack or even just with a cup of tea.
would I make it again: Yes. It has always been a quick easy staple in our house. Now it is just easier than ever.
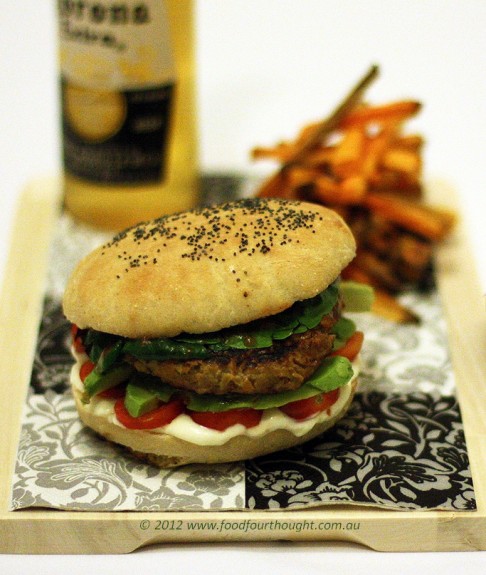
Lately the weather in Perth has been a little wild and wet causing me to rug up and wish for summer. Given that the warmer months are still a little way off I thought I’d inject our lives with a little “sunshine” by making something that I love to eat in summertime.
A good burger is something I hold in high esteem, and a good homemade burger is hard to find, let alone to make. Read on, everything in this little beauty is made from scratch.
To digress slightly, I was recently able to participate in the “Chemical Free Life Seminar” run by Perth Organics. It was a wonderful event showcasing many products that allow use to take control of the amount of chemicals we have in our daily life.
It made me think about (and be very grateful for) the way the Thermomix has changed my life. I was always a traditional cook in the sense that I would make things from scratch as much as possible but more and more I was finding that extremely difficult due to the time taken up with other commitments. Of course that meant that I wasn’t able to spend as much time in the kitchen, even if I wanted to. Since getting the Thermomix that has all changed. A few weeks ago I found some tomatoes on special at the markets so I purchased six kilograms and decided to make tomato sauce. With my (old) traditional method this would have meant hours in the kitchen. I was actually in the kitchen for approximately 10 minutes, no peeling, no deseeding, minimal chopping and cooked and pureed all in one pot with no additional equipment. I ended up making 18 jars with a minimal amount of effort. Just one of the things I love about the Thermomix.
What do you love most about your Thermomix?
homemade rolls, burgers (gluten and wheat free), mayonnaise, tomato sauce and sweet potato chips – (recipe by Fiona at Food 4 Thought).
makes six burgers
bread rolls
I use the basic bread recipe (p 112) from the Everyday cookbook (the recipe book you get when you buy your machine) and follow the recipe. I let the dough rise for 20 – 30 minutes then divide the mixture into six. I flatten the rolls so that will rise like burger buns. I put them into a cold oven and bake as described in the recipe.
burgers
Ingredients
1 clove garlic
150g onion, quartered
100g carrot, roughly chopped
1 tablespoon olive oil
1 tsp ground cumin
1 tsp ground coriander
300g rump steak, trimmed of fat and sinew, cut into 3-4cm chunks
1 tablespoon TM stock concerntrate
1 egg
Preparation
Place garlic into TM bowl and chop for 5-10 seconds on speed 6. Add onion and carrots and chop for 5 seconds on speed 5. Scrape down sides of bowl, add olive oil and cook at 100°C, for 5 minutes on soft speed. Add cumin and coriander, cook at 100°C, for 2 minutes on soft speed. Remove from bowl and set aside to cool.
In the meantime, place chunks of rump into TM bowl and mince on reverse, speed 7 for 2 seconds. Add to cooled onion mixture. Mix together then add stock and egg, combine well.
Moisten hands with cold water and divide mixture into six. Shape like burger patties, place on a lined tray, cover and refrigerate until required.
When ready to cook, heat a frying pan on the stove or BBQ hot plate to cook to your liking.
My tips/alterations: *These burgers are very moist because they have no flour or breadcrumbs added to them. I find they are best prepared ahead of time and chilled to firm them up a little. You can take them out of the fridge about 10 minutes before you want to cook them to help them cook evenly. *If you find them too wet then you can simply add some breadcrubs or flour. *You could substitute the beef with lamb or chicken if preferred. *Add any burger toppings that you like.
mayonnaise
Ingredients
1 large egg, straight from refrigerator
¼ tsp salt
½ tsp dijon mustard
190-200g grapeseed oil
15g lemon juice
Preparation
Add egg, salt and mustard into TM bowl and heat at 37°C, for 1 minute on speed 3. Make sure the MC is in the hole of the lid in the upside down position. With the blades running on speed 4, pour the oil into the lid and allow it drizzle in. Once all the oil is mixed in (about 2 minutes) squeeze or pour lemon juice oto lid and continue to mix until well combined. Refrigerate until required.
My tips/alterations: *There is no need to use the Butterfly for this recipe. *This is best made ahead so that it can set in the fridge before using. *If you like you can add flavours at the end such as herbs and/or garlic (that you had previously chopped in the TM). *My mayonnaise usually keeps for 3 – 4 weeks depending on how much we use! I use the half of the lemon that I cut to clean the lid of the TM – acid cuts through oil.
tomato sauce
Ingredients
1kg tomatoes, quartered
2 apples
½ onion
150g sugar/raw sugar
200g apple cider vinegar
1 tablespoon salt
pinch cayenne
½ tsp ginger
½ tsp ground cloves
½ tsp ground allspice
2 tablespoons tomato paste (optional)
Preparation
Place all ingredients into TM bowl and chop for 30 seconds on speed 8.
Cook on Varoma temperature for 10 minutes at speed 2. Scrape down bowl and cook for further 40 – 50 minutes at 100°C on speed 2. To make a thicker sauce, remove MC from lid and place basket on top to avoid spitting.
Once cooked, process by slowly turning dial up to speed 8 and puree for 1 minute. Pour into sterilised jars.
My tips/alterations: *Another make ahead item! *Change the spices to suit your tastes. *I prefer to leave the tomato paste out of this recipe. *I store this in a dark cupboard and so long as you sterilise the jars it will keep for a long time. *Don’t peel or deseed the tomatoes as the TM will pulverise them easily.
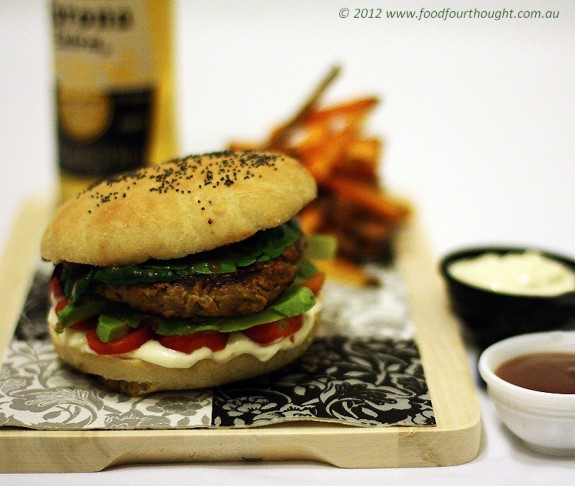
ease: 8.5/10. I only reduced my score because there are so many elements involved. However, it can all be made ahead. The TM made light work of everything.
prep time: 10mins (If all the elements are made ahead as planned).
cooking time: 12mins.
total: 22 minutes.
taste: 9/10. I loved these. I slightly toasted the buns so they were just crisp, the burgers were moist, the sauce gave it a kick because of the spices and the mayonnaise added that little bit of richness needed to bring it all together. 9.5/10 from G. The only problem, he didn’t have room to eat more 🙂
would I make it again: Absolutely.
Recently I’ve been varying our diet a little (much to G’s dismay) by trying to get a few more veggies and leafy greens into each meal. That includes breakfast and dessert. And although my banana, chocolate breakfast shake, including a huge handful of spinach (I know it sounds bad), seemed ridiculous we both agreed it tasted great.
I’ve taken it a little further and have been exploring the world of raw and vegan food. I know people who are dedicated enthusiasts to either or both of these styles of eating and say that they feel more alive, more alert and incredibly satisfied when following their lifestyle choice. However in the past when it came to desserts my recipes have tended to be those of a more traditional style in the sense that they include ingredients like butter, flour, sugar, milk, etc.
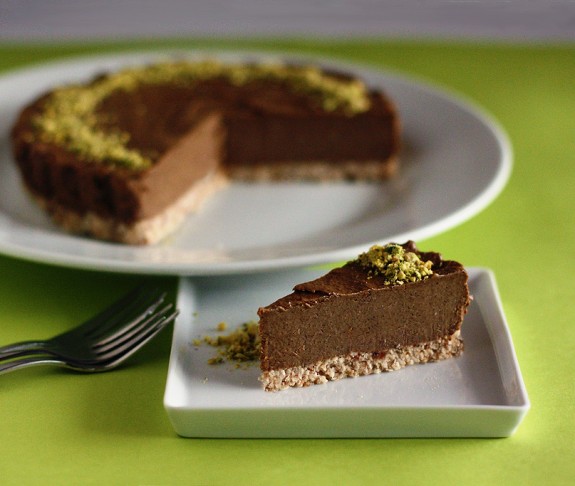
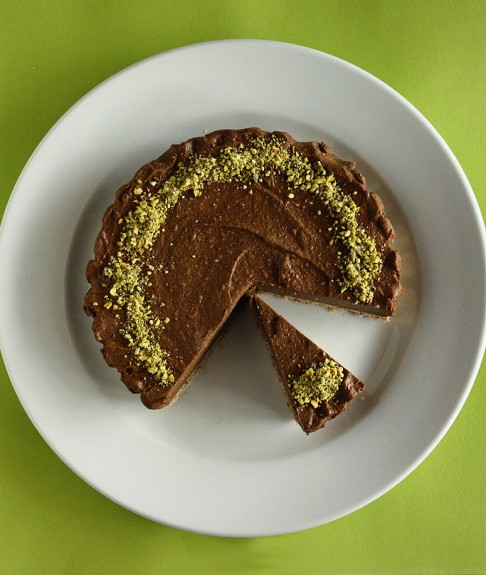
This recipe fits into a completely polarised view of the dessert world. Suddenly we have a nut-free, egg-free, dairy and soy-free, gluten-free, sugar-free cake. And I would pay good money for.
It was inspired by our last Team Cooking Class in South Perth where one of our consultants has made a recipe that had been adapted from the Raw Power website. After a little research I changed it (as I do) and what I ended up with something very similar but a little different 🙂
I hope you enjoy it.
chocolate cake (raw and vegan) – (recipe adapted by Fiona at Food 4 Thought).
serves one 20 – 22cm cake
Ingredients
base
100g pitted dates (soaked in hot water for 20 minutes and drained, if using Medjool dates there is no need to soak them)
100g desiccated Coconut
20g coconut oil
filling
100g raw cacao nibs
100g coconut oil
200g pitted dates (soaked in hot water for 20 minutes and drained, reserve the liquid. If using Medjool dates there is no need to soak them)
2 ripe (medium – large) avocado
70g maple syrup
30g raw cacao powder
reserved liquid from soaking dates or water, as required (see tips)
to serve, chopped pistachios (see tips for nut free)
Preparation
For base, place drained dates, coconut and coconut oil into TM bowl and process for 5 seconds on speed 5. Scrap around bowl and repeat until desired consistency reached. Remove and press into cake tin with removable base. Refrigerate.
For filling, place cacao ibs into TM bowl and prcoess for 45 seconds on speed 10.
Add coconut oil and dates and blend for 10 seconds on speed 6.
Add avocado, agave nectar and cacao powder. Blend for 30 seconds on speed 6 using the spatula to assist if required. Scrape around sides of bowl and add reserved liquid if required (I used approx 60g) and blend for 45 seconds on speed 6.
Pour this mixture into the base and refrigerate for a minimum of 3 hours.
Serve, topped with chopped pistachios
My tips/alterations: *If your coconut oil becomes solid, I find the easiest way to get it out is to sit the bottle/jar in a container of hot water a few minutes before you need it. *The reserved date liquid is completely optional. I just found the mixture a little thick without it and by adding it in I got a smoother consistency. *For an even richer “cake” you can add more raw cacao powder. You need to make sure it is raw cacao as some cocoa (spelt differently by the way) powders are heated above 37C during processing. This is one of the reasons I choose to use raw cacao nibs. If you can’t find the nibs use 70-80g cacao powder. *To chop the pistachios, I just used closed lid and turbo a couple of times until I got the desired texture. * If you leave the pistachios off, this is nut free. *You will find most of these ingredients in the health food store. Some Asian food stores also sell coconut oil.
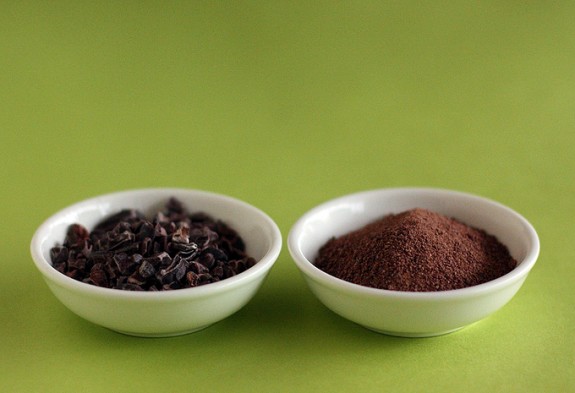 Cacao nibs (L); Ground Cacao nibs (R) ease: 9.5/10. The hardest part was getting ingredients that I had never used. But now my pantry is we stocked.
prep time: 25mins (20 mins to soak dates, 5 minutes for me to actually do anything).
cooking time: 0mins (no cooking required) + 3 hours chilling.
total: 25 minutes + 3 hours chilling.
taste: 9/10. I loved this. It was dense, rich and tasted great. I also found that I was amazingly satisfied with just one piece. It actually took me 5 days to eat the whole thing, and that was sharing it too. 7.5/10 from G. He wasn’t as impressed because he has a prepensity towards lemon cheesecake. And although this looked like cheesecake it didn’t taste like his favourite lemon version. In saying that, he still thought this was pretty good for “what it was”.
would I make it again: Absolutely In fact, I happen to have a few extra avocados again this week, so I might need to make another one. 
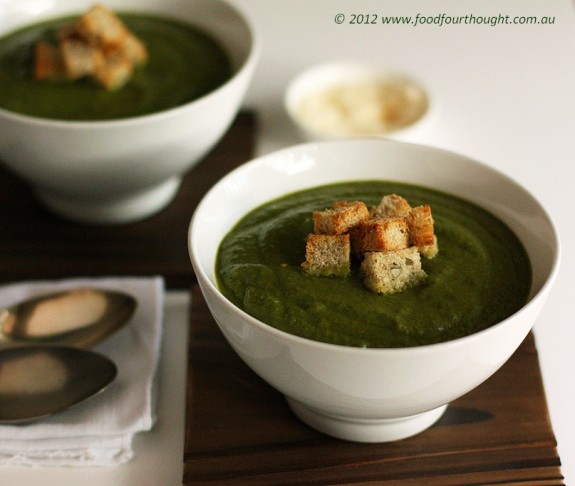
With the season starting to move towards winter G and I have both suffered with a slight sore throat and minor head cold. So I’ve been thinking about how I can give our immune system a little boost.
Recently I’ve been reading about the health benefits of Kale. It appears that this inconspicuous leafy green vegetable packs a powerful punch in the vitamins, minerals and antioxidant arena.
Like most other dark green vegetables it’s considered perfect for detox purposes. But it also seems to support the cardiovascular system and is claimed to assist in the prevention of cancer. Super food? Maybe!
Kale is rich in:
- Vitamin K, Vitamin A,
- Vitamin C, Manganese,
- Fibre, Copper,
- Calcium, Tryptophan,
- B6, Potassium, Folate,
- Anti-inflammatory properties,
- Antioxidants
and much more!
So my goal was to find a way to get more of this little gem into our diet. While green smoothies are an easy way to do so, I must admit, I’m not really that partial to them. Soup however is one thing that I love eating. I like that all the goodness stays in the bowl and I am able to eat it all. And that was exactly what I wanted to do when I developed this recipe.
I wanted something healthy that tasted delicious and honoured the main ingredient. I think I managed to achieve it all and even felt healthier when I was eating it. (See tips for vegan and paleo option).
green power soup (recipe by Fiona at Food 4 Thought).
serves 4 – Makes approximately 1.25l
Ingredients
25g parmesan cheese, 1cm cubes (Optional, for non paleo)
1/2 onion, cut into quarters
1 large clove garlic, peeled
10g olive oil
200g kale (leaves only, stalks removed), washed and roughly chopped
300g hot water
150g broccoli, cut into bite size florets
150g frozen peas
1 tablespoon TM stock concentrate
handful of basil leaves, or herbs of your choice
1 tablespoon coconut cream
Preparation
Place cheese into TM bowl and grate for 10 seconds on speed 7. Remove and set aside.
Add onion and garlic to TM bowl, chop for 3 seconds on speed 7. Add oil and cook for 4 minutes at 100°C on speed 1.
Add chopped kale and water to TM bowl. Cook for 3 minutes at 100°C on soft speed.
Add broccoli, peas and stock, cook for 15 minutes at 100°C on speed 1.
Once cooked, add grated cheese (if using), herbs and coconut cream. Blend by slowly turning to speed 5, then increasing speed and blitzing for 30 seconds at speed 8.
Check for seasoning and adjust as desired. Serve with paleo croutons.
My tips/alterations: *This soup comes up quite thick, if you’d like it thinner then add some more water. *If you find the earthy flavour of the Kale too strong you can add extra peas and more herbs. You could also add some celery and/or carrot into the mix when you chop the onion. *I designed this recipe for the Thermomix BUT you can make this in a pot and blender like any other soup. *Don’t chop the Kale in the TM because if you over work the vegetables before they are cooked they will become bitter. *The cream at the end is optional, however it does bring out the sweetness in the dish very well. *If you would like this to be vegan or paleo, then simply leave out the cheese and cream.
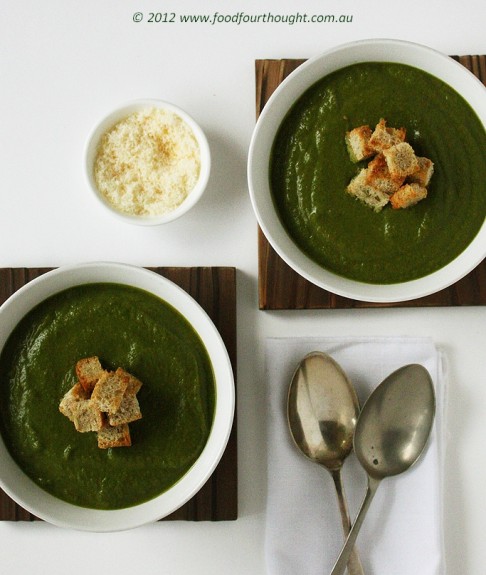
ease: 9.5/10. The hardest part is washing the Kale.
prep time: 5mins.
cooking time: 25mins
total: 30 minutes
taste: 8.5/10. I loved this soup. I even felt better as I ate it. I think G was a little less reserve with his score because he is not as big a fan of that earthy quality that comes from the dark green hero. 7/10 from G.
would I make it again: Yes. Every time I feel like I need a kick start. 🙂

When some of my friends first found out that I had purchased a Thermomix, they couldn’t quite believe it. They felt that I was such a “cook” that I would love the process of cooking and not want to “cheat”. I must say, I don’t feel that using the Thermomix is cheating. Many amazing chefs use this incredible machine everyday to create fabulous food and they are still regarding in the highest esteem among their colleagues.
Besides, the process of cooking is something I enjoy, when I have 5 hours to spend in the kitchen. But lets face it, we are all a little “time poor” these days so that doesn’t happen very often, at least not for me.
One of the major reasons I bought my Thermomix, even though I already had ever other kitchen appliance known to man, was that none of my other amazing (and expensive) machines would allow me to put ingredients into them, set a program, walk away and come back to a complete, healthy, cooked meal in under 30 minutes.
Before this little gem had a home on our bench we never ate risotto. Not that we didn’t enjoy it, more that it took too long and was too much effort to make. Now we have it in many different forms, whenever we want to.
This recipe came about because we were given a delicious leg of ham for Christmas (thanks Jenn!) and (as you do) we had some left over. It was one of those nights (you know the kind I mean) when you either need to spend minimal time in the kitchen or you’ll opt for calling the local take-away. So this was what came out of our kitchen instead. 🙂
It can be even easier without the egg but when I was creating it, all I could think about was Dr Seuss’s “Green eggs and ham” I had the green peas and ham so I added an egg. Besides, I‘ve done this before with a pasta dish and it was delicious. I hope this helps you avoid take-away too. 🙂
green pea, ham and corn risotto topped with a poached egg (recipe by Fiona at Food 4 Thought) – Designed for the Thermomix BUT you can make this in a pan like any other risotto.
serves 6 – 8
Ingredients
50g Parmesan cheese, cubed
1/2 brown onion, quartered
1 garlic clove, peeled
10g olive oil
360g Arborio (or short grain) rice
100g white wine
200 – 250g thick sliced ham, cubed (to approximately same size of peas and corn)
2-3 tablespoons TM stock concerntrate
1000 – 1100g water
170g frozen peas
170g (drained) tinned corn
Preparation
Place Parmesan into TM bowl, grate for 5 seconds on speed 7. Transfer to a bowl and set aside.
Place onion and garlic into TM bowl and chop for 3 seconds on speed 7. Add oil and sauté for 5 minutes at 100°C on speed 1.
Add the butterfly, then add rice and wine, sauté on reverse for 2 minutes at 100°C on speed soft.
Add ham, stock and water, cook for 16 minutes at 100°C on reverse, speed soft. 5 minutes before the end of cooking, add the peas. Use the spatula to push them into the rice mixture. (Meanwhile, cooked poached egg to your liking) Once cooking has finished, pour the risotto into the TM serving bowl, stir through the corn and as Parmesan to taste. Adjust seasoning as you like, cover and let stand for at least 5 minutes before serving.
Serve topped with a soft poached egg.
My tips/alterations: *If you don’t have a Thermomix, you can make this in the normal way that you would make risotto. *You can substitute the ham for bacon if you prefer. *If you want it to be even simpler, you can leave out the egg, although I think it is worth the effort. *Resting the risotto in the TM server means that it will retain its heat very well and the consistency can change. Make sure that you check it occasionally so that you can devour your meal when the desired consistency is reached.
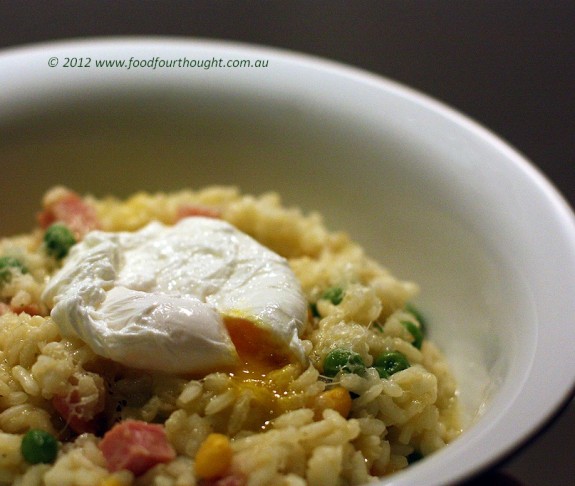
ease: 9/10. So much easier than a pan risotto.
prep time: 15mins.
cooking time: 25mins plus resting
total: 45 minutes plus cooling
taste: 7.5/10. I think G was almost sick of risotto when I made this version. 8.5/10 I loved this. The ingredients were so simple and the flavour was great. How much better does a dish get?  . .
would I make it again: Yes. Too easy and tasty.

When I think about what we ate before purchasing our Thermomix it was quite different to what we eat now. At the time I used to think we had quite a healthy diet. Lots of fruit and vegetables, red meat a few times a week, chicken and never enough fish :). However after having our beloved “Hermie” for over a year, I have come to realise that what I thought was healthy, actually wasn’t so good for us. We were still consuming a lot of additives and preservatives.
The main reason I say this is because we used to still have store bought basics like tomato sauce, peanut butter, chocolate hazelnut spread, etc and when you start reading the labels on these items there can be several letters and numbers instead of fresh ingredients.
Now I find myself making these things and many more, just because I can. Soy milk, almond milk, raw vegan shakes, cashew cream, whole wheat sesame crackers, some of these things I’ve never contemplated making let alone attempted to do so.
That is exactly how this recipe came about. I started reading the label on the box of biscuits that we buy for our girl (Bonnie the dog) and I thought “if we’re eating healthy then so will the dog”. No more fillers and additives for anyone in this family! So now we also have homemade dog biscuits, which I might add, are totally safe for human consumption and taste really good. (Yes, I did try them!)
I have you have a special someone to make these for too.
“bonnie” (dog) biscuits (recipe by Fiona at Food 4 Thought) – Designed for the Thermomix BUT you can make these without one. Just read “My tips”.
makes approximately 60 bone shape biscuits
Ingredients
200 – 250g (3 – 4 rashers) bacon, roughly chopped
350g whole wheat grain (or whole wheat flour)
100g rolled oats
100g cheddar cheese, cubed
50g butter
200g water
100g milk
150g cornmeal (polenta)
1 egg
Preparation
Pre-heat the oven to 160°C (325°F/Gas 3).
Add bacon to TM bowl and chop on Speed 5 for 3 – 5 seconds, until desired texture is obtained. Cook at 100°C for 8 – 10 minutes on reverse, soft speed. Once cooked, remove and set aside to cool.
Add whole wheat grain to TM bowl and mill on Speed 10 for 30 – 45 seconds depending on the desired texture.
Add cheese and oats to TM bowl and mill on Speed 7 for 5 seconds. Set aside with milled wheat.
Add butter, water and milk to TM bowl and heat at 60°C for 2 minutes on speed 1. Once complete, add milled wheat, oats, cheese, cornmeal and egg to TM bowl and mix on speed 6 for 5 – 10 seconds (by slowly turning dial from 1 – 6) until just combined. Add bacon and mix for 5 – 10 seconds on reverse until completely combined.
Tip bowl upside down onto Thermomat and turn base of blade to release mixture. If mixture is slightly wet leave to stand for 5 minutes before rolling out. Roll out (with rolling pin) to 1/2 cm thickness and cut into desired shape. Place on lined baking tray and bake for 40 – 45 minutes. Cool on wire rack.
My tips/alterations: *If you don’t have a Thermomix, use wholewheat flour instead of the grain. You can also substitute the oats for an extra 100g of flour if you like. You could cook the bacon in a frying pan as you would normally, allow it to cool, then crumble it into small pieces. Grate the cheese as you would normally. Then you can just mix it all together and rolll it out as instructed. *You could add chopped carrots, spinach or corn to these for something a little different. See my Puppy Treats recipe for other tips.

ease: 7.5/10. The fact that these are made from whole ingredients makes it more challenging but the TM makes it easy.
prep time: 15mins.
cooking time: 45mins plus cooling
total: 1 hour plus cooling
taste: 8/10. These are hard to rate as I’ve never eaten dog biscuits before :). Bonnie seems to love these. Whenever she sees one she begs to have it asap.
would I make it again: Yes. Not a lot of work to achieve a healthy alternative.

Some time ago I made a strawberry and lemon tart in my food processor. Crisp and buttery pastry, tangy smooth filling, it was the kind of dessert that both G & I love. Unfortunately it didn’t score too highly on the G scale (nor with me really) and the remainder was given away to friends and family which is unheard of when a good dessert hits the table in our house.
At the time I wrote a comment stating “would I make it again: Yes, but there are conditions. Normally with a score like this I wouldn’t bother making it again. However, since baking this I have purchased my Thermomix (Hermie for short) and knowing what it can do I am sure I can get a very smooth consistency for the filling by using it to whiz everything up. It is so much easier than making lemon curd filling!”
So here is the recipe that I came up with for the TM. I was fortunate enough to have my Mum visiting when I made this tart and we spent many hours in the kitchen together making a myriad of tasty treats. She was amazed at what “Hermie” can do!
lemon tart (recipe by Fiona at Food 4 Thought – with help from Mum)
makes two 35cm (14 inch) x 10cm (4 inch) tart (use a tin with a removable base)
Ingredients
pastry
70g (2½ ozs) raw sugar
250g (½ pound) plain (all-purpose) flour
½ teaspoon sea salt
150g (4¼ozs/1¼ sticks) butter, diced and chilled
1 egg
30g (1½ tablespoons) cold water
filling
1 or 2 large juicy lemons (total 230g fruit)
250g (1¼ cups) caster (superfine) sugar
30g (2 tablespoons) cornflour (cornstarch)
3 eggs
120g (½ cup) very soft or melted butter, cooled
to finish
250g (½ pound) strawberries
icing (confectioners) sugar for dusting
Preparation
Pastry: Place sugar into TM bowl and mill for 10 seconds on speed 9. Add flour and butter, mix for 10 seconds on speed 6. The mix should resemble fine breadcrumbs. Add egg and water. Set dial to closed lid position. Knead for 20 – 30 seconds on interval speed to form a dough. Turn mixture onto plastic wrap, form a disc and chill until firm (about 30 minutes).
Preheat the oven to 200°C (400°F/Gas 6). Roll pastry out on a lightly floured bench and line the tart tin. Refrigerate or freeze until firm.
Bake the tart blind for 20 minutes, then remove the baking weights and paper. Reduce the heat to 170°C (325°F/Gas 3) and bake for a further 5 minutes. Cool.
Filling: Cut the lemon into quarters, remove the obvious pips. Add these, along with all other ingredients to TM bowl. Mix on speed 5 for 20 – 30 seconds until mixture is combined and very smooth.
Pour into the tart case and bake for 25 minutes until the filling is just firm and the top is lightly browned. Cool.
To serve: Dust with icing sugar to serve.
My tips/alterations: *If the pastry sticks to the blade, simply use Turbo for 2-3 seconds to remove it. *Blind baking is when you line a pre-prepared case with baking paper and fill it with weights or dried beans. The beans support the pastry as it cooks. *If you are short on time when making the pastry you can place it in the freezer which will halve your time. *I used Meyer lemons, which have a thin skin and are slightly sweet when ripe. I using Eureka (thick skin with a thick layer of white pith) you may want to peel the rind away to use in your recipe, then remove and discard the pith as this can be quite bitter. I tried to make the filling using raw sugar but due to the higher caramel content it didn’t set well and became really chewy. The caster sugar produced a lovely textured tart. *Blend the filling until it is smooth as it makes the end result so much better.

ease: 8/10. This was even easier than using the food processer.
prep time: 10mins plus chilling and cooling.
cooking time: 50mins plus cooling
total: 1 hour plus chilling and cooling
taste: 8.5/10. From the man of the house, a whole 2 points more than the original version with none of this one being allowed to leave the house. G couldn’t believe it was even the same recipe. 8.5/10 From me too. An extra point from me. This reminds me of a tarte au citron with its delicate tangy flavour and crunchy pastry.
would I make it again: Yes. I think I need to try it again, just to make sure that my scoring is correct. 🙂
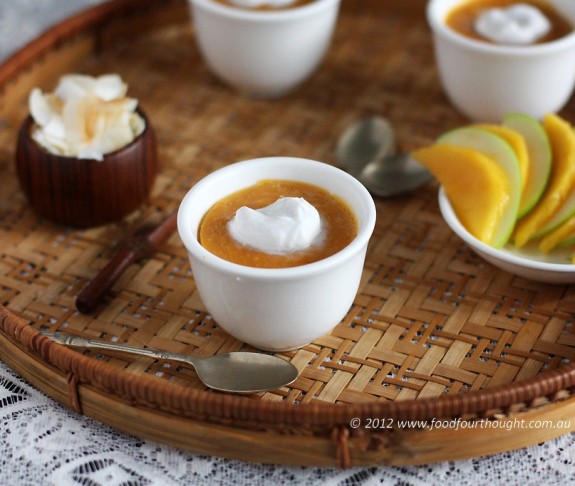
I’m constantly amazed at how my Thermomix makes the most difficult cooking creations so easy. A few weeks ago I decided to adapt a recipe for a steamed sweet potato puddings. They were delicious and so much easier with the Thermomix.
One of the other things that little miracle machine has done is (re)inspire me in the kitchen. I have always loved trying new things, creating something that I can call my own. That was until life got so busy that I didn’t have time to consider what we might eat for dinner let alone be creative. Dinner just became “whatever is the fastest, healthiest meal with the least amount of dishes possible. Usually it was steak and steamed vegetables, steak and salad or stir fry. Believe me, there is only so much of all of those dishes that one person can eat. Now it is “would you like curry or risotto for dinner?” We will often have Thai chicken red curry, risotto or anything we feel like really. Last week I even made a Chunky beef chilli which I thought sounded a great way to use the piece of rump steak that I wanted to, rather than pan frying it and steaming some vegetables :).
Another thing I love about my Thermomix is the business that it has created for me. I am so lucky to be able to do something that I love, to meet some amazing people and to actually have people thank me for changing their lives and making things so much easier. What a great job I have and what a lucky girl I am!
I hope you get to do something that you love too.
sweet potato and coconut steamed puddings (adapted for the Thermomix from recipe in Dish)
serves 6
Ingredients
1100g water, for cooking
½ tsp ground rock salt
400g peeled and 2cm diced (orange) sweet potato
150g coconut milk
½ tsp vanilla extract
100g coconut or palm sugar
25g desiccated coconut
2 eggs
900g water, for steaming
to serve
coconut cream
Fresh fruit of your choice
Toasted shredded coconut
6 x 125ml ramekins
Preparation
Place water and salt into TM bowl, add basket and place sweet potato into the basket. Cook for 16 minutes at 100°C on speed 4. Once potato is fork tender, remove the basket using the spatula and shake off excess water. Discard water from bowl. Place potato into the TM bowl and heat for 1 minute at 90°C on speed 1 to remove excess water. Puree for 30 seconds on speed 4. Remove from bowl and set aside to cool.
Add coconut milk, vanilla and sugar to TM bowl. Heat for 2 minutes at 90 °C on speed 1. Inset butterfly. Add desiccated coconut and cooled potato. Mix on speed 2 and with blade running add eggs one at a time thru the hole in the lid. Beat for 20 seconds on speed 3.
Divide mixture between ramekins, filling them 1cm from the top. Pour water into TM bowl and place ramekins into Varoma. Set Varoma in place. Steam for 20 – 25 minutes at Varoma temperature on speed 1. Puddings should be just set.
Serve with garnish of your choice.
My tips/alterations: *This is best made in ramekins rather than patty cake moulds then attempting to turn them out. *Don’t overcook these as they will dry out and become slightly chewy in texture. You could add more spices to this such as cinnamon, nutmeg and even a little of all spice. *If you like your coconut cream (to serve) really thick then pop it in the fridge for ar least an hour before serving.
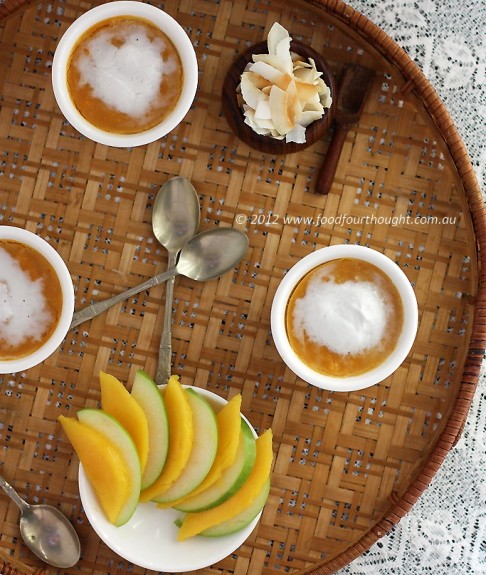
ease: 7.5/10. Not difficult, just a few steps
prep time: 15 mins.
cooking time: 45 mins
total: 60 mins
taste: 8.5/10. These have a slightly unusual and very delicious flavour. The coconut and palm sugar come through the potato and the texture is quite light.
would I make it again: Yes, especially if I wanted to do something a little different for my friends.
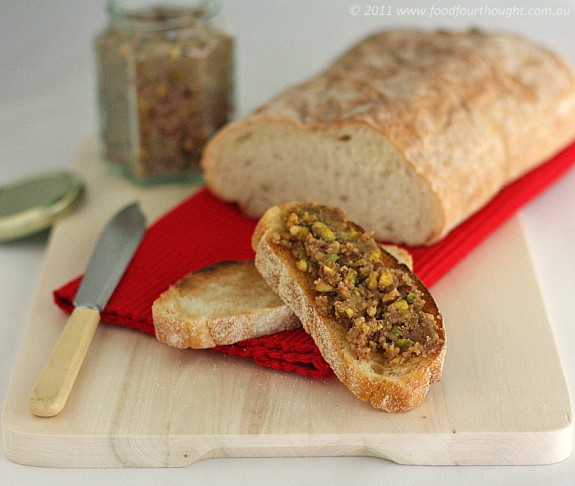
I may have mentioned before that making desserts is one of my favourite things to do in the kitchen and looking at my last few Newsletters I seem to do a lot of it :). Clients often ask me if I actually eat the food I create because they think I should be somewhat larger in size than I am. My response is that I don’t eat what I create, I inhale it. I also exercise and eat a balanced diet but I never restrict myself when it comes to trying the things that I make.
To help with balancing things a little I often try to find ways to still get the flavours I love but in a not so traditional way. Baklava is one of my favourite sweet treats. I love the honey flavoured sweet sticky syrup, the light crunch of pastry and the richness of the nuts. I never make it because I can’t control myself when it is in the house. So thank goodness for this somewhat healthier version. By substituting pastry for ciabatta or sourdough, reducing the butter and increasing the nuts we have something that I will eat as often as I like. I hope you enjoy it too.
baklava spread (adapted for the Thermomix from recipe by The Healthy Foodie)
makes approximately 2 cups
Ingredients
50g pistachios
50g almonds
200g walnuts
40g honey
40g water
25g lemon juice
¼ tsp ground cardamom
¼ tsp ground cinnamon
to serve
thinly sliced, lightly toasted ciabatta bread or similar or bread of your choice
Preparation
Pour pistachio nuts, almonds and 50g of walnuts into TM bowl. Chop for 2 seconds on speed 5. Remove from bowl and set aside.
Add honey, water, lemon juice and spices to bowl. Heat for 2 minutes at 70°C on speed 1. Add the remaining walnuts and chop for 30 seconds on speed 5. Scrape down sides of bowl and repeat until a soft paste forms or desired texture is achieved.
Add chopped nuts and stir for 10 seconds, reverse on speed 3 to combine all ingredients.
Serve at room temperature on warm toasted ciabatta or bread or your choice or store in sterilised jars in the fridge until required.
My tips/alterations: *This has a slightly crumbly texture. It is best eaten as soon as it is made however it will store well in the fridge. *Once it is chilled it is very easy to mould. For something a little different shape it into balls and coat with chocolate or use it as a filling in filo (phyllo) cigars. *If you would like this to have a more butter like consistency you can add a little more butter, honey, lemon juice and water then blitz this along with the walnuts for a little longer before adding the shopped nuts. *This would be great made as a gift for friends. *If you would like a similar recipe that does not require a Thermomix then check it out at The Healthy Foodie. *Use paleo bread if you like.
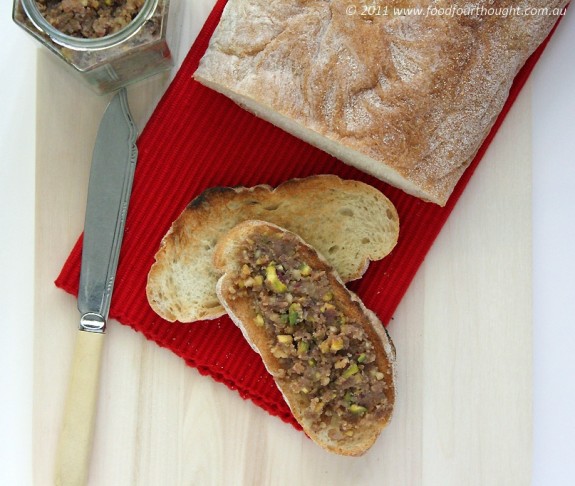
ease: 9/10. 10 times easier and quicker than normal Baklava!
prep time: 10mins.
cooking time: 5mins
total: 15 mins
taste: 9/10. Both G & I loved this, as did my TM team when I made it for them. I think it is best straight after it has been made, while it is just warm because the spices and honey really come through in the flavour.
would I make it again: This is my new best friend! When I told G walnuts were healthy for him he asked me to make this again 🙂
I’ve always been somewhat creative in the kitchen. Sometimes this creativity has served me well and others not so much. Yes, I have had my fair share of disasters in the kitchen but I’m not going to share them right now :).
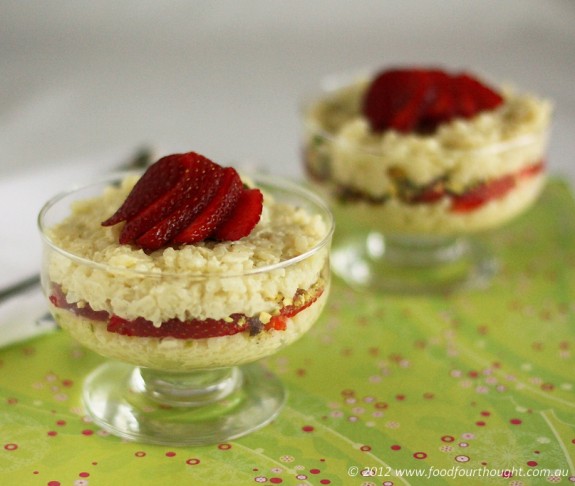
When I decided to develop this recipe I threw caution to the wind and jumped right in. The end result I wanted to achieve was that of sweet risotto and NOT rice pudding.
Don’t get me wrong, there is nothing wrong with rice pudding perse, it’s just that there are so many recipes available (both Thermomix and non-Thermomix) that I didn’t want to create yet another. And hence, Sweet risotto with strawberries, pistachios and limoncello was born.
The strawberries were included because they were in season and gorgeously sweet, the pistachios because I love their green hue and the limoncello was a suggestion from my wonderful Group Leader, Liz. When I mentioned to her that I wanted to try this recipe she gave me a sample from her bottle of limoncello so that I could test it. It was so good I’ve now purchased my own (very large) bottle.
The first time I made this, G liked it but felt that it needed a sauce of some kind. I wasn’t so sure because I tried it as soon as it was assembled whereas he let it cool first. However, I had some strawberries left over so whipped up a strawberry and limoncello syrup. When others tried it they agreed with G.
So I acknowledge two things. I love a collaboration of ideas/suggestions when it comes to creative cooking and G has a wonderful palate that teaches me more than he knows :).
sweet risotto with strawberries, pistachios and limoncello (recipe by Fiona at Food 4 Thought)
makes approximately 4-6 desserts
Ingredients
50g shelled pistachio nuts
Zest of ½ large lemon (approx 10g)
50g raw sugar
½ vanilla bean, scraped
40g butter
200g Arborio rice
60g white wine
1 ½ tablespoons limoncello
550g full cream milk
to serve
thinly sliced strawberries
crushed pistachios
strawberry syrup/sauce
Preparation
Pour nuts into bowl and chop for 2 seconds on speed 5. Remove from bowl and set aside. Place lemon zest, sugar and vanilla into TM bowl and pulverise for 20 seconds at speed 9. Scrape down sides of bowl and repeat if necessary, until zest is finely ground.
Add butter and cook for 2 minutes at 100°C on speed 1. Insert butterfly, add rice and cook for 1 minute at 100°C, reverse, on soft speed.
Add wine and limoncello. Cook for 1 minute at 100°C, reverse on soft speed. Add milk and cook for 16 minutes at 100°C, reverse on soft speed. For the last 5 minutes tilt MC to allow the mixture to thicken slightly.
Once cooked, pour into Thermoserver and stand while slicing strawberries.
To serve, place 2 tablespoons of risotto in base of glass or bowl. Place single layer of strawberries on top of rice then sprinkle with chopped pistachios.
Top with another layer of risotto. Decorate with strawberries and pistachios. Serve with syrup.
My tips/alterations: *You can make this dish without a Thermomix but following the recipe and cooking it in a pot on the stove. Just watch that it doesn’t burn and you may need to cook it a little longer. *If this starts to bubble out of the hole in the lid of the Thermomix you can tilt the MC and insert on its side. *If you allow it to stand in the Thermoserver for too long it will thicken quite a bit. If you would like a softer consistency just add some milk or even thin cream. *If you want to peel your pistachios (see difference in picture at the end of this post), simply place pistachios in bowl, cover with boiling water, allow to stand for 5 minutes then squeeze them out of their skins.
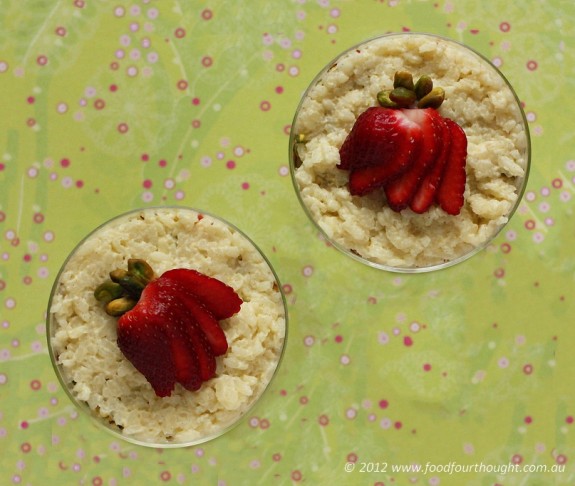
ease: 9/10. The Thermomix makes risotto a very simple thing to make!
prep time: 10mins + assembling.
cooking time: 20mins
total: 30 mins + assembling.
taste: 8.5/10. Both G & I loved this, and it was something that we have never tried before. The flavours and textures worked really well and the strawberry syrup (recipe to follow) bought it all.
would I make it again: Yes! Especially if I wanted to show friends something a little different.
 L: Unpeeled; R: Skins removed

It was my Birthday a few months ago. As I get older the actual celebration of a Birthday on “the day” means a little less. However, because I have lived away from my immediate family for so long I still get very excited by receiving cards in the mail to mark the special occasion. Wishes of love and happiness are heartfelt from those who care about me.
This year I received one card that was a big surprise and most unexpected. To put this into prospective I need to tell you a little about the sender.
Approximately two months before my Birthday I commenced as an Independent Consultant with Thermomix Australia. It is my own business that I conduct under the guidelines set out by Thermomix. As part of my role they provide free training and ongoing support, something (as a consultant) I feel is quite rare these days. My team leader is amazing and always there with words of encouragement when they are needed.
So really, I guess it shouldn’t have come as a surprise when I received a Birthday card from such a wonderful company but for some reason it did. I think it was the fact that the card had been personally written on rather than a pre-printed version automatically popped in the post, a very nice touch that made me feel somewhat special.
The front of the card had a picture of a piece of cake that looked delicious. And the best part, the recipe was on the inside 🙂 .
So here it is my friends, I hope you feel special when you enjoy a slice of this with someone you love!
caramel mud cake with toffee cream (recipe from Thermomix Birthday Card – May 2011)
makes 1 x 23cm cake
Ingredients
Cake
200g unsalted butter, cubed
200g white chocolate, in pieces
200g dark brown sugar
150g hot water
50g golden syrup
2 tsp vanilla bean paste
4 eggs
140g plain flour
140g SR flour
berries and icing sugar, to serve
Preparation
Brush 23cm springform tin with some melted butter and completely cover outside of base with double layer of foil for waterproof. Set aside.
Pre-heat oven to 180°C and place large baking tray of water in bottom of oven.
Place butter, chocolate, sugar, water, golden syrup and vanilla into TM bowl. Cook for 5 minutes at 70°C, on speed 1. Cool slightly. Add eggs 1 at a time onto rotating blades, beating each in for 10 seconds on speed 6. Add flours to TM bowl and set dial to closed lid position. Incorporate gently for 20 seconds on interval speed.
Pour into prepared pan, then place into baking dish of water. Reduce temperature of oven to 170°C and cook for 50 minutes to an hour until set in the centre.
Allow to cool before un-moulding. Serve with toffee cream and raspberries.
Toffee Cream
50g unsalted butter
100g cream + 400g cream
100g dark sugar
2 tsp vanilla extract
Place butter, 100g cream, sugar and vanilla into TM bowl and cook for 5 minutes at Varoma temperature on speed 2 with MC off. Pour out of TM and cool completely (it will partially set).
Insert butterfly into TM bowl and return toffee mixture to TM bowl. Add remaining cream and whip together for 10-20 seconds on speed 4 until cream holds still peaks. Either spread over cake with palette knife or serve on the side.
My tips/alterations: *I cooked this for 1 hour to make sure that it was set but this will vary depending on your oven. *If you use a butter substitute, this cake will be dairy free. You can switch out the toffee cream and the whole thing would be dairy free.
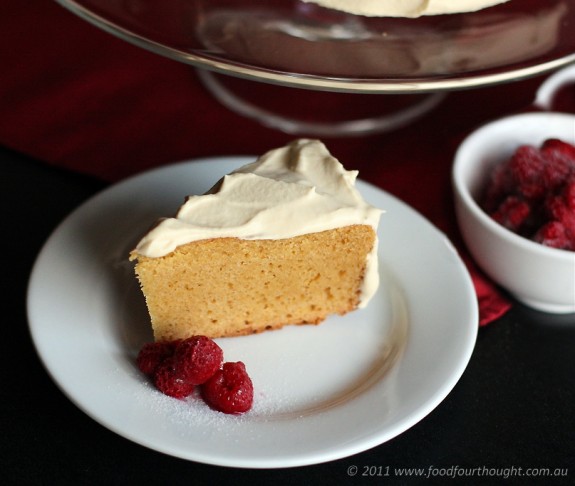
ease: 8/10. The most difficult part was getting it into the tray of water in the oven!
prep time: 15mins.
cooking time: 55-60mins
total: 1 hour 15 mins
taste: 9/10. This was an amazing cake. Dense – like every mud cake should be, Sweet – without being over the top, Sophisticated – I would make this for guests, anytime! The caramel flavour was stunning. I found the cream a little too sweet but others loved it, so I think that is personal preference.
would I make it again: Absolutely! I’m just waiting for that special occasion and someone to spoil!
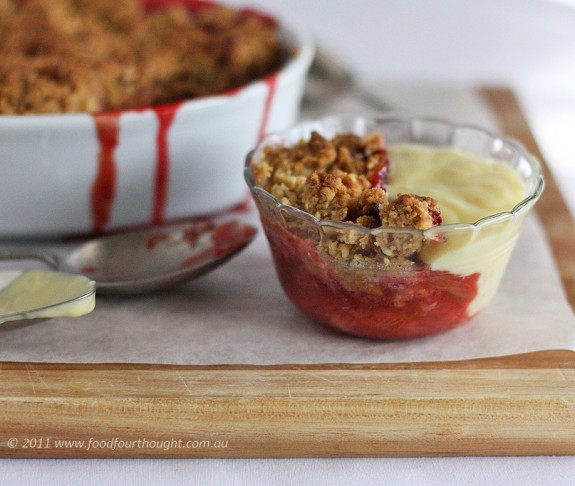
I have always found it quite fascinating how our taste buds change over the years. And I have often wondered, is it because of age, because we experience different things or simply because we are more open to trying something new?
No matter what the reason, it means we can often find ourselves enjoying flavours we never expected to. For me, one of these is rhubarb.
Like many, as a child I found this fruit to be stringy in texture, tart in flavour and somewhat challenging to eat, therefore generally avoiding it. I’m not sure when I started to enjoy it. I think it was when I cooked it for myself and added lots of sugar while stewing it to a pulp :).
Funnily enough, now I like it lightly stewed with honey or raw sugar in preference to the mountain of white sugar that I used to add. Oh how one’s taste buds have changed!
When I saw the first rhubarb of the season at my local fruit and veg markets I was so excited I had to buy some. Unfortunately, life was really busy and I was unable to pay it the attention it deserved. By the time I found it unintentionally hidden into the back of the fridge it needed some TLC. And although I am a lover of classic flavour combinations, I didn’t want to make anything that used apple and rhubarb together. I wanted something a little different and somewhat special. Fortunately I found a great recipe that I could tweak a little to make into my own. Even better, I could save more time because I could use ‘Hermie’! (For non-thermomix method see “My tips/alterations” below).
strawberry & rhubarb crumble (recipe adapted by Fiona at Food 4 Thought, original from Thermomix Customer Newsletter – August 2010)
serves 4 – 6
Ingredients
Zest and juice 1 lemon
120g raw sugar
400g rhubarb roughly chopped
1 tsp vanilla paste or 1 vanilla bean, scraped
5 – 10g cornflour
250 – 300g strawberries, hulled and sliced
100g light brown sugar
100g toasted hazelnuts, skins removed
120g butter, room temperature
70g rolled oats
70g plain flour
Preparation
Pre-heat oven to 200ºC. Use a 1 litre capacity oven-proof baking dish.
Place rind and raw sugar into Thermomix (TM) bowl and grate for 5-10 seconds on speed 8. Scrap down bowl and repeat if necessary.
Add lemon juice, rhubarb and vanilla into TM bowl and cook for 12 minutes at 80ºC on Reverse + speed 1.
Pour mixture into simmering basket and sit inside baking dish, allow juice to drain off. Return juice to TM bowl and add cornflour. Cook for 4 minutes at 90ºC on speed 3. In the meantime, spread rhubarb in base of baking dish. Once cooked, pour thickened juice over rhubarb and top with sliced strawberries.
Place remaining ingredients into clean, dry TM bowl and with dial set to closed lid position, press Turbo button 2-3 times until crumble mixture forms. Sprinkle on top of rhubarb and bake for approximately 30-35 minutes until fruit is bubbly and fragrant.
Serve warm with plenty of whipped cream and/or ice cream.
My tips/alterations: *I like the sauce in my crumble to be thick therefore I added the cornflour, however you can skip this step. *You can use any nuts you like; I would also try macadamia or pecan nuts. *For Thermomix 5 owners, the turbo would be 3 times 0.5 seconds. *Adjust the amount of cornflour depending on the liquid. *You can make this recipe without a TM you would need to simmer the rhubarb and thicken the juice on the stove first and make the crumble mixture in a food processor. *I served this with custard from the EDC.
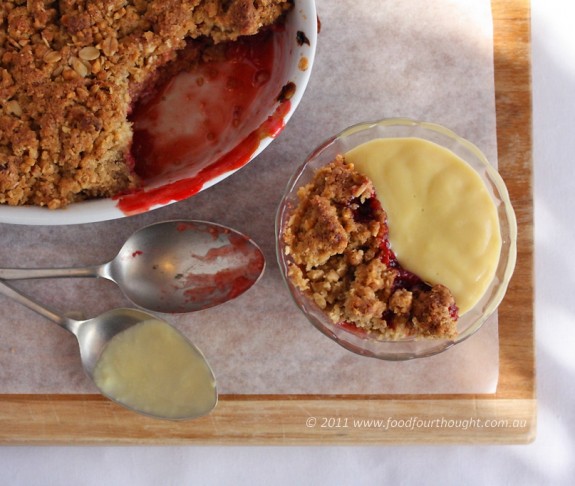
ease: 9/10. The easiest crumble I’ve ever made.
prep time: 10mins.
cooking time: 47mins 17 for TM and 30 in oven
total: 57 mins
taste: 9.5/10. This is simply delicious. G rated this as the best dessert I’ve ever made. The topping is the best crumble topping I’ve ever tasted and will be the basis for all my crumble topping from now on. I loved the combination of rhubarb and strawberry, so grown up.
would I make it again: Absolutely! and especially using the TM. Being able to cook rhubarb while walking the dog is a blessing.

Like many other households, winter tends to be the time of year when comfort food hits our table. Dishes like curry, pasta, casserole and all those heart warming things that make you feel snug when it is cold outside. And while I love all that winter brings at times I can’t help but feel somewhat weighed down and longing for a little warmer weather.
However, one of my favourite things about the cooler months is the citrus season. G’s Mum has several lemon trees and a gorgeous lime tree too. More often than not, I am the fortunate recipient of the luscious fruit that the trees produce and finding ways to use them is a lot of fun!
I have been making lemon curd for many years and it is one of my favourite things to make to use an abundance of fruit. Normally I would grate the zest by hand, sieve the eggs and add the lemon juice and sugar. Then I would stand at the stove for twenty minutes stirring the mixture until it reached the desired consistency. Although I really wanted to make it this year I didn’t want to it the traditional way because I simply didn’t have the time.
After looking at a few different methods I decided to put my faith into “Hermie” (our trusted Thermomix). The recipe almost looked too simple. The result of me contributing five minutes of my precious time and Hermie doing the rest was an amazingly rich, creamy, tangy curd with a bright yellow hue that reminded me of summertime and the warmer weather to come!
lemon curd (recipe from “My Way of Cooking” Cookbook by Thermomix)
makes approx 600ml
Ingredients
240g (1 cup/8 ozs) sugar
lemon peel of 2 organic lemons
125g (1 stick/4 ozs) unsalted butter, cut into pieces *for dairy free, use coconut oil
3 x 60g eggs
150g (½ cup plus 1 tablespoon) freshly squeezed lemon juice (3-4 lemons)
Preparation
Place sugar into TM bowl, mill for 15 seconds on speed 10.
Add lemon peel, mill for 20 seconds on speed 10.
Scrape down jug, add butter, eggs and lemon juice. Cook for 20 minutes at 90°C on speed 2, without measuring cup.
Insert measuring cup and mix for 25 seconds at speed 6. Pour into 2 hot washed jam jars with twist-off lids and close immediately. Cool completely before storing in the fridge.
My tips/alterations: *I used Meyer lemons which gave this a fantastic yellow colour. *I used sterilised jars to ensure these would keep as long as possible. *I love to make mini tart cases and fill them with lemon curd for a quick dessert. * This can be served on wholemeal toast for breakfast.
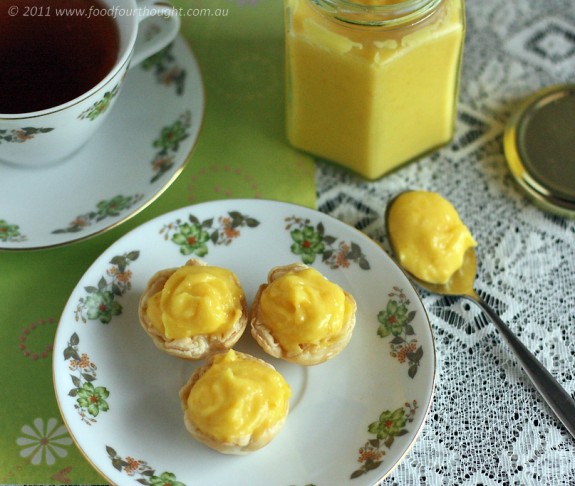
ease: 9/10. The hardest part is peeling the lemons.
prep time: 10mins.
cooking time: 21mins
total: 31 mins + cooling time.
taste: 8/10 – This was a well balanced curd with a fantastic colour. The consistency was lovely and thick just like my traditional method version.
would I make it again: Absolutely. When the season brings you lemons, make lemon curd! 🙂

Even after many years of cooking, gaining valuable experience and improving my technical skills I have never been able to cook a light and fluffy pancake. Don’t ask me why. Maybe it’s the recipes I have chosen in the past or the ingredients I have paired together OR maybe it is simply because I wasn’t using a Thermomix :). I’m not sure, I just know that I‘ve never quite got it right.
That is, until today!
We have wanted to make pancakes for breakfast for a few weeks now and given the cold weather this morning it seemed like the ideal day. I decided to trust my fate in an internet search for the perfect pancake using the Thermomix. The Thermomix Forum popped up with (what appeared to be) a great result. I got started straight away so that I had time to allow it to stand for the suggested 30 minutes.
I returned to find my mixture had thickened considerably so I added a little more milk to encourage it to pour more freely. I initiated “Project Pancake” by anointing my preheated pan with butter and pouring over a layer of the mixture. After a minute or so, I had lots of bubbles forming in the batter. “Brilliant” I thought. Bubbles mean light and fluffy pancakes, just what we really wanted for breakfast. I encouraged the edges to release from the pan then flipped it over to discover a gorgeously crisp crust. A few minutes on the other side firmed up the centre sufficiently and created a golden disc. Two seconds after it hit the plate, the pancake was doused with maple syrup and devoured by two delighted and astonished diners. More were made and all were eaten………..rather quickly.
I couldn’t believe how light these were, although they were really filling at the same time. These will definitely become a winter breakfast favourite in our house!
rara’s pancakes (recipe by Maddy, posted on Forum Thermomix)
makes approx 10 large (20cm/8 inch) pancakes – 1.25 l of batter
Ingredients
50g (¼ cup/2 ozs) unsalted butter – cubed
350g (¾ lb) self raising flour
60g (¼ cup/2 ozs) caster sugar
2 eggs
500g (2 cups) milk
1 tsp vanilla extract
to serve
maple syrup, blueberries and whipped cream
Preparation
Place chopped butter in Thermomix jug. Melt for 2 minutes, 50°c, speed 1.
Add in the remaining ingredients, and mix for 30 seconds, speed 5.
Scrape down jug, and mix a further 30 seconds, speed 5-6.
Let the batter stand for at least 30 minutes.
Brush non-stick pan with melted butter and cook on medium-low heat. Wait until mixture bubbles, then turn over. Cook for 1-2 minutes until pancake feels spongy but does not dent when pressed gently.
Repeat with remaining mixture. Keep pancakes in a warm oven until ready to serve.
My tips/alterations: *I let my mixture stand for approx 1 – 1 ½ hours and used approx 600g of milk as I felt the batter was too thick. *Just use a small amount of butter on the pan as that is all you need. *If you have left over mixture simply refrigerate it and just cook it the next day. *You could make this in a blender I think but I am not sure that you will get the same quantity of air throughout the mixture.
 
ease: 9/10. Almost child’s play!
prep time: 5mins + standing time.
cooking time: 30mins
total: 35 mins + standing time.
taste: 9/10 – These were light and fluffy but had sufficient density that made them very satisfying. They were just sweet enough to allow them to be (almost) drowned in maple syrup without feeling like you were heading for a sugar high.
would I make it again: Absolutely. These will definitely be a favourite winter breakfast in our house!
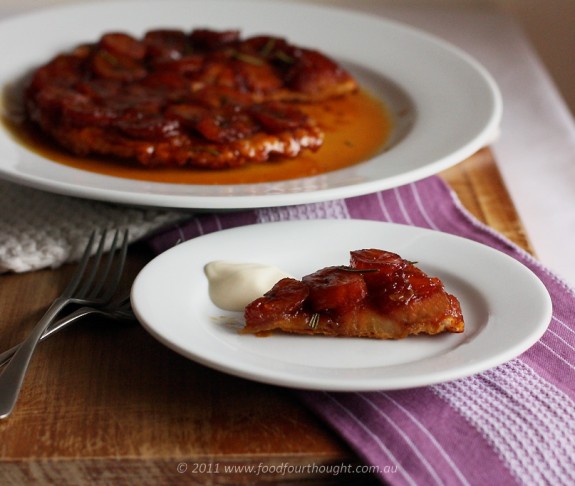
Spending time with friends is something that I love to do. And when they happen to be a fellow foodie it is an extra bonus for me because they tend to feel the same way I do when I talk about food and cooking. I get so exhilarated, almost like a “kid in a candy store”. My eyes get a little wider, I can’t wipe the smile off my face and when I speak the words tend to come out quicker than normal due to pure excitement. All of this could potentially be a little off putting, however I am fortunate that my friends understand I am driven by passion. 🙂
My dear friend Julia came over last weekend to make tarte tatin. We had been discussing the difficulties of making caramel and wanted to try and perfect it for this simply yet potentially challenging dessert.
Both Jules and I have electric cooktops which means that the heat is not as consistent as a gas or induction appliance. While I am not one to blame my equipment, it does seem to be a common denominator for use both when it comes to caramel making failures. Using an electric cooktop seems to bring about a significant challenge when trying to make caramel using sugar and butter, as the sugar tends to clump and burn rather than actually dissolve. The only success I have ever had is to make caramel using sugar and water in the way described below. And while not traditional it works for me.
Sometimes cooking has to be that way…..do what works for you!
banana and rosemary tarte tatin (original recipe by Nico Moretti “Food for Friends” adapted by Fiona at Food 4 Thought)
makes one 20cm (8 inch) tart
Ingredients
120g (½ cup/4 ¼ ozs) caster sugar
60ml (¼ cup) water
30g (1 oz) unsalted butter, diced
2-3 large bananas, (not too ripe), sliced
2 teaspoons rosemary leaves
1 sheet of puff pastry
to serve
double cream or vanilla ice-cream
Preparation
Preheat fan-forced oven to 190°C (375°F/Gas 5). Take a 20cm non-stick frying pan and invert it onto sheet of puff pastry. Run a knife around the edge of the pan to create a circle the size of the top of the frying-pan (this should be bigger than the base). Place the pastry into the fridge until required.
Place a medium size heavy based saucepan over a medium heat. Add the sugar and water, stirring until the sugar has dissolved. Increase the heat and bring the mixture to a boil. Make sure you have a cup of recently boiled water and a pastry brush handy to wash down the sides of the pot, this will prevent crystals forming. Continue to boil until it begins to colour. Swirl the pan (do not stir) to ensure even cooking. Continue to cook and swirl until dark amber in colour (this will take about 5 minutes), remove from heat and add the butter. Stir to combine. Once combined, immediately pour into frying pan (make sure the pan can also go into the oven).
Place banana slices in a single layer on top of caramel. Lay the pastry on top of bananas. It should hang over the edge. Using the edge of a spoon, tuck in the extra pastry like you would tuck in a blanket. This creates a seal around the bananas and caramel.
Bake in oven for 15-20 minutes or until golden brown.
Remove from the oven, and carefully invert onto a serving plate or board. Serve with cream or ice-cream.
My tips/alterations: *When making caramel be sure not to stir it once the sugar has dissolved as this can cause the sugar to crystallise. The best method is to swirl the pan. *It can be a good idea to have a sink filled with cold water, if you feel the caramel is getting too dark remove it from the heat and place the base of the pan into the water. It will splutter a little but this will stop the cooking process almost instantly. *Always ensure you wear protective clothing (long sleeves, apron, shoes, etc) when making caramel as it gets very hot and sticky and will burn very quickly. If you do happen to splash some onto your skin run it under cold water immediately. *When making a tarte tatin it is important to tuck the pastry in as this contains the caramel as the base (that becomes the top when turned out). *We used an organic puff pastry that Jules found in the supermarket, no nasty additives and it definitely had the crunch factor.
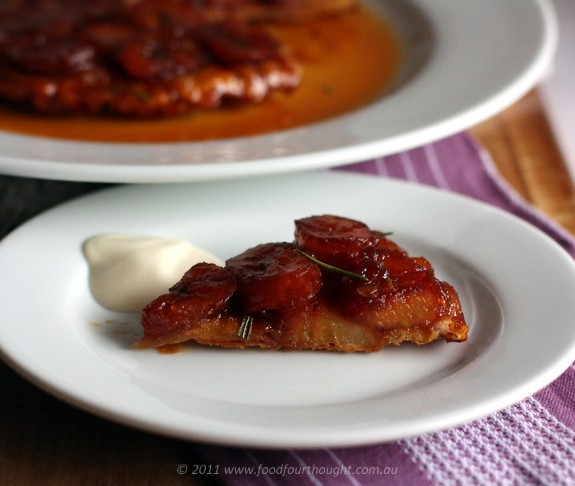
ease: 7.5/10. Like anything, the more you make this the easier it gets.
prep time: 10mins.
cooking time: 30mins
total: 40 mins
taste: 7.5/10 from the man of the house, 7/10 from Julia and 7.5/10 from me. We tried this after we had taken these photos and we agreed it is best served immediately, with vanilla ice cream (which we didn’t have). The flavours worked well together, the banana was soft and sweet from the caramel and the pastry crunchy. All the things you want in a good tarte tatin.
Jules also thought it would work well with the classic apple, pear and also mango.
would I make it again: Maybe. This is not a dessert I cook often, however the simplicity of it (and knowing that I can do the caramel) has suddenly made it more attractive.
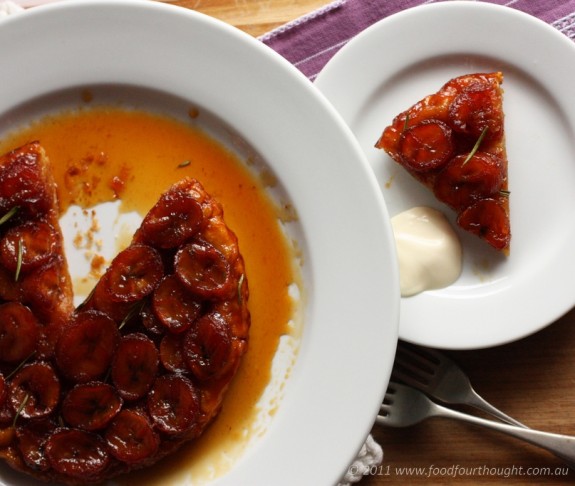

Cooking with good quality seasonal produce is something that every great chef will attest to being one of the things that makes for a wonderful dish. I love trying to find different ways of using things when they are in season. I also have a passion for baking cakes and slices and my favourite course of any meal (to create) would have to be dessert.
I have wanted to make this dish ever since I read the recipe about four months ago. Given the strawberry season has almost ceased I think I can say that I made it by the “skin of my teeth”.
In all cooking there are certain ingredients that you expect to see together, tomato & mozzarella, lamb & rosemary and peaches & cream for example. And while combining strawberry with citrus is not necessarily a natural paring that would spring to mind it does work very well. This tart is a fine example of a marriage made in heaven.
strawberry and lemon tart (recipe from Dish Magazine, December 2010/January 2011 edition)
makes one 35cm (14 inch) x 10cm (4 inch) tart (use a tin with a removable base)
Ingredients
pastry
250g (½ pound) plain (all-purpose) flour
½ teaspoon sea salt
½ cup icing (confectioners) sugar
150g (1¼ sticks) butter, diced and chilled
1 egg
filling
1 large juicy lemon
½ an orange
1¼ cups caster (superfine) sugar
2 tablespoons cornflour (cornstarch)
2 eggs
1 egg yolk
½ cup melted butter, cooled
1 teaspoon vanilla extract
to finish
250g (½ pound) strawberries
icing (confectioners) sugar for dusting
Preparation
Pastry: Put the flour, salt, icing sugar and butter in a food processor and pulse to coarse crumbs. Add the egg and pulse again until the dough starts to come together. Tip onto the bench and gently bring the dough together with your hands. Form into a disc, wrap and chill until firm.
Preheat the oven to 200°C (400°F/Gas 6). Roll pastry out on a lightly floured bench and line the tart tin. Refrigerate or freeze until firm.
Bake the tart blind for 20 minutes, then remove the baking weights and paper. Reduce the heat to 170°C (325°F/Gas 3) and bake for a further 5 minutes. Cool.
Filling: Cut the lemon into wedges and the orange into quarters, remove the pips. Chop the fruit roughly and place into food processor with the sugar. Process until the fruit is finely chopped then tip into a bowl. Put the cornflour in a small bowl and stir in a ¼ cup of the fruit mixture until smooth. Tip back into the bowl and add the remaining ingredients, gently whisking to combine. (Don’t whisk too much as you do not want a lot of bubbles in the mixture).
Pour into the tart case and bake for 25 minutes until the filling is just firm and the top is lightly browned. Cool.
To serve: Halve or quarter the strawberries and pile on top of the tart. Dust with icing sugar to serve.
My tips/alterations: *Use 300g of good quality purchased sweet short crust pastry if you don’t want to make your own. *Blind baking is when you line a pre-prepared case with baking paper and fill it with weights or dried beans. The beans support the pastry as it cooks. Bake in a preheated 190°C (375°F/Gas 3) – 200°C (400°F/Gas 6) oven for up to 20 minutes before removing the paper and weights. The shell should have taken form. Return to the oven for time specified in recipe.

ease: 7.5/10. I used careme vanilla bean sweet shortcrust pastry because I had some in the fridge.
prep time: 20mins plus chilling and cooling.
cooking time: 50mins plus cooling
total: 1 hour 10 mins plus chilling and cooling
taste: 6.5/10. From the man of the house, who didn’t really enjoy the texture of the filling. It wasn’t smooth like lemon curd, rather you knew there was blitzed up whole fruit in there. 7.5/10 From me. I didn’t mind the texture and really enjoyed the flavour combination.
would I make it again: Yes, but there are conditions. Normally with a score like this I wouldn’t bother making it again. However, since baking this I have purchased my Thermomix and knowing what it can do I am sure I can get a very smooth consistency for the filling by using it to whiz everything up. It is so much easier than making lemon curd filling!
Besides it gives me another excuse to eat strawberry and lemon tart and that is always a good thing 🙂
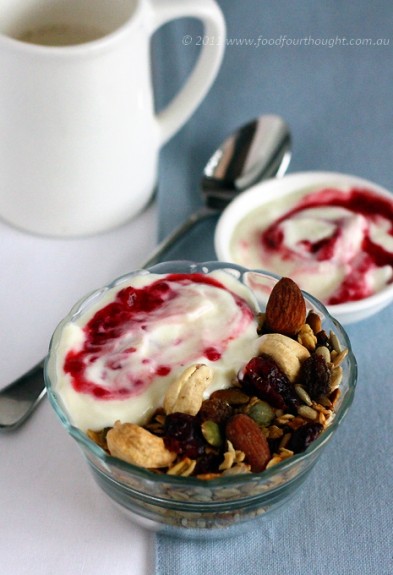
As mentioned in previous posts, eating a healthy breakfast is important to both G & I. In winter we usually enjoy a bowl of porridge and in the warmer months we both like some kind of cereal. I’ve been making quite a bit of bircher recently but G wanted a change. Normally we would just go for a store bought option but lately we have been reading the labels and have not really been happy with any of the options.
Because breakfast has always been something that I enjoy to eat I don’t mind having quite a big meal early in the day. So I decided to make us some toasted muesli. I would never buy toasted muesli because of the fat content and I actually don’t really like untoasted muesli because it has that raw oat taste that makes me feel like I’m chewing on a spoonful of flour.
I have made this recipe several times over the years and have adapted it along the way. This is my favourite version so far.
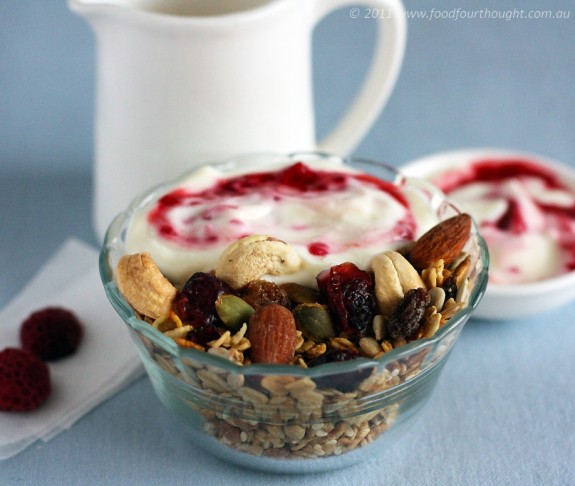
cranberry and almond toasted muesli (original recipe by Bill Granger adapted by Fiona at Food 4 Thought)
makes approximately 6 ½ cups
Ingredients
300g (3 cups) rolled oats
125ml (½ cup) apple juice
2 tablespoons vegetable oil
80g (½ cup) raw almonds
65g (½ cup) sunflower seeds
80g (½ cup) pumpkin seeds
40g (¼ cup) sesame seeds
80g (½ cup) raw cashews
80g (½ cup) sultanas
80g (½ cup) dried cranberries
raspberry swirl yoghurt
½ cup raspberry
1 cup plain yoghurt
Preparation
Preheat the oven to 160°C (315°F/Gas 2-3). Line a large baking tray with non-stick baking paper.
Place all the ingredients, except for the sultanas and dried cranberries, in a large bowl and stir well to combine. Spread the mixture evenly over the baking tray and place in the oven for 30 minutes, stirring occasionally until lightly browned.
Remove from the oven, allow to cool then add the sultanas and dried cranberries.
Serve with the raspberry swirl yoghurt and milk.
My tips/alterations: *I switched the ingredients a little from the original recipe by removing the coconut and dried blueberries and adding the cashew nuts, sultanas and dried cranberries. You can add fresh seasonal fruit when you serve it if you like. *You can make this gluten-free by substituting the oats with your favourite ingredient.
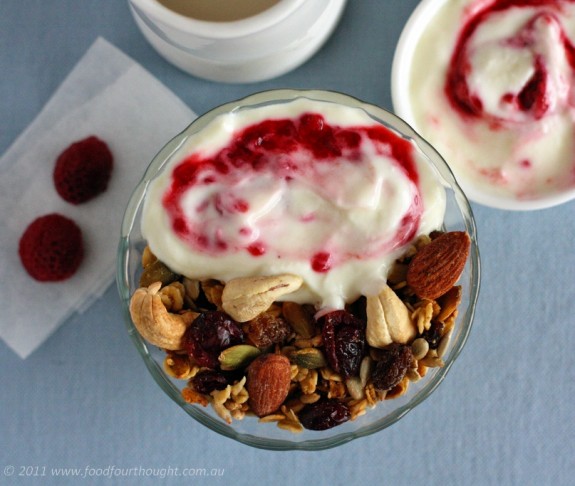
ease: 9/10. One of the simplest breakfasts I ever made.
prep time: 10mins.
cooking time: 30mins plus cooling
total: 40 mins plus cooling
taste: 9/10. This muesli is delicious. It has lots of textural and flavour differences because of the range of ingredients. I also love the fact that it is so healthy in comparison to many of the pre-packaged brands. For us this is definitely a breakfast winner.
would I make it again: Yes this will become our alternate when we need a break from bircher.
During my classes I have often been asked what I thought of the Thermomix when I first saw it. My response has always been the same. “An amazing machine, can do so many things but I wouldn’t buy one”. When I was asked why I would never be a Thermomix owner my response was “because I love to experience cooking, I want to make mistakes so I can learn how to do things right”. And that is still the case, at least the statement about experiencing cooking is.
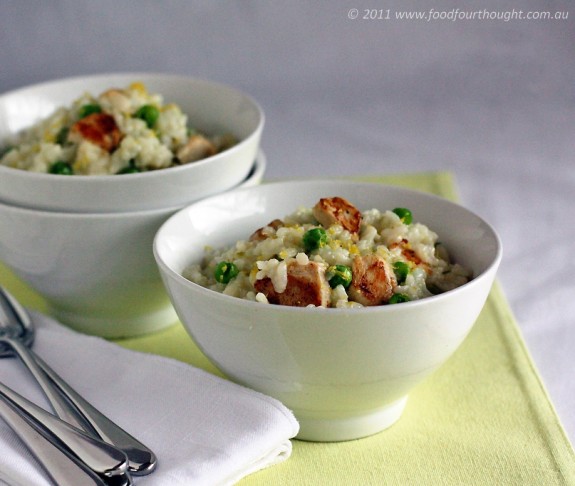
So as I unpacked my Thermomix box you can understand the question running through my head, “had I sold out to the ‘dark side’ of the kitchen?” I can tell you after using my machine for less than a week I feel truly enlightened. Yesterday I made the most delicious pumpkin soup for my girlfriend for lunch, followed by a snack of raspberry and lemon sorbet. Last night I made G & I a chicken, pea and parsley risotto (recipe below) that we both absolutely loved. And for all of this I spent maybe an hour in the kitchen including doing the dishes by hand (because I don’t have a dishwasher).
All of these dishes were healthy, low-fat and quick & easy to prepare. For me, spending less time in the kitchen, especially during the week, means that I can do other things that I really want to do. I can still “experience cooking” while using the Thermomix and if I choose to immerse myself into the land of trial and error I can do so on the weekends when I have more time to experiment. G, being a boy, has the mechanical mind in the family. He was so impressed with the Thermomix and its capability that even he wanted to use it.
So was this an impulse buy and I just love it because it is a new “toy”? Absolutely not. I had been fortunate enough to use one previously as a client purchased it some time ago and I had also attended a home demonstration. I had asked several owners what the pros and cons were and did a mountain of research on it. All of this led me to purchasing my own Thermomix, realising how amazing these things really are and a further step of wanting to show others. So I have also decided to become a Consultant for Thermomix throughout Perth.
As such I would like to share my first Thermomix recipe with you. I wanted to keep this as close to an authentic risotto method as possible so there is a little fiddling at the start but after the rice goes in you can walk away.
If you would like to know more about the machine, what it can do for you or to have a home demonstration please feel free to contact me.
chicken, pea, parsley and lemon risotto (recipe by Fiona at Food 4 Thought)
serves 4-6
Ingredients
50g Parmesan cheese, cubed
5g fresh parsley leaves and stem
1 brown onion, quartered
1 garlic clove, peeled
20g olive oil
2 small or 1 large skinless chicken breasts (approx. 250 – 300 g), cut into 2cm pieces*
100g white wine
370-400g Arborio (or short grain) rice
500g low salt chicken stock (gluten-free if preferred)
500g water
200g frozen peas
1-2 tablespoons lemon juice
Preparation
Place Parmesan into TM bowl, grate for 5 seconds on speed 7. Transfer to another bowl and set aside. Place parsley into TM bowl, chop for 3 seconds on speed 7. Transfer to another bowl and set aside.
Place onion and garlic into TM bowl and chop for 3 seconds on speed 7. Add oil and sauté for 5 minutes at 100°C on speed 1. Meanwhile, place chicken into a preheated non-stick pan and seal on all sides until slightly golden. Remove from pan and set aside. Add the butterfly if you wish (optional), then add wine and sauté for 1½ minutes at 100°C on speed 1. Add rice and sauté for 2 minutes at 100°C on speed soft.
Add chicken, stock and water, cook for 15 minutes at 100°C on reverse, speed 1.
5 minutes before the end of cooking add the peas and parsley. Use the spatula to push them into the rice mixture. Once cooking has finished, pour the risotto into the TM serving bowl, stir through the Parmesan, parsley and lemon juice then check for seasoning. Adjust seasoning as you like, cover and let stand for at least 5 minutes before serving.
My tips/alterations: *You can remove the step of browning the chicken in a pan and just add it to the machine after the onions have cooked. Set the TM to sauté for 5 minutes at 100°C on speed 1. Then continue with the rest of the recipe. However you will need to reduce the rice to 350g and the liquid (ie stock and/or water) to 900g – 1L. *If you would like to substitute the wine, you can use fruit juice such as pear juice or even verjuice. *This recipe can be made with homemade vegetable or chicken stock. If you would like to use the TM stock concerntrate, use 2 – 3 tablespoons per litre of water. *You can make this recipe gluten-free very easily. *You can make this recipe without the TM by using a traditional risotto method and cooking things for longer. The internet has many examples of this. *Resting the risotto in the TM server means that it will retain its heat very well and the consistency can change. Make sure that you check it occasionally so that you can devour your meal when the desired consistency is reached.

ease: 9/10. So much easier than a pan risotto.
prep time: 5mins.
cooking time: 24mins plus resting.
total: 30 mins plus resting.
taste: 9/10. G and I loved this. I was being quite critical because (for me) a good risotto must be almost runny rather than stuck together and the rice must be al dente. This not only had both of those qualities, it also tasted delicious. It had a creamy texture, the peas were cooked perfectly, the chicken was moist and the lemon juice livened everything up a little.
would I make it again: Absolutely! I have always thought that risotto took a glass and a half of wine to make it. Half a glass in the pan, the rest in my glass :). Normally I would have to stand over the pan while drinking it but this time I was able to enjoy my wine while sitting with G because I could let the TM do all the work.
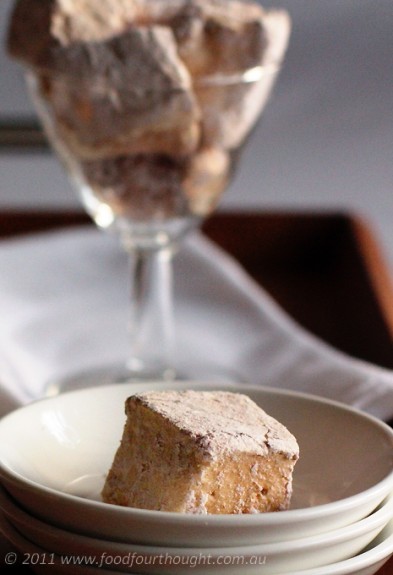
A good espresso is something that is celebrated in our house. For the past few years G has immersed himself into the world of caffeine and has become quite the self-educated connoisseur. His love of this habit (for want of a better word) has also meant that half of our kitchen bench space is dedicated to a fully manual coffee machine (a smaller version of those you see in a cafe’) and a rather large conical burr grinder to go with it.
The benefits of all of this is that we can have wonderful coffee whenever we desire. It also makes it much easier for me to create things that include “a shot of espresso”. Because I have this advantage I have wanted to make something that incorporated coffee for quite some time, so when I saw a recipe for Espresso Marshmallows I knew it would have to be on my list.
Given it was Valentine’s day soon and I was making raspberry marshmallows for that occasion, it seemed like a perfect time to make an extra batch flavoured with coffee.
espresso marshmallows (original recipe from Australian Gourmet Traveller adapted by Fiona at Food 4 Thought)
makes approximately 40 pieces
Ingredients
flavourless oil such as vegetable or canola
2½ gelatine leaves (titanium strength)*
30ml (1ozs) espresso, cooled
330g (1½ cups) white sugar
160ml (2/3 cup) corn or glucose syrup
scraped seeds of 1 vanilla bean or 1 teaspoon of vanilla paste
160g (1 cup plus 2 tablespoons) pure icing (powdered) sugar
10g (1 tablespoon) Dutch cocoa
10g (1 tablespoon) cornflour
Preparation
Lightly grease a 22cm x 22cm (9″ x 9″) pan with oil.
Break gelatine into small pieces, combine in the bowl of an electric mixer with coffee and 50ml cold water and set aside. Combine sugar, corn syrup and 125ml water in a small saucepan, stir over medium-high heat until sugar dissolves, then bring to the boil and cook until syrup reaches 115C on a sugar thermometer (2-3 minutes).
Whisk gelatine mixture on low speed, add hot syrup in a thin steady stream down the side of the bowl, add vanilla and whisk on high speed until thick and fluffy and tripled in volume (8-10 minutes). Spoon into prepared tin, quickly smooth top with a lightly oiled spatula and stand at room temperature until set (2-3 hours).
Sift icing sugar, cocoa and cornflour into a bowl. Turn marshmallow out of tin onto a lightly oiled piece of baking paper, cut into 3cm cubes with a lightly oiled knife, then toss in cocoa mixture. Store in an airtight container, in cocoa mixture, until required. Marshmallows will keep for a week.
My tips/alterations: *Because of the ingredients (lack of egg whites to encapsulate the air) I was very dubious as to the result I would get but they worked well. *I followed the same process I used for my raspberry marshmallows and melted the gelatine before adding the hot syrup. This ensured that the gelatine would be evenly distributed throughout the mixture. *All gelatine will vary in how much it will take to set a set quantity of liquid. Make sure you read the instructions of the packet.
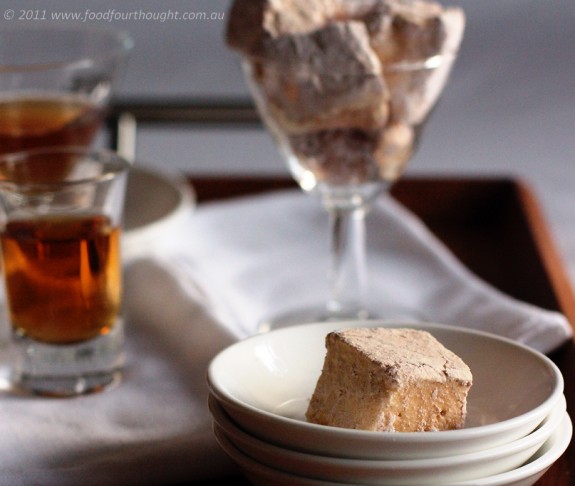
ease: 7.5/10. Not that difficult but you will need a candy thermometer.
prep time: 15mins.
cooking time: 10mins plus setting and cutting
total: 25 mins plus setting and cutting (which took me about 30 mins)
taste: 8/10. These were yummy although the texture was a little sticky. I think it was due to me having different strength gelatine leaves than what the recipe specified.
When I popped these into my mouth they tasted like a burst of espresso laced with condensed milk, never a bad thing! I couldn’t eat many of these because to me they were quite sweet. Those coffee lovers who tried these loved them.
would I make it again: Yes and just make sure I had the right gelatine to get the texture right 🙂
|


